ScanProfilesCustomizer - Create or modify a scan profile
Principle
A scan profile is a sum of parameters (format, colour, orientation, type of document, etc.) defining the way in which a document is scanned. Saved in a JSON file, the scan profile can be modified using the ScanProfilesCustomizer executable.
N.B.: in a domain, to guarantee the availability of scan profiles on all slaves servers in the event of a failure of the interserver database, it is advisable to duplicate all the scan profile JSON files from the master server to the slaves servers.
To do this, copy the custom scan profiles folder (in which you have saved your scan profiles) from your master server to the slave server(s).
Prerequisites
We recommend that you do not modify the files containing the scan profiles directly. To create and modify a scan profile, we recommend that you copy/paste an existing profile and modify the copy.
Procedure
Create a file of customized scan profiles
-
Access the Watchdoc server as administrator;
-
Create a custom folder in which your custom scan profiles will be saved (for example: C:\Work\Projets\SCAN).
Access the tool
Launch ScanProfilesCustomizer :
-
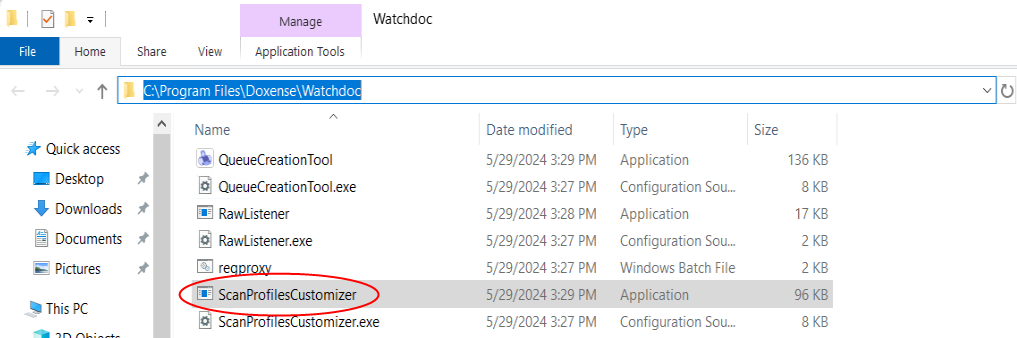
go tho the folder C:\Program Files\Doxense\Watchdoc,
-
click on ScanProfiles Customizer.exe:
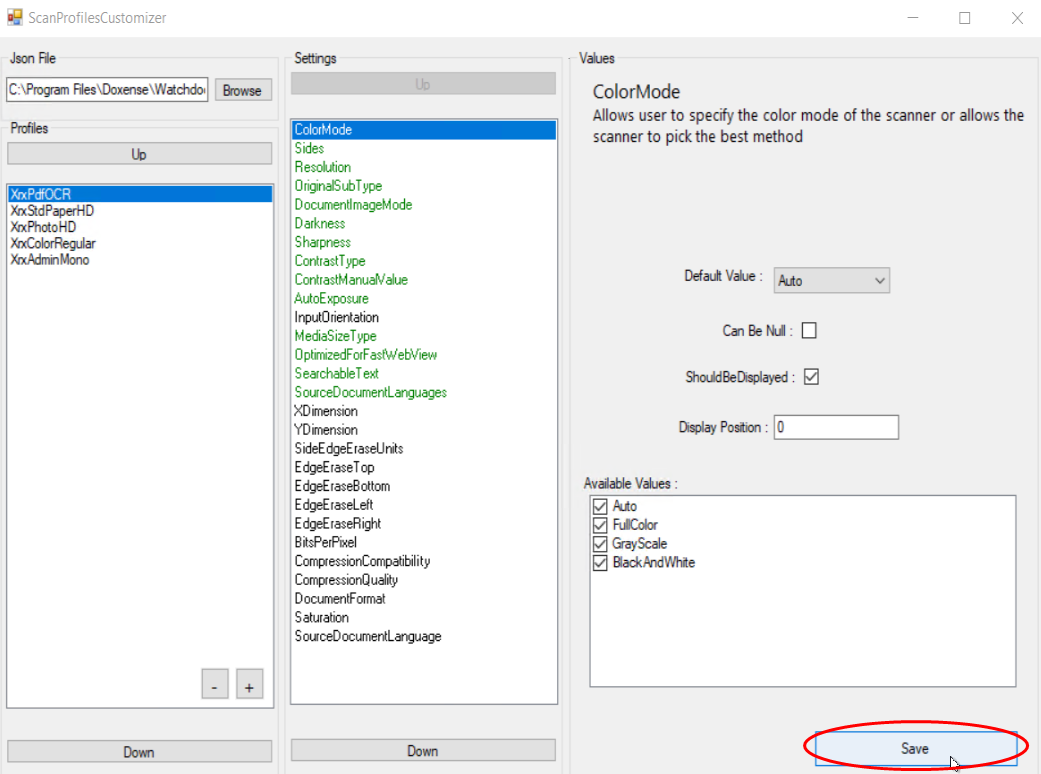
Configure the customized scan profile
-
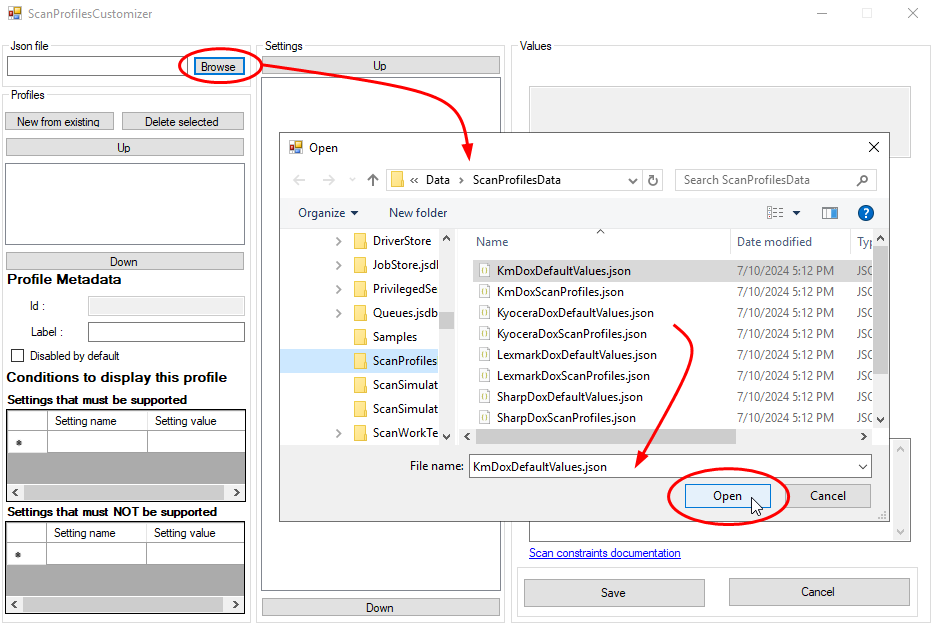
In the JSon File section, click Browse to browse the list of existing profiles;
è By default, the tool displays the contents of the C:\Program FilesDoxense\Watchdoc\DataScanProfilesData folder, which contains the default profiles for WEScan-compatible brands;
-
select the profile corresponding to the brand and technology of the profile you want to create;
è the selected profile is highlighted in the Profiles section and its parameters are displayed in the Settings section:
-
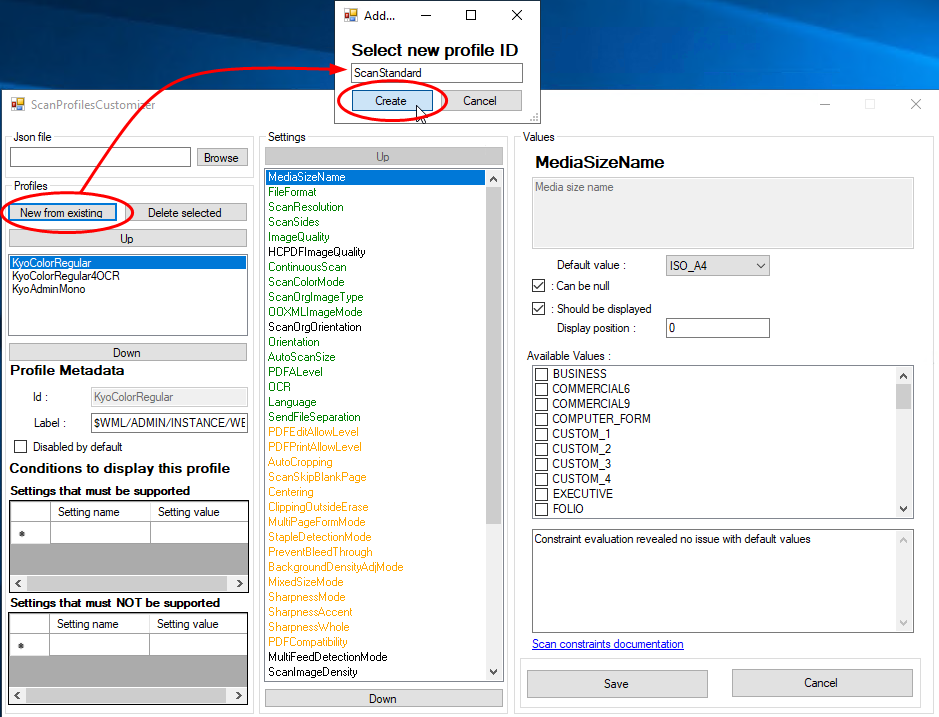
click he button New from existing;
-
in the interface Add..., enter the id of the new profile in the field;
-
click on Create:
-
The new profile is displayed in the Profiles section: select it to display its parameters in the Settings section.
In Settings, select each parameter to be modified and define its values in the Values section;
-
in green are the parameters displayed as priorities in the WEScan interface
-
in orange are the parameters available, but displayed in an alphabetical order in the WEScan interface:
-
Some settings must comply with the constraints listed in the Conditions to display this profile section: settings that must be supported / that must not be supported. If these conditions are not met, an information message is displayed. Below this window is a link to the Scan Profile Configuration Constraints documentation.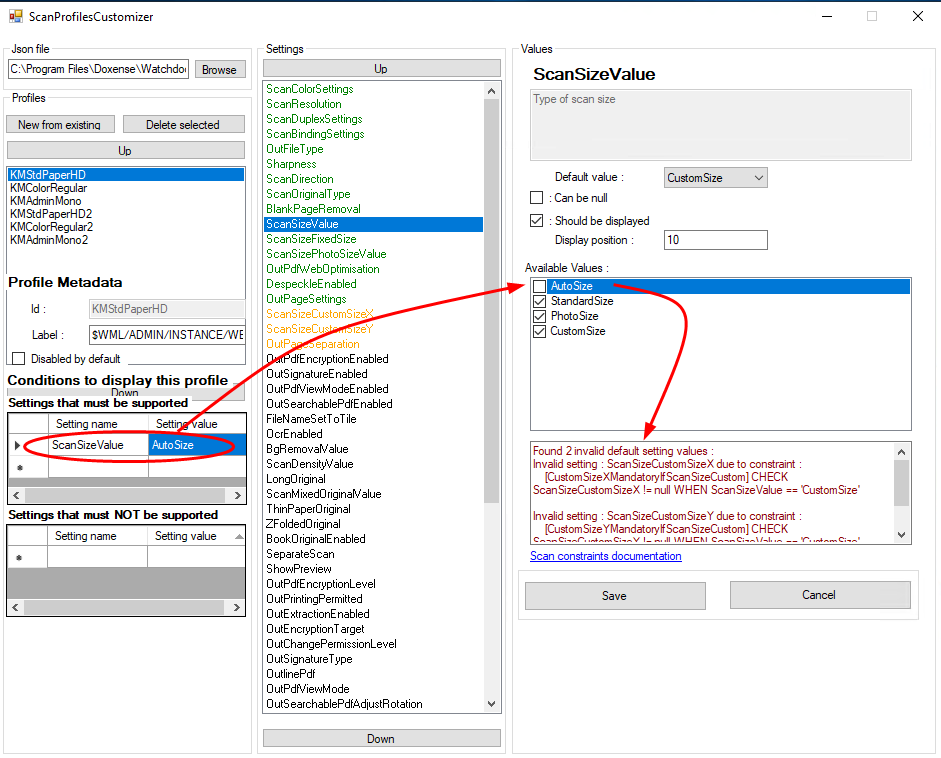
-
Once you have configured the profile to your requirements, click Save to save it:
-
Save it in the folder dedicated to personalised profiles (created beforehand).
Finalising the configuration
To finalise the configuration:
-
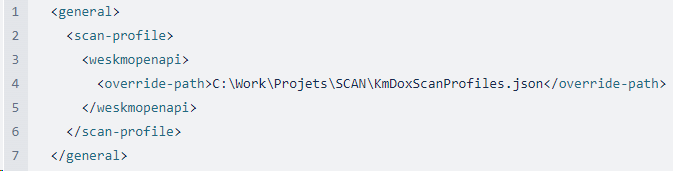
On the Watchdoc server, open the configuration file (C:\Program Files\Doxense\Watchdoc\Data\config.xml) with a text editor.
-
Find the tag corresponding to the installed scan profiles <scan-profile> ;
-
In the <wes...> tag, note the name of the instance corresponding to your scan profiles (see below);
-
Under the instance tag, copy the <override-path> </override-path> tags and indicate in this tag the path to the new configuration file :
-
Sav the file config. xml ;
-
Restart the Watchdoc service.
The instances corresponding to the brands and technologies compatible with WEScan are:
-
weshpoxpd
-
weskmopenapi
-
weskonicaminolta
-
weskyocerahypas
-
weslexmarkesf
-
wessharposa
-
wessharpesf
-
westoshibaesf
-
wesxeroxeip