Directories - Entra - Registration of the Watchdoc application in Microsoft Entra ID
Register the application
To register Watchdoc Server applications in Entra ID:
-
access the Microsoft Entra Admin Center as an administrator ;
-
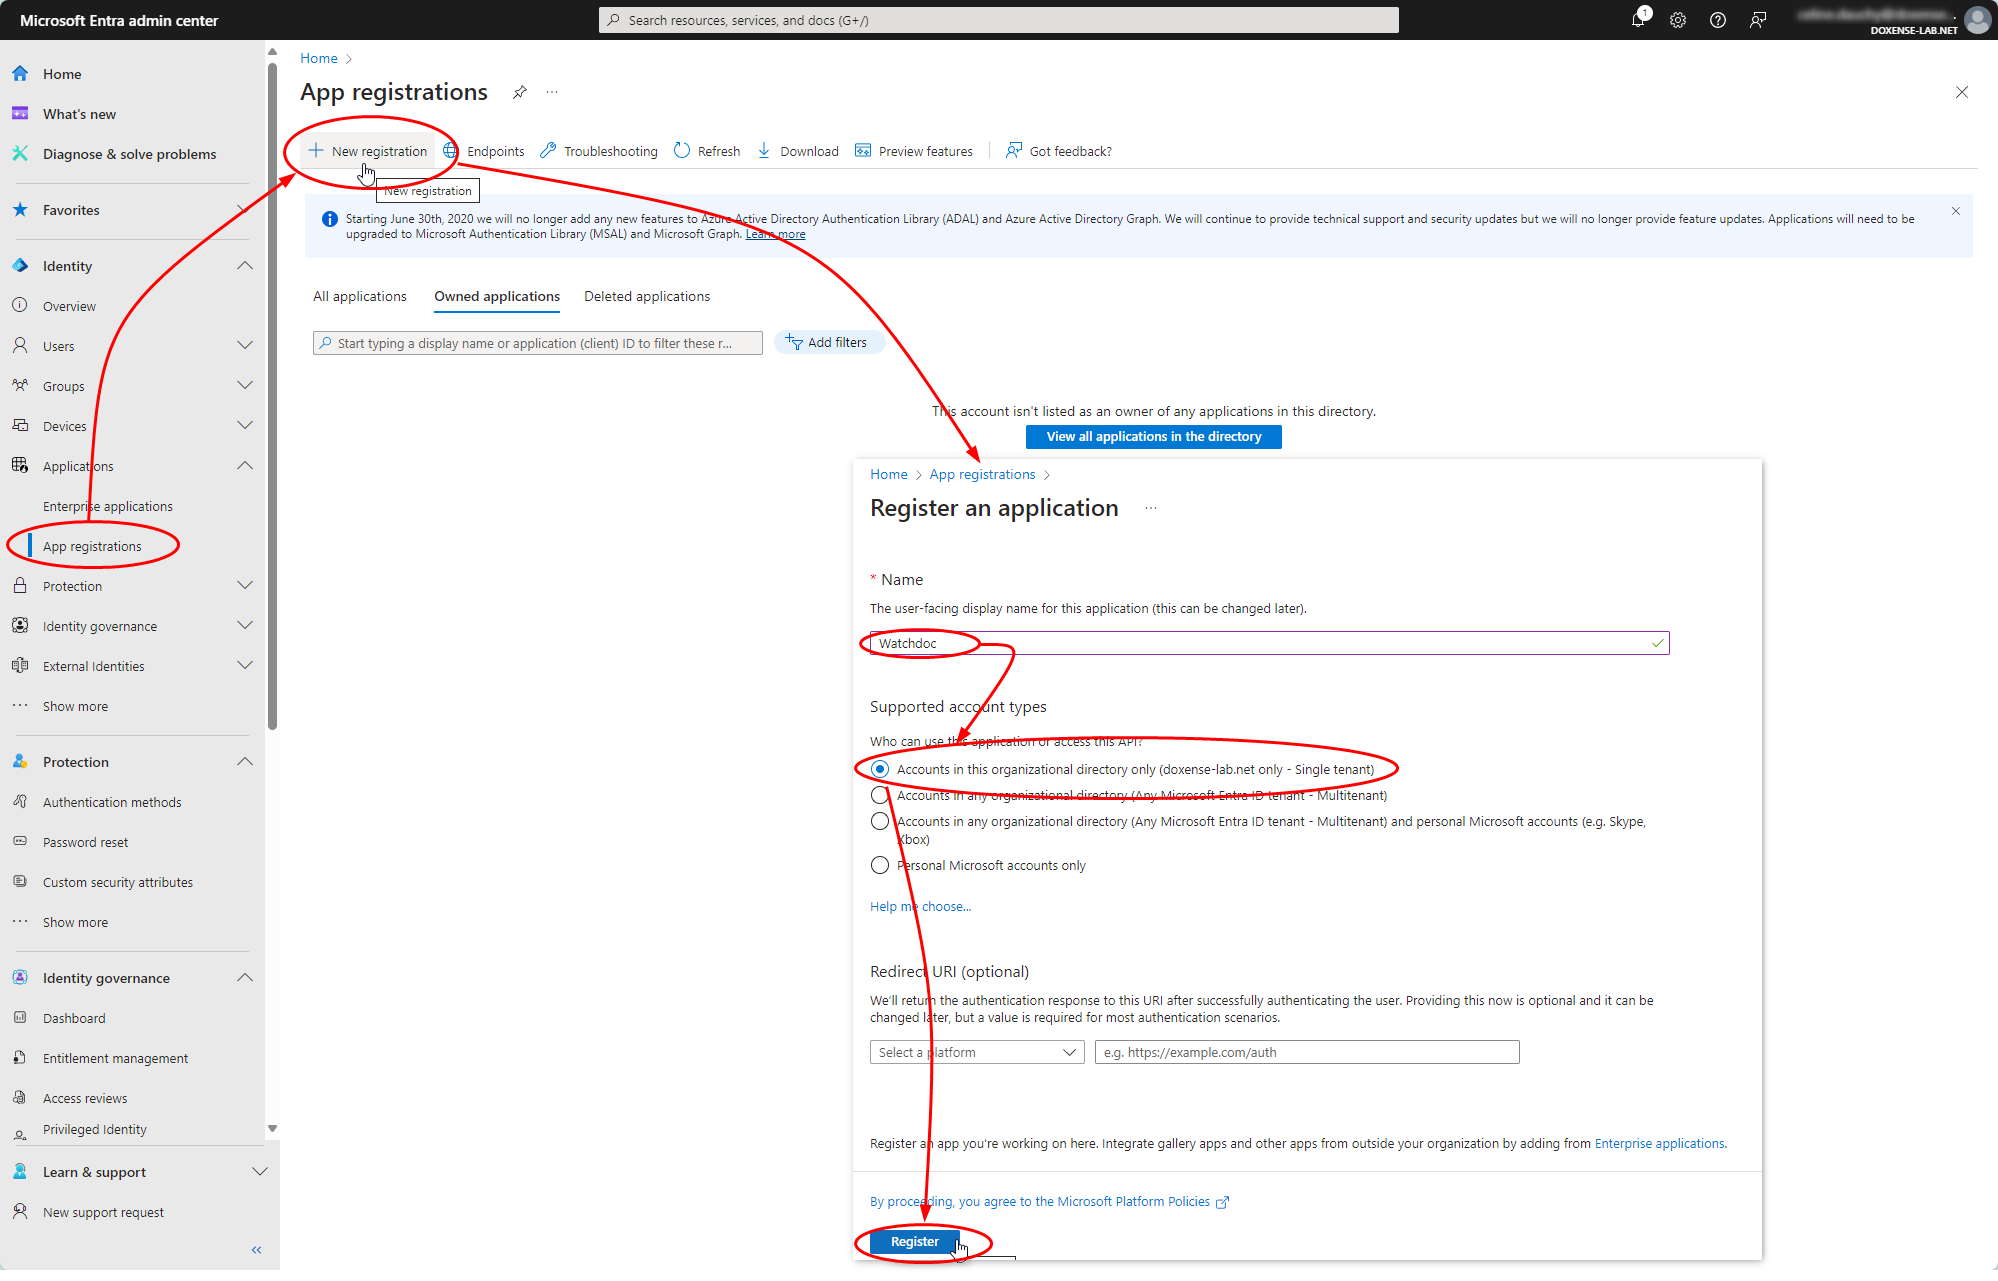
in the left-hand menu, click on Identity > Applications > App registrations:
-
in the menu of this interface, click on the New registration button:
-
in the Register an application interface:
-
enter the Name of the application (for example, Watchdoc);
-
tick Accounts in this organisation directory only.
-
-
Click Register:
Granting authorisations
Once the application has been registered, configure it:
-
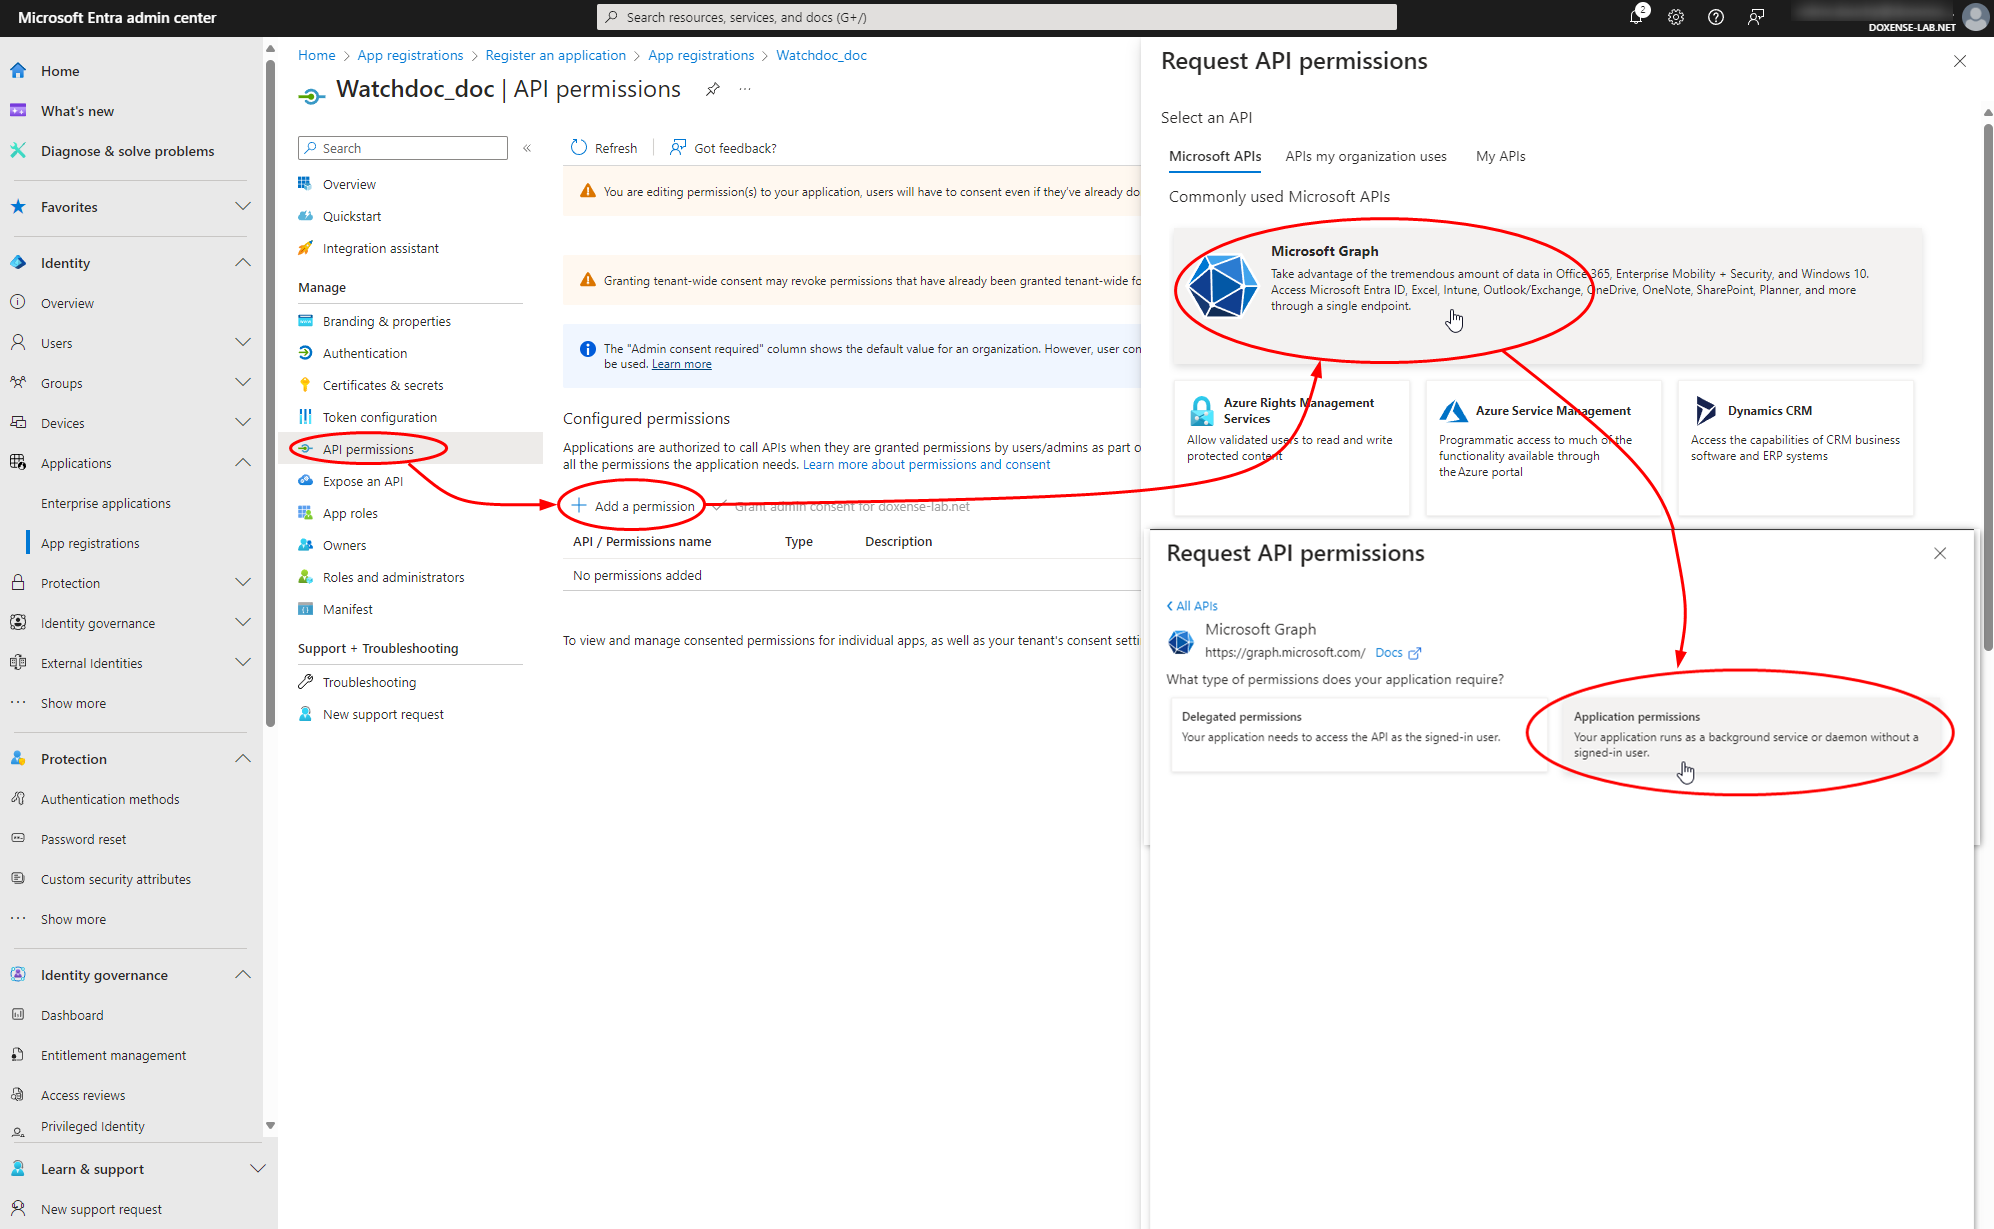
from the left menu, click on Manage > API permissions;
-
click on Add a permission;
-
in the Request API permissions interface, select Microsoft Graph;
-
Choose the Application Permissions type, which allows Watchdoc to perform operations on its behalf without a specific user context:
-
In Request API permissions interface, search, select and configure the following permissions:
-
Group > Group.Read.All : read all groups
-
User : User.Read.All :Read all users' full profiles
-
-
Then click on Delegated permissions which allows the Windows client to use the API and act on behalf of the user connecting.
-
Seach, select and configure the following permissions:
- email: view users' email address
-
offline_access: maintain access to data you have given it access to
- User.read: sign in and read user profile
- openid: sign users in
- profile: view users' basic profile
-
Click on Add permissions.
Grant admin consent
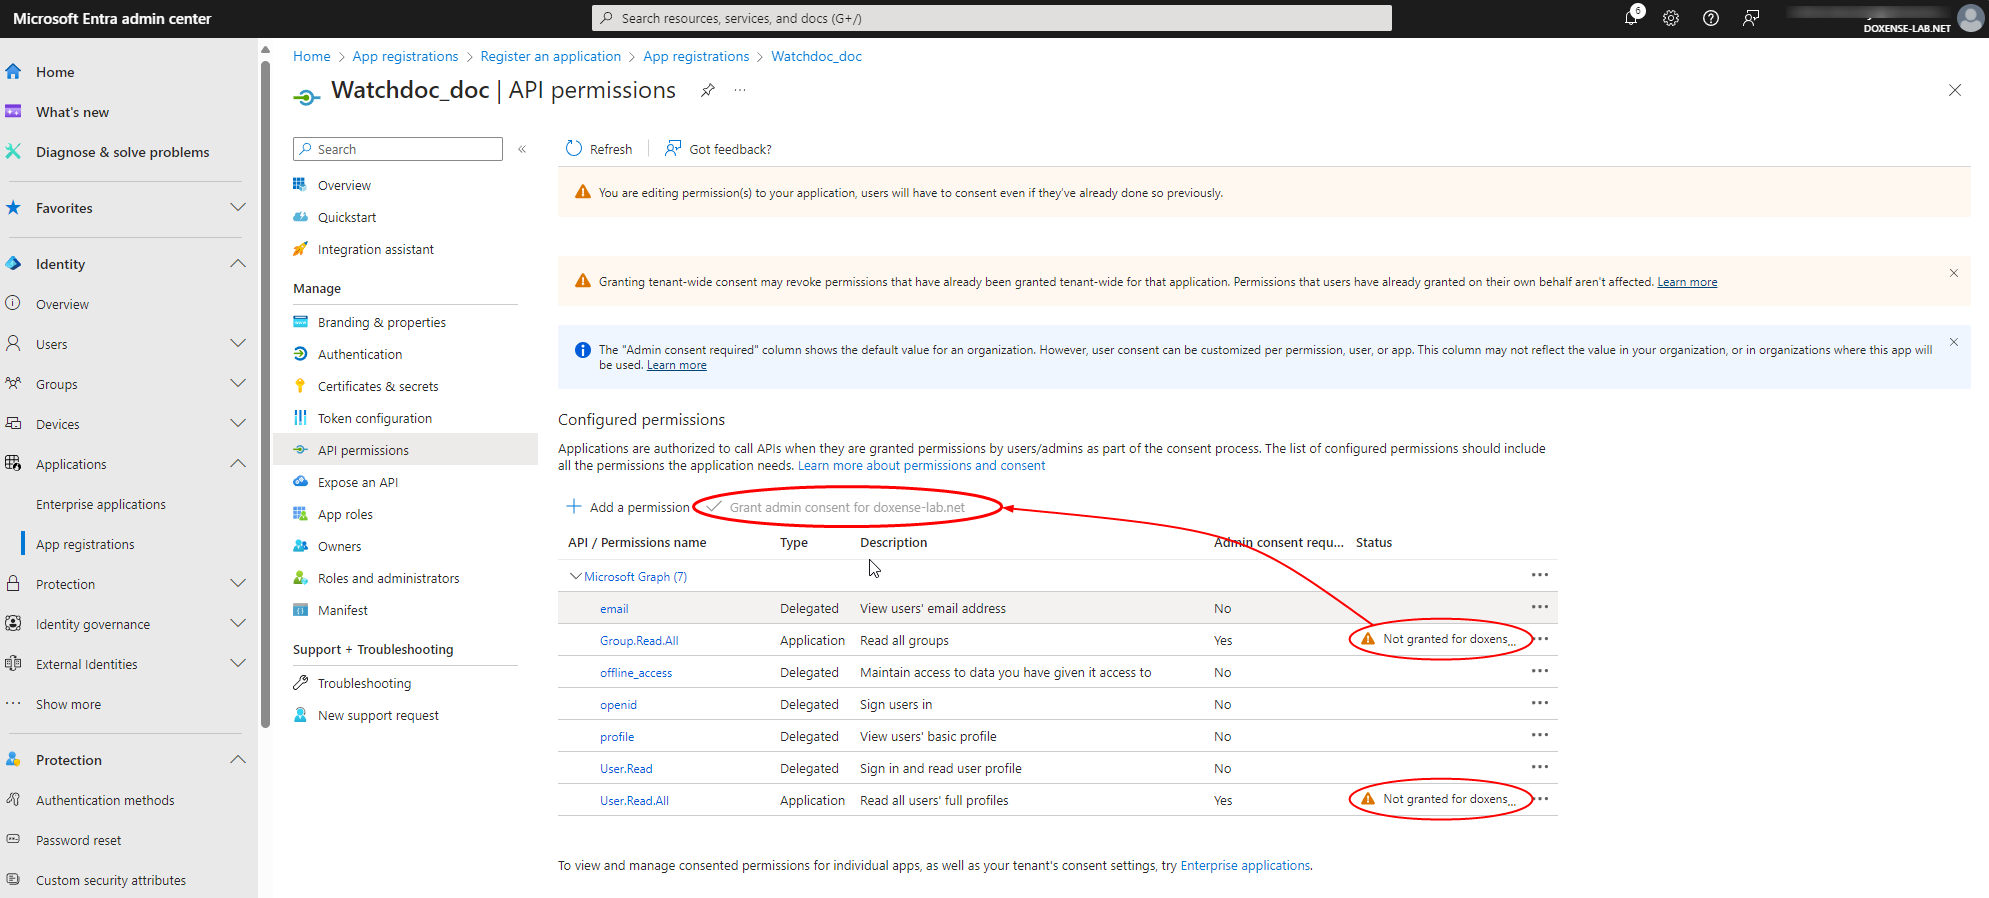
Once the authorisations have been added, they appear in the Configured permissions list, with the status Not granted...
-
Click on Grand admin consent for [ORGANISATION].
-
Confirm the consent agreement:
Configure authentifcations
Once the consents have been granted, 3 authentications need to be configured:
-
for the Windows client
-
for the Watchdoc web interface
-
for the WSC web interface
For the Windows client
-
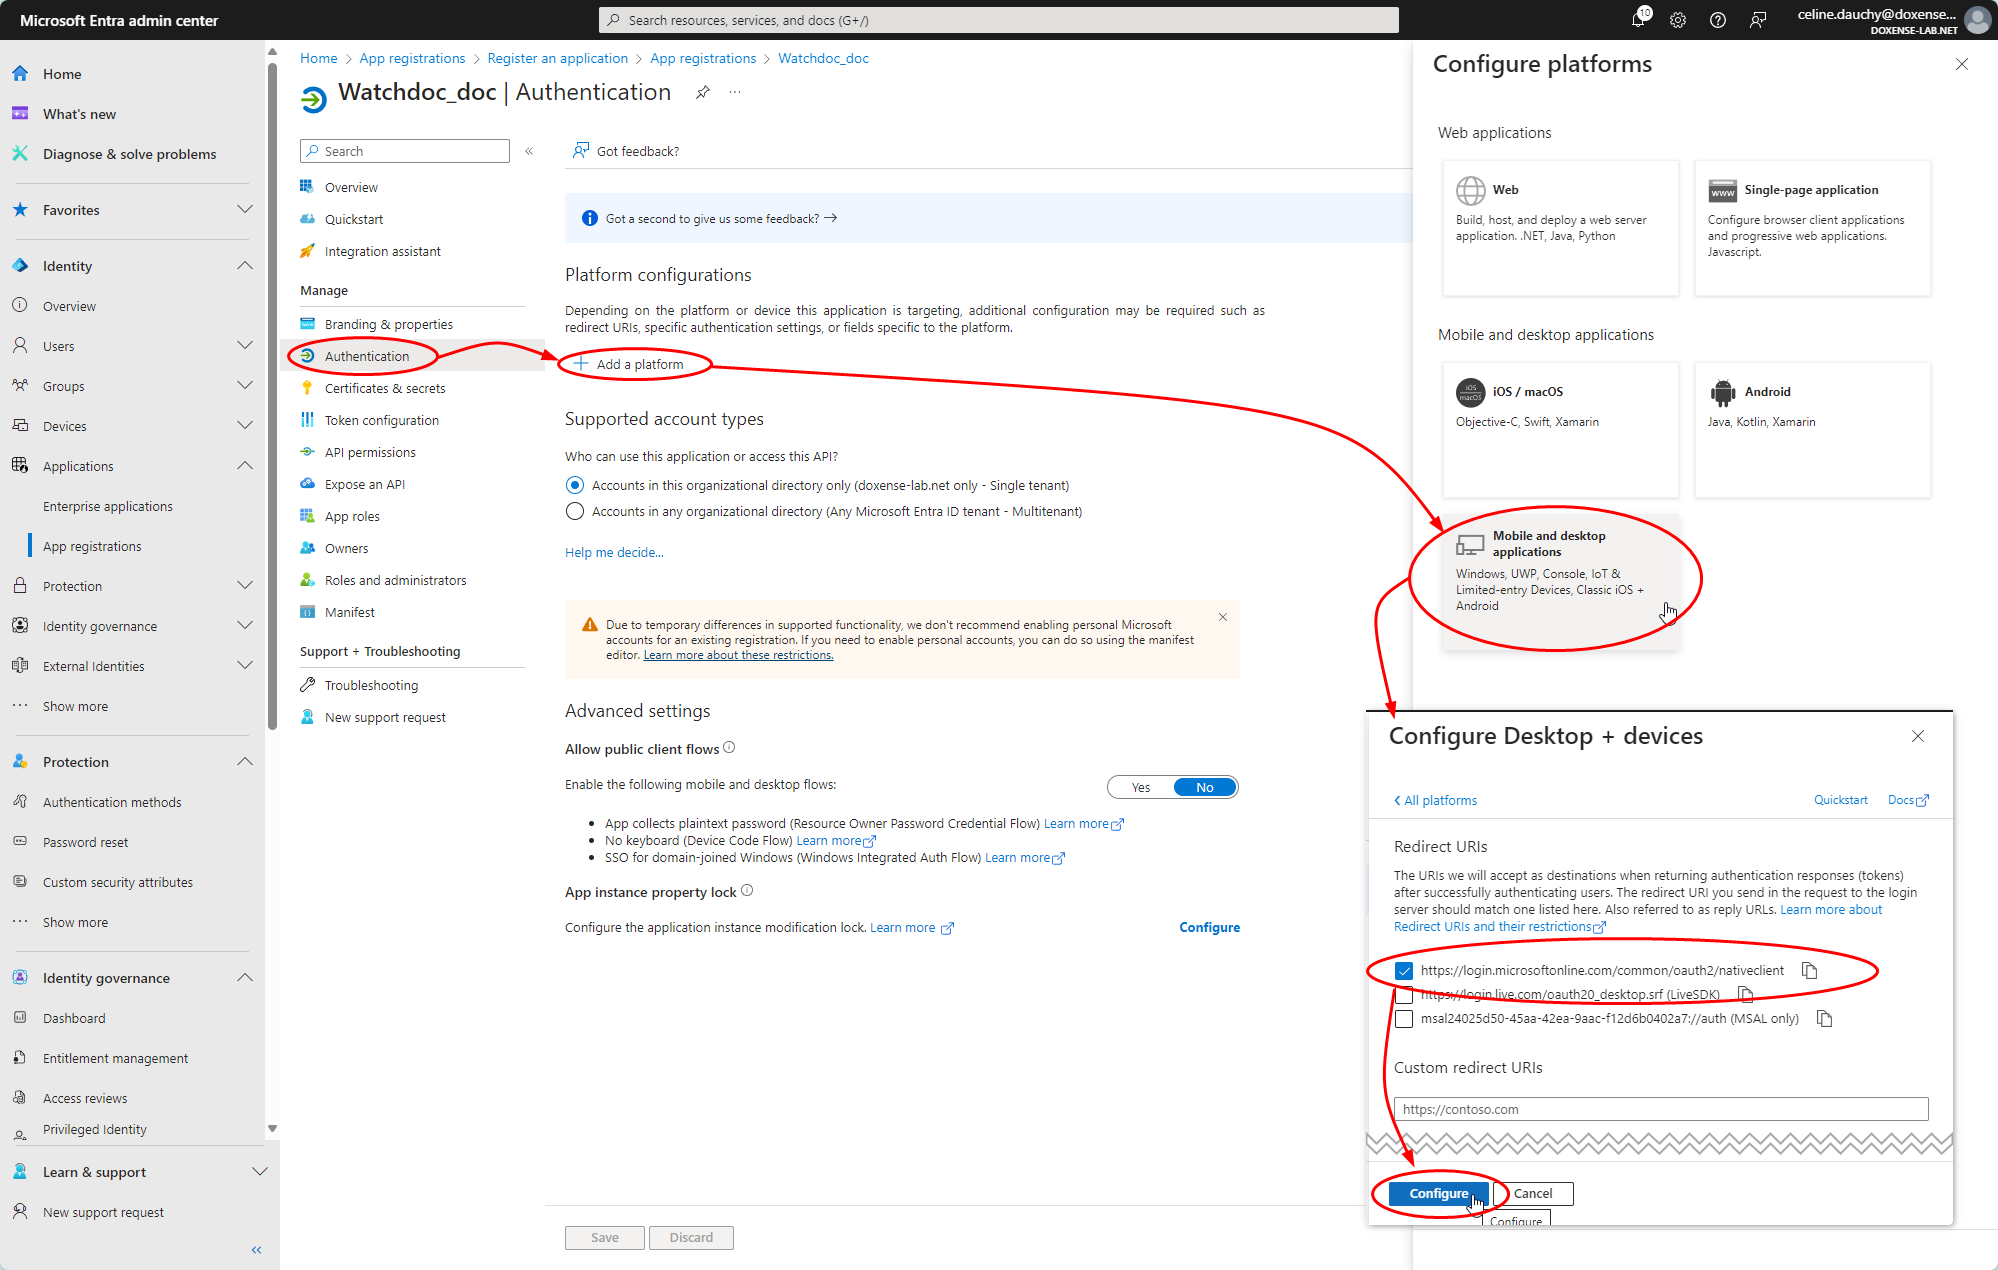
in the management interface of the authorised application,in the left-hand menu, click Authentication :
-
in the Platform Configurations interface, click on Add a platform ;
-
select Desktop and Mobile Applications:
-
in the URI redirection interface, tick the box https://login.microsoftonline.com/common/oauth2/nativeclient
-
click on Configure:
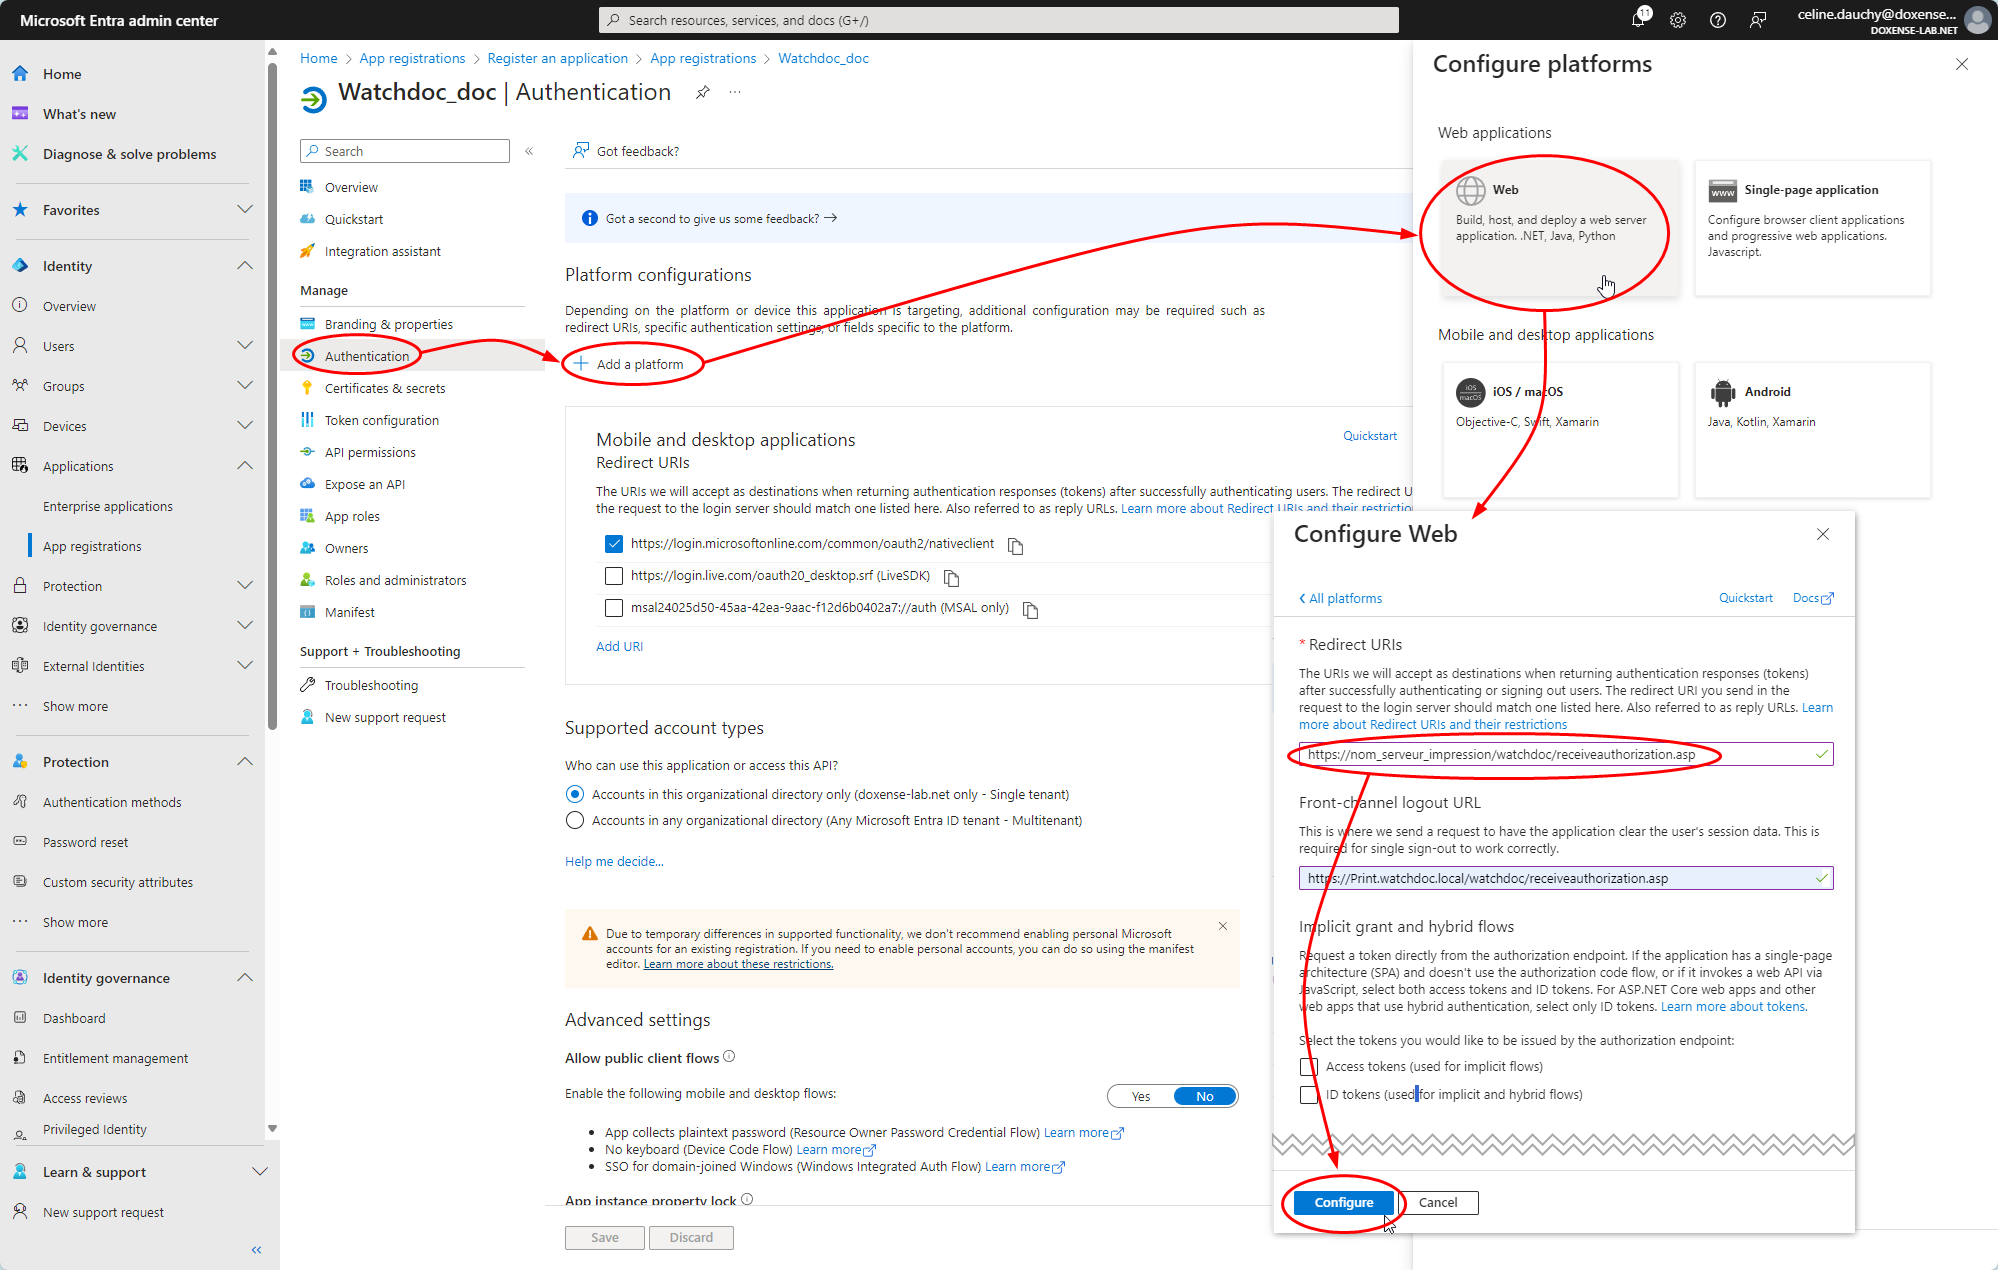
For Watchdoc web interface
-
Then click again on Add a platform.
-
Select Web.
-
In the Configure web interface , enter the following Redirect URI:
https://[watchdoc_server_name]/watchdoc/receiveauthorizationcode.asp -
Click on Configure :
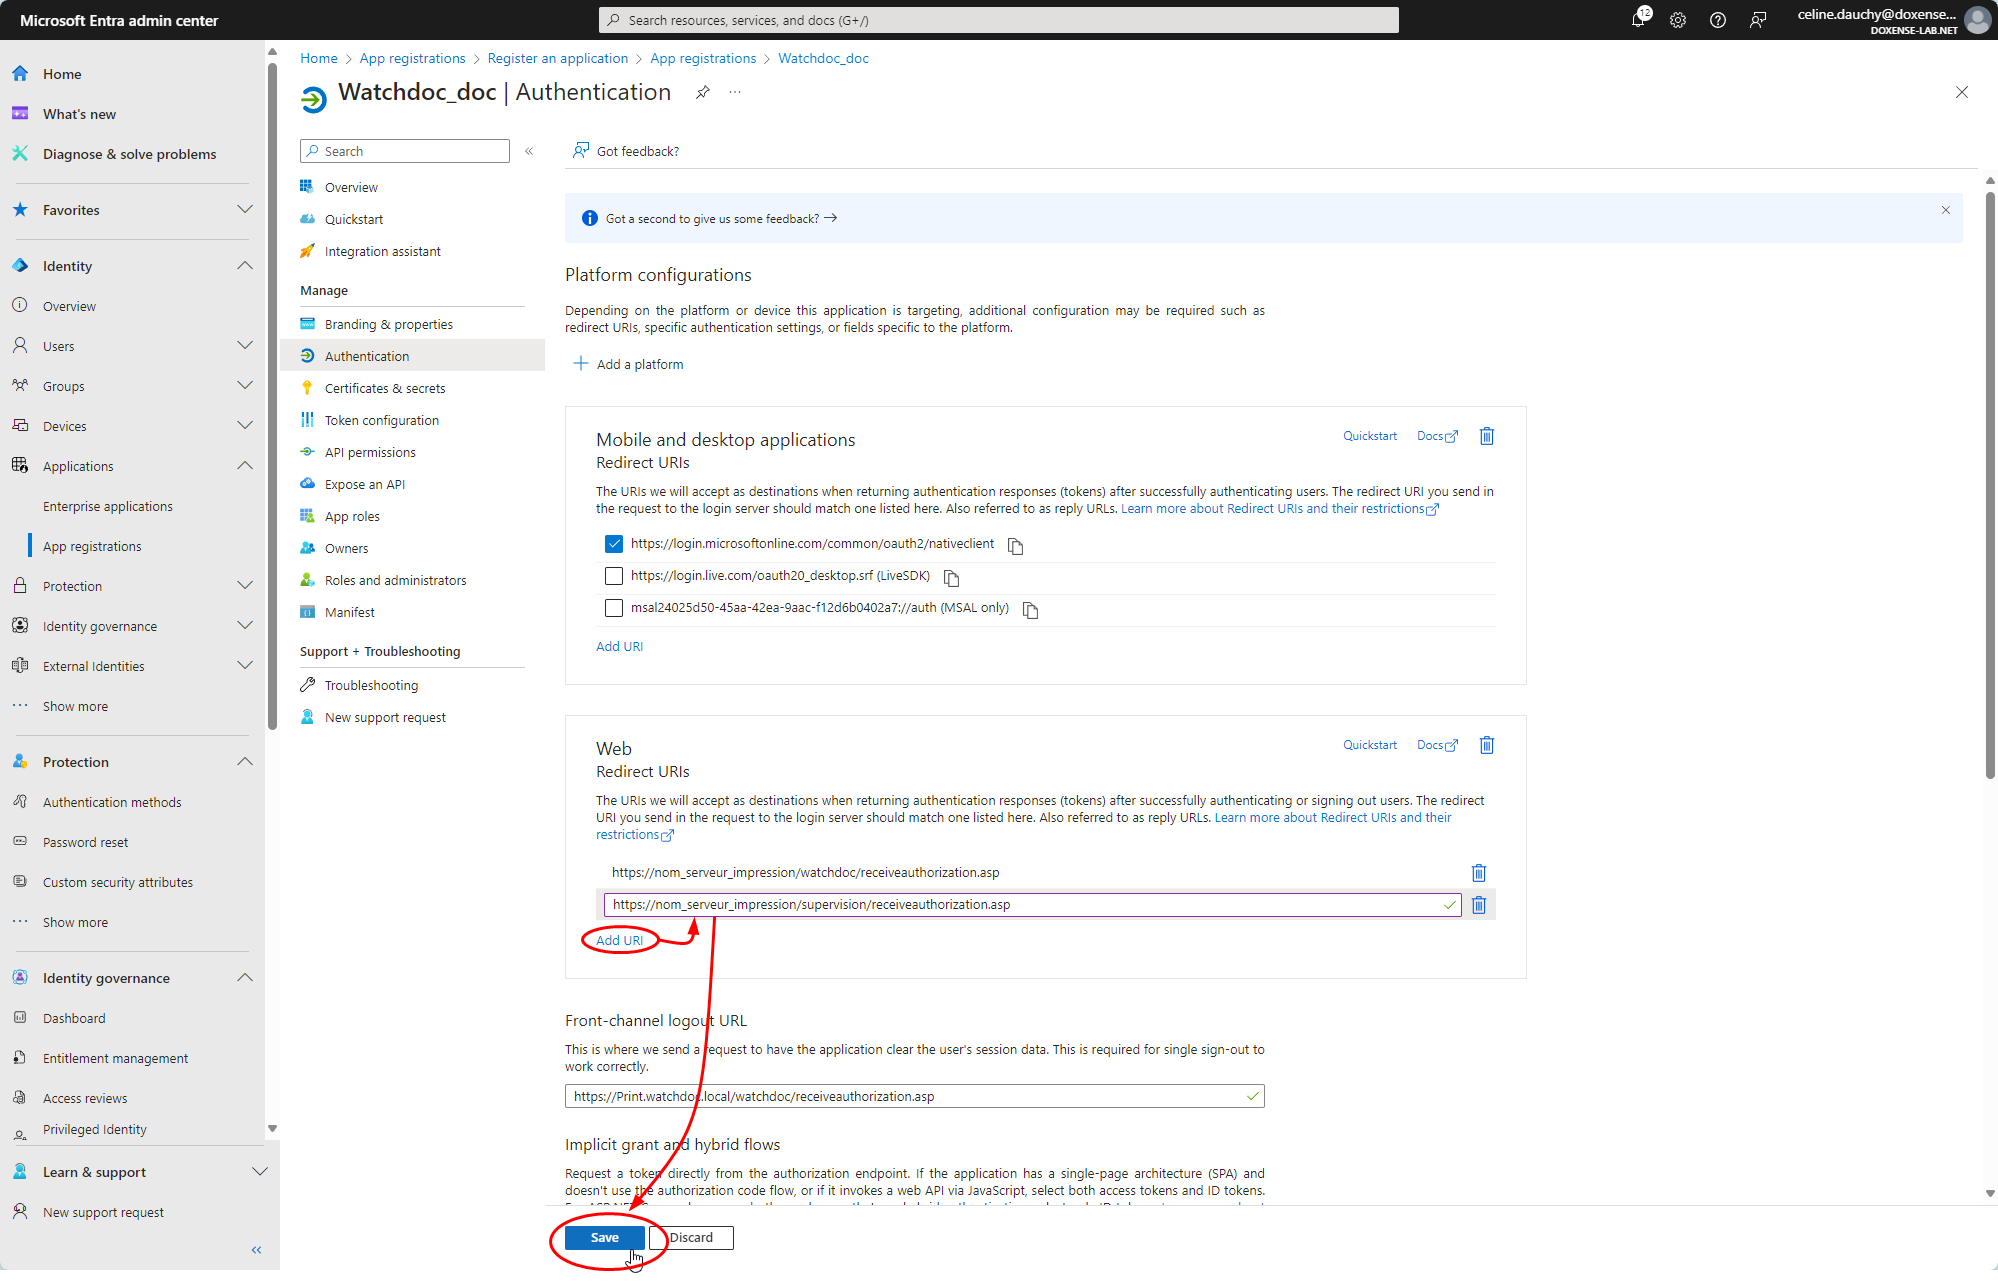
For WSC (Watchdoc Supervision Console) web interface
-
The URI is displayed in the Web section. In this section, click on Add a URI and enter the following uri:
https://[server_wsc:port_wsc]/Account/ReceiveAuthorizationCode -
Click on Save :
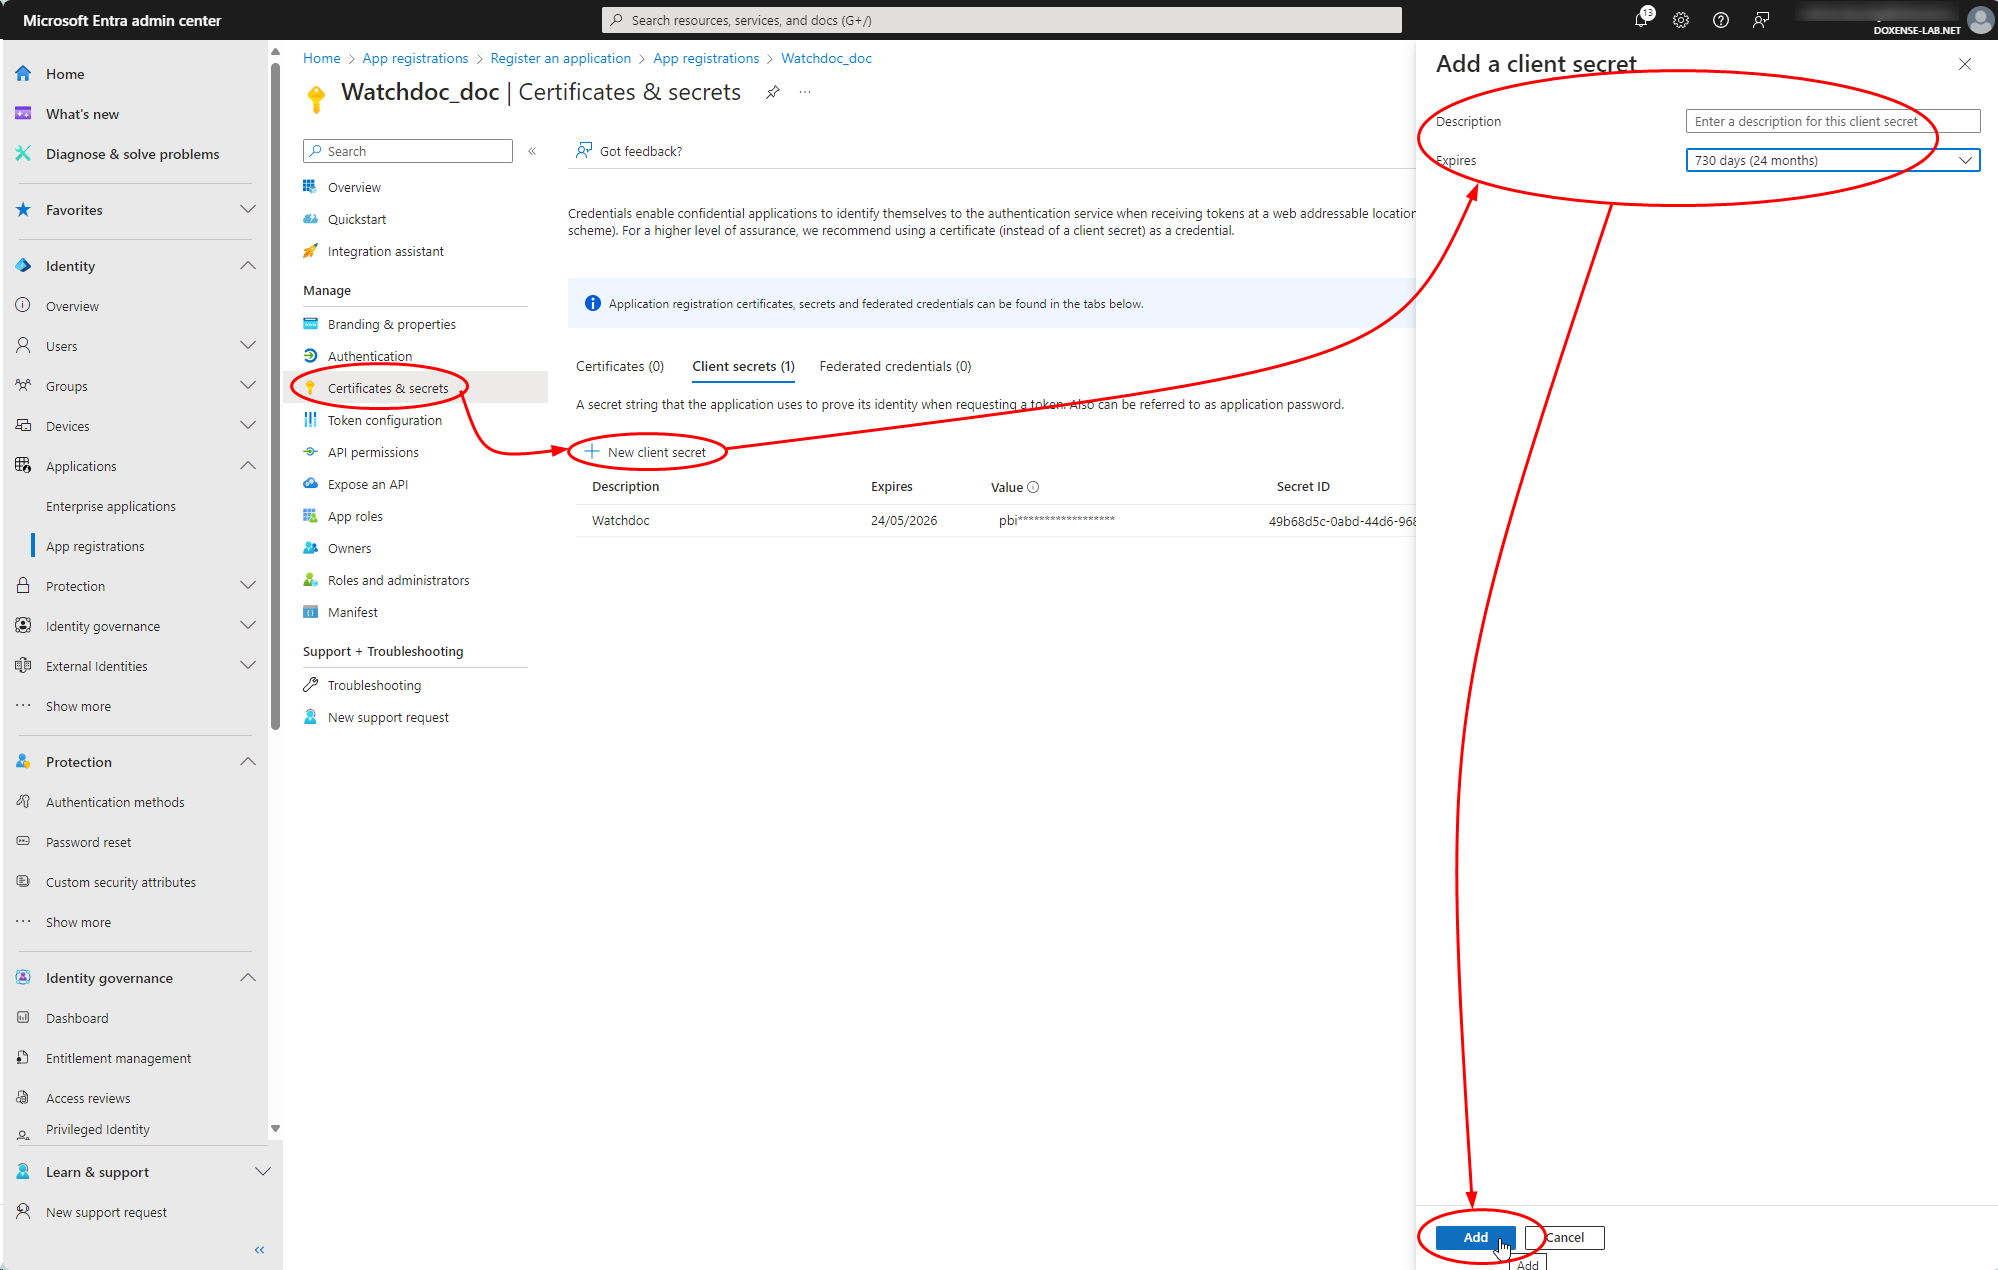
Configure a secret
You can add a secret (password) to your application to secure exchanges between it and the directory.
To add a secret :
-
from the Manage menu, click Certificates & secrets ;
-
in the Client secrets tab, click Add client secret :
-
in the Add a client secret interface, enter :
-
a description for your secret
-
an expiry date (limited to 24 months)
-
-
Click Add.
è After confirmation, the value of the secret is displayed: be sure to copy the value of the secret as it is only shown to you once:
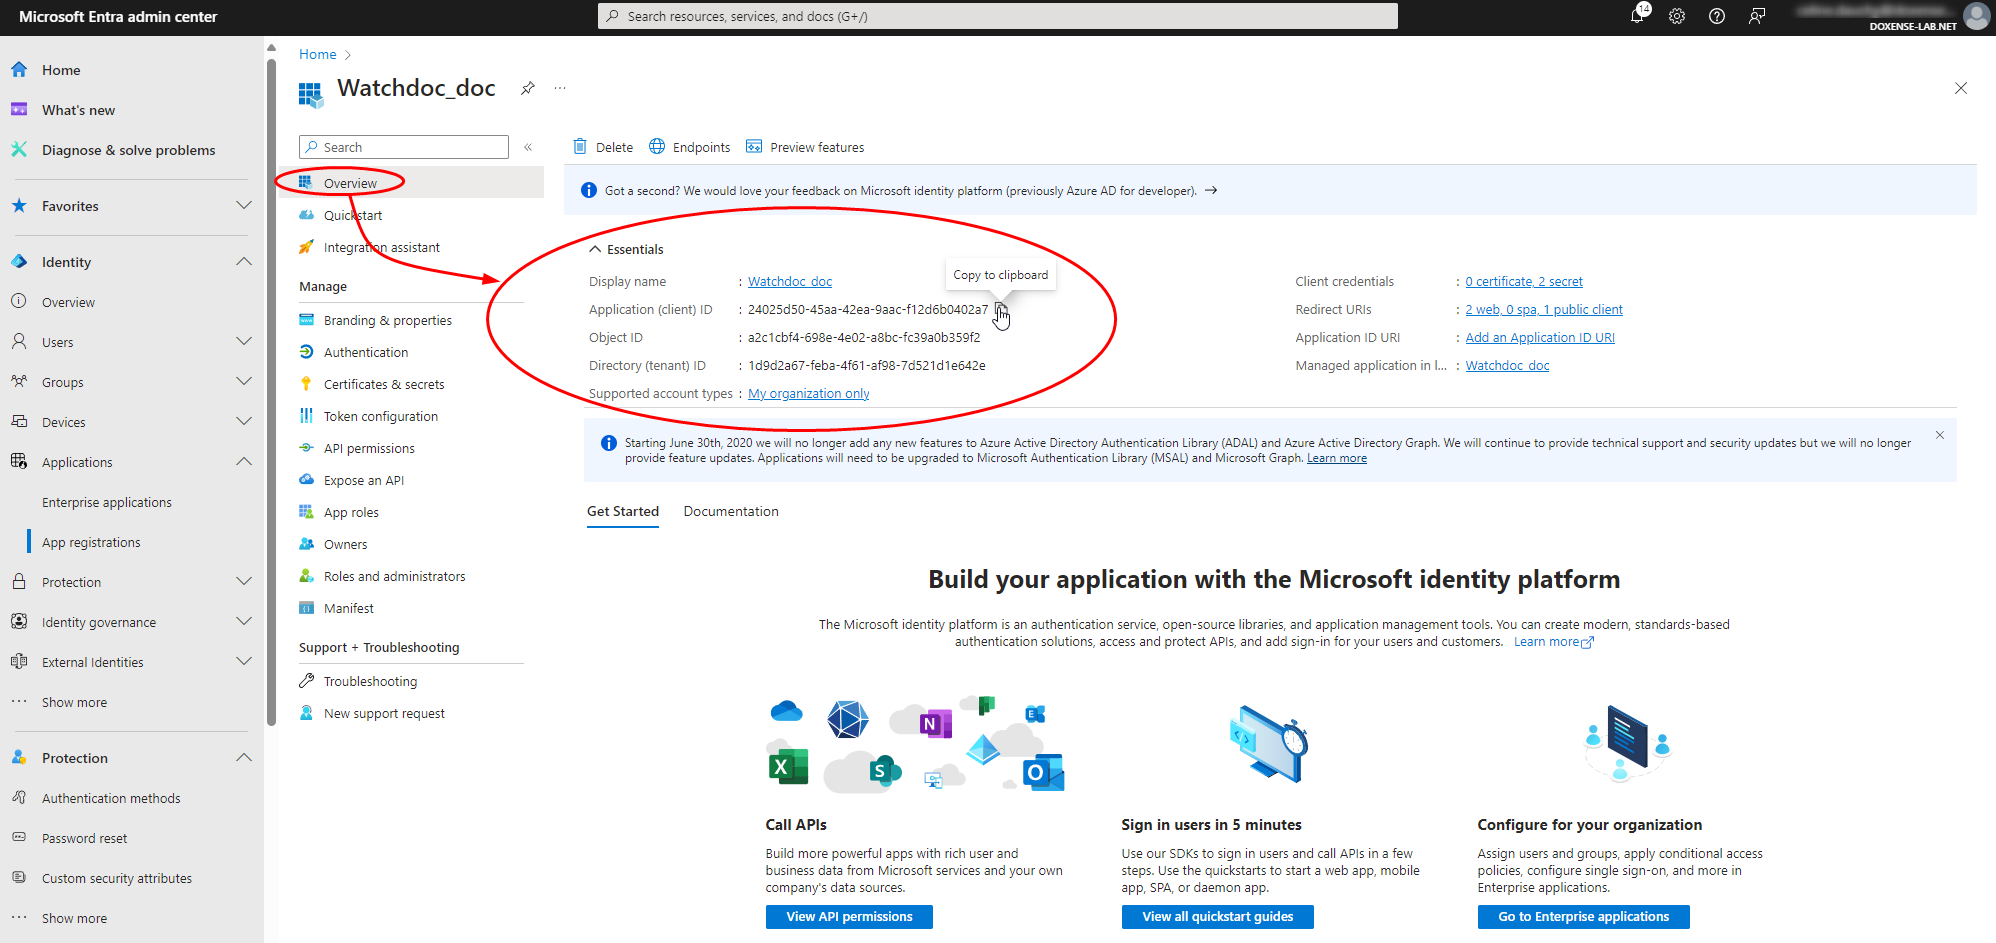
View application information
The Overview menu displays the information you need to configure applications in Watchdoc:
-
Application ID (client)
-
Directory ID (tenant) Tenant ID:
 *
*
èOnce the Watchdoc application registered in Entra ID, configure the Entra ID directory in Watchdoc.