Configure a PUK codes (SQL) directory
Principle
When Watchdoc users are registered in an Entra ID directory (Microsoft Azure), if they authenticate using a PUK code, these codes are stored in a directory of PUK codes managed in a SQL table.
This is also the case if the LDAP directory is specifically configured with a remote PUK code directory (see Declare and configure an Active Directory).
Prerequisites
Before declaring the directory, you need to know the name of the SQL database containing the "Cards" table in which the PUK codes will also be stored, as well as the access account for this database (user name and password).
Declaring a PUK codes directory
From the Main menu in the administration interface,
-
From the Configuration section, click on User directories:
-
From the list of directories displayed, click on the Register a new directory
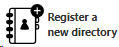 button:
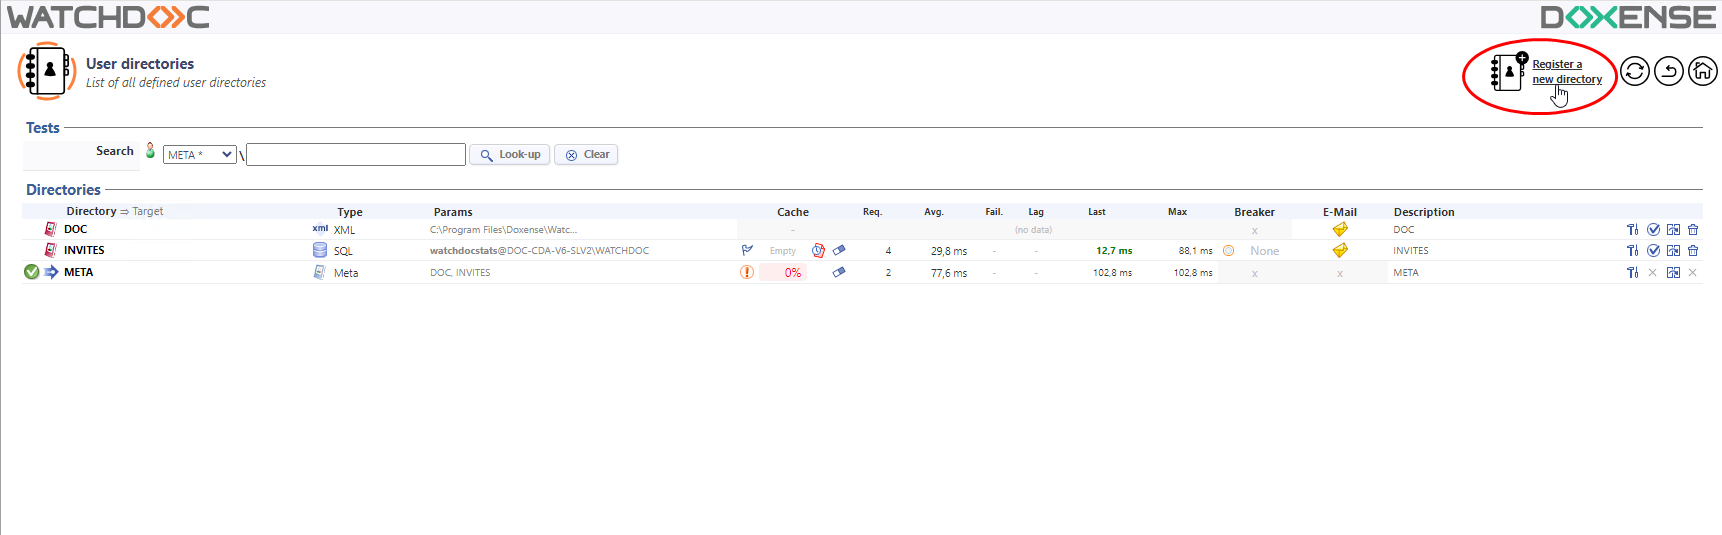
è You will access the Register a new directory interface comprising a number of sections.
The number and kind of parameters found in this interface vary with the kind of directory to configure.
Configure a PUK codes directory
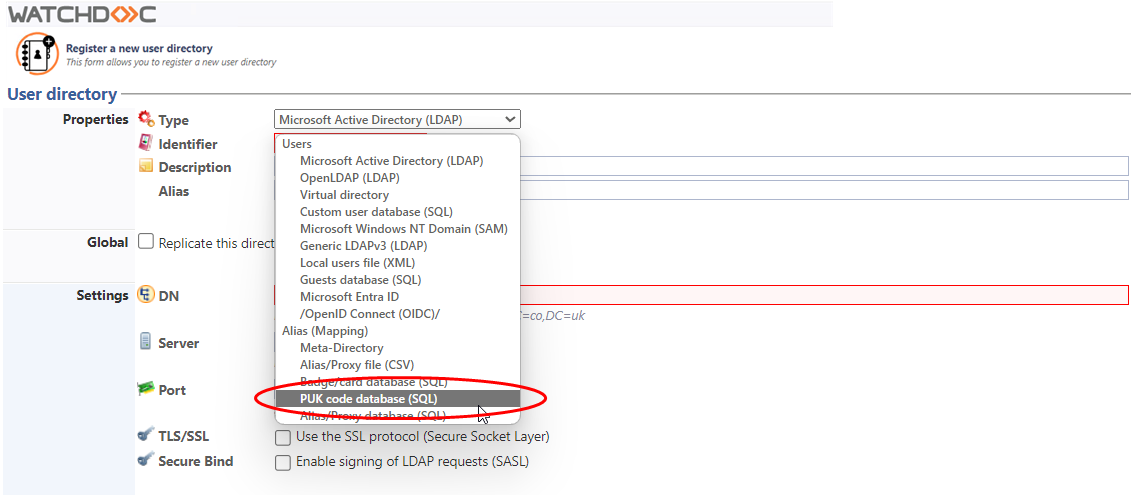
Properties
-
In the Properties section, select the PUK Code Base (SQL) Type:
-
Global: tick this box if you are configuring the directory on a master server and want to replicate it on the slave servers (if the synchronisation mode is bidirectional.
-
Enter the information required to establish communication between Watchdoc and the database:
-
Identifier: enter the directory identifier;
-
Use the configuration of the statistics database: tick this box if you want to use the same database as the statistics database, so that you don't have to fill in all the previous fields. This box saves time when configuring slaves servers in Mailbox mode that do not share a common database).
If you are not using the statistics database configuration, complete the following fields:
-
SQL Server: indicate the server where the SQL database hosting the directory is located. Click on the Browse button to browse your workspace and select the server from among the SQL servers detected on your network;
-
Password: enter the password for the user account authorised to manage the SQL database;
-
Database: indicate the name of the database in which the PUK codes associated with the users registered in the Entra ID directory (watchdocstats, in most cases) are to be stored. Click on the Browse button to browse the SQL server previously declared in order to select the statistical tables declared there. By default, PUK codes are stored in the cards database.
Options
The information entered can be used to specify the settings for generating PUK codes associated with users of an Entra ID directory:
-
Seed: enter a number used as a "random seed" to initialise the user PUK code generator. This number is a 32-bit integer between 1 and 2,147,000,000;
-
Algorithm: from the list, select the level of algorithm used to generate your users' PUK codes (6 or 10 digits);
-
Variability: in the list, select (if necessary) the frequency with which the directory of PUK codes will be regenerated. By default, the directory does not change. Regenerating PUK codes increases the security of this authentication mode.
Logs
-
Recording SQL requests in the application log: Tick this box if you wish to retain a trace of SQL requests in a dedicated file.
Cache lifetime
Watchdoc can retain a data cache that is specific to users to accelerate processing times. The data entered is used to define how long the caches are retained:
-
TTL Info: Enter the time (in seconds, minutes, hours or days) for retaining user data.
-
TTL NotFound: Enter the time (in seconds, minutes, hours or days) for retaining data relating to users authenticated in the Watchdoc application when the latter did not find them in the directory.

During the specified time, Watchdoc will not call on the directory but only its cache. Setting an excessively long retention period is not recommended, especially for users who are not found
Cache
Watchdoc can retain the requests for cache in its memory to accelerate their execution.
By default, the lifetime (TTL![]() By default, the lifetime (TTL) of cached directory data is 72 hours.) of cached directory data is 72 hours.
By default, the lifetime (TTL) of cached directory data is 72 hours.) of cached directory data is 72 hours.
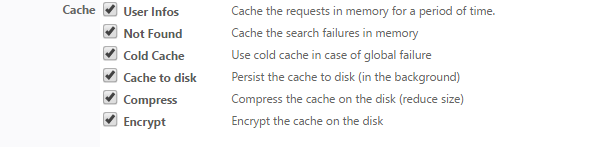
Tick the boxes for the caches you wish to enable:
-
User Infos: Tick this box to enable the user information cache.
-
Not found: Tick this box to enable the cache covering users whose accounts have not been found.
-
Cold Cache: Tick this box to retain "cold" data cache, i.e. already checked but now expired data..
-
Persistence: Tick this box to allow retaining the cache on disk so that it can be retrieved if the Watchdoc service is restarted..
-
Compression: Tick this box to enable cache compression on disk. We strongly recommend enabling this setting to reduce the size of the file when persistence is enabled.
-
Encryption: Tick this box to encrypt the cache file on disk, to secure its content.
Circuit breaker
User directories are usually hosted on a remote domain controller or server, accessible via the local network. In the event of a network failure or severe slowdown, this can cause a cascading effect that can cause the print server to freeze or slow down.
In this case, it may be useful to activate a "logic fuse", which trips in the event of a major system slowdown, to stop requests being sent to the faulty server.
Enter in the fields the values beyond which Watchdoc stops sending queries to the directory server to avoid overload:
-
Acces the Watchdoc administration interface as an administrator.
-
From the Main Menu, Configuration section, click on Users directories.
-
In the list of declared directories, click on the button
 to access the directory settings ;
 -
or click on the button
 to Register a new directory (in the top banner).
 -
In the Register a directory interface, go to the Circuit breaker section.
-
In the fields, enter the values beyond which Watchdoc stops sending queries to the directory server to avoid overload:
-
Max. errors: it's the number of "serious" successive errors. A "serious" error is, for example, a network communication problen, a timeout, a malfunction or the remote server. These errors are generally rare and can sometimes be resolved automatically (end of a peak period, restart of the remote server, etc.). Logical errors (such as authentication failure, syntax error or directory setting error) are ignored.
-
Max. Requests: this is the maximum number of parallel requests allowed. In case of heavy workload, the remote server may not be able to respond to a large number of simultaneous requests.
-
Max. duration: it is the maximum average time for the execution of the 10 last requests. In case of a strong slowdown of the remote server (peak period, network timeout,...), this time is extended.
-
Retry Delay: after starting the circuit breaker, waiting time before reactivation. At the end of this delay, Watchdoc restarts the requests in order to "probe" the state of the server. If the requests are successful, the fuse is reactivated, otherwise it waits for the timeout to expire again.
The administrator can manually deactivate the fuse at any time. The fuse then remains switched off until it is manually reactivated. Consider using this feature to test the impact of a failure on the print server.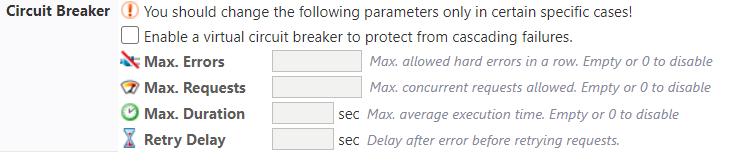
The values frequently entered to activate the circuit breaker in a a large multi servers environment are the following:
-
max. errors: 5
-
max. requests: 5
-
max. duration: 30 secondes
-
retry delay: 120 secondes
Print clients
Do not use this directory for Print Client authentication: check this box if you do not want to use this directory to allow the user to authenticate in Watchdoc Print Client.
Validating the configuration
Click on the ![]() Create button to validate the configuration for your directory.
Create button to validate the configuration for your directory.