Certificats - Import a signed certificat in Watchdoc
The D.S.I. may sometimes wish to provide you with a signed certificate.
Provide certificate details
-
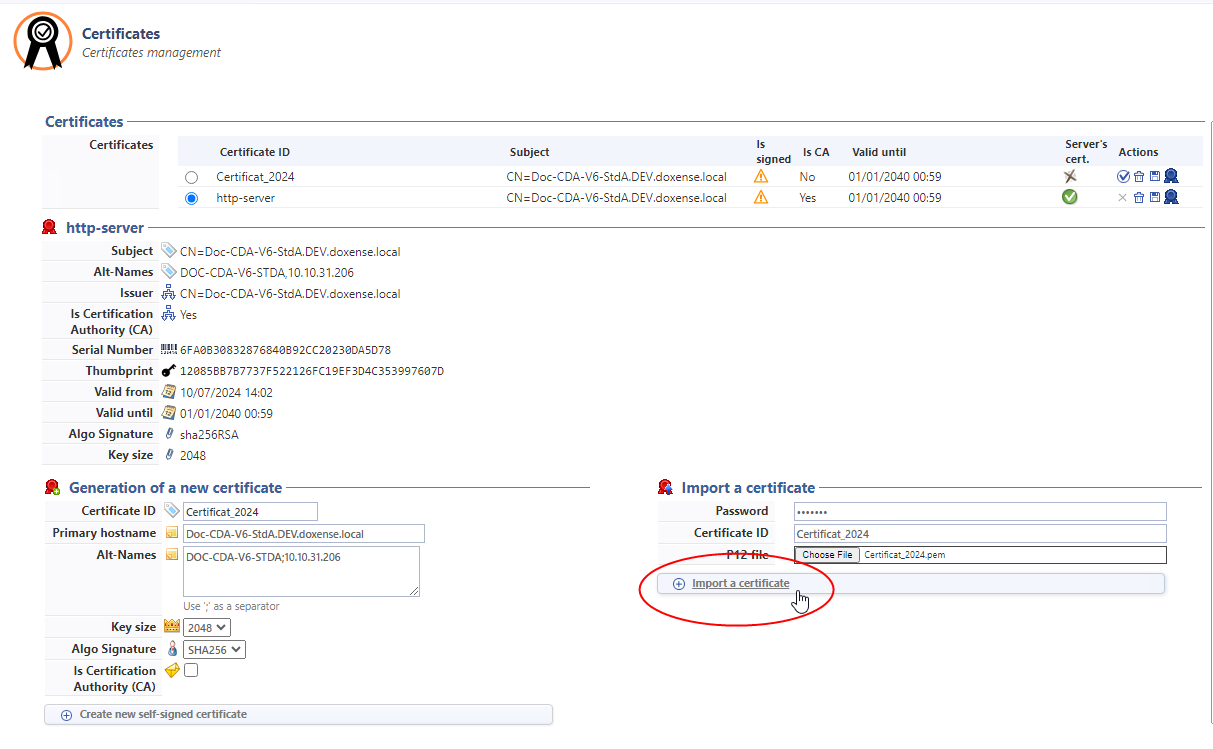
In the Certificates configuration interface, in the Generating a new certificate section, enter an ID identifier (unique and definitive);
-
provide your IT department with the information (ID, main host name and Alt-Names) relating to the expected certificate;
-
retrieve the p12 file supplied by your IT department from your workspace.
Importe a certificate
-
When your IT consultant sends you back the p.12 file (.pfx or .pem) and the corresponding password, complete the following fields in the Import section:
-
Password: enter the password for the file;
-
Certificate ID: enter the certificate ID;
-
p12 file: click on the Choose a file button to select the file supplied by your referrer (.pem or .pfx).
-
-
Click on the Import a certificate button:
-
Check in the list of certificates that the ‘Signed certificate’ logo
 is displayed in the Is signed column to the right of the certificate.
Associate a certificate with a web server endpoint
-
In the Web Server interface, DSP section, in the list of web server endpoints, add an endpoint or click the button to modify an existing endpoint:
-
In the Web server endpoint interface, complete the fields (see Create an endpoint) then, in the Certificates list, select the newly added certificate.
-
Complete the other settings, then click to confirm the association between the certificate and the endpoint:
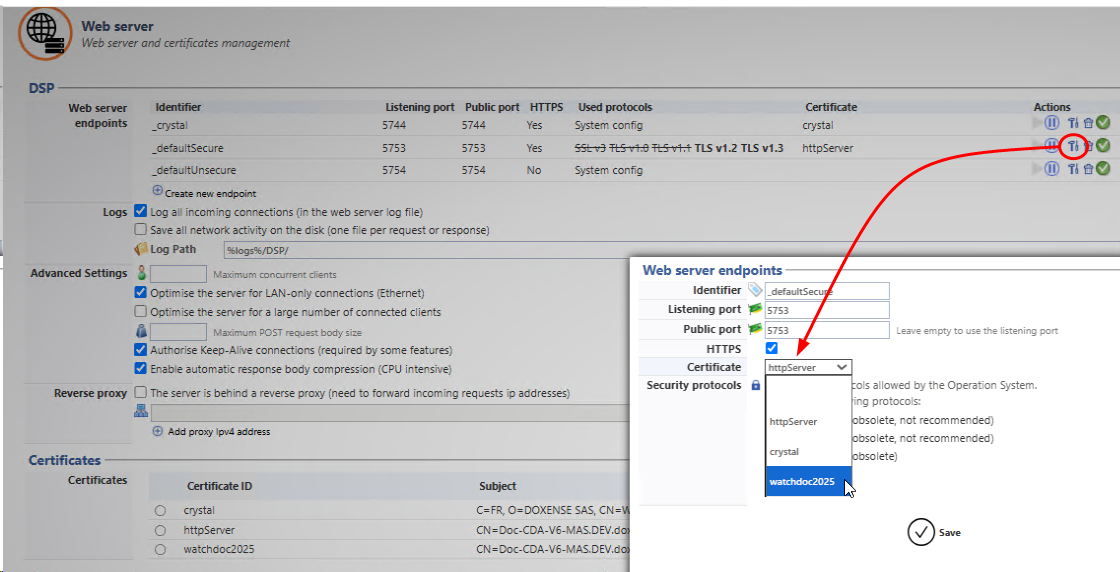
èYou can then delete the other certificates if you wish.
Delete a certificat
To remove a certificate from the list, click on the  button to the right of the certificate.
Please note! Deletion is immediate: no confirmation is required.