Watchdoc - Certificates - Manage certificates
Generate a self-signed certificate
-
In the certificate management interface, in the Generate a new certificate section, complete the following fields:
-
Certificate ID: enter a unique and definitive identifier, which can be made up of letters, numbers and the underscore ‘_’ as a separator, up to 64 characters long;
-
Primary hostname: enter the host name of the http server in this field;
-
Alt. names: enter the other names contained in the certificate using a semi-colon ‘;’ as a separator.
N.B.: for some print devices, the address with which they communicate with Watchdoc must appear either in the Primery hostname field or in the Alt. Names; -
Key size: from the list, select the key size corresponding to the certificate;
-
Signature Alg.: from the list, select the hash algorithm used to sign the certificate;
-
Is a certification authority: tick the box if the certificate has this status. For security reasons, we do not recommend the use of such certificates;
-
-
Click the button Create new self-signed certificate:
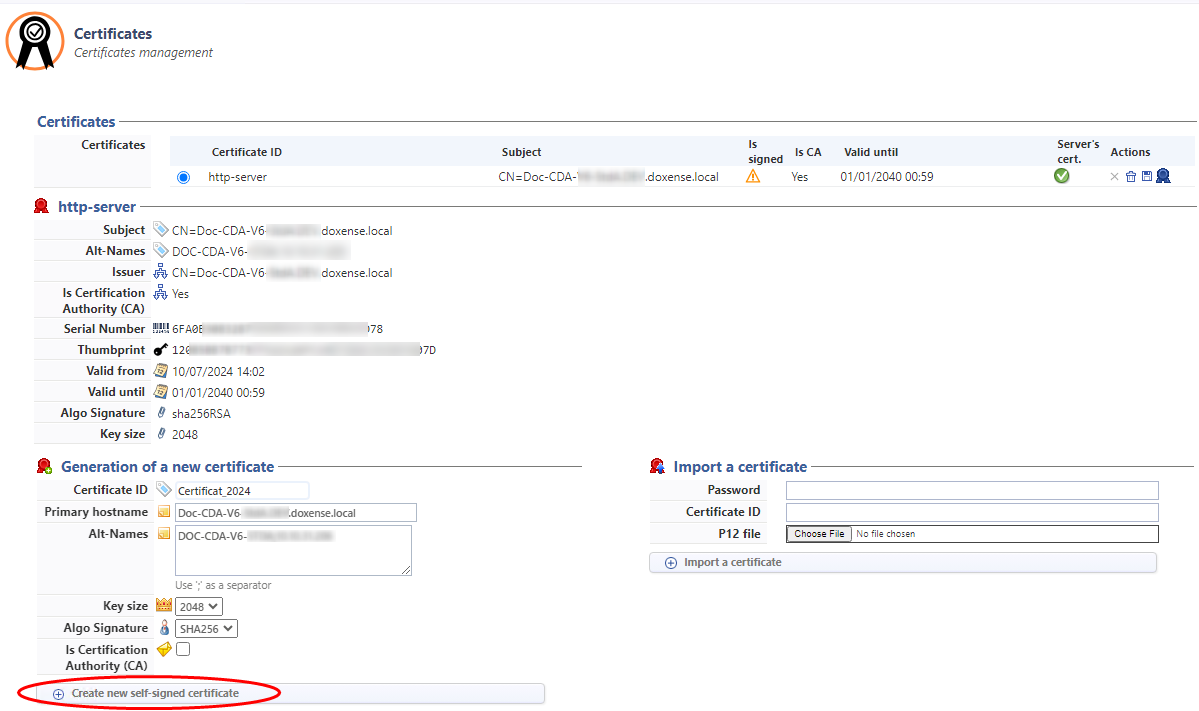
è Watchdoc generates a CSR file (.pem format) and displays the newly generated certificate in the Certificates list. The ‘is self-signed’ icon
 is displayed in the Is signed column to the right of the certificate. If you wish, you can have this certificate signed by your certification authority.
Have the certificate signed by your Certification Authority
-
From the list Certificates, click on the button
 to the right of the certificate to be signed;
 -
in the interface Sign certificate > Step1, click the button Download the CSR:

-
download the CSR file generated by Watchdoc (.pem) from the Download folder (by default);
-
Step2: submit this .pem file to your certification authority (which will sign it using base 64 encoding);
-
Save the signed certificate in your working environment;
-
Step3: click on the Choose a file button to select the certificate file in your working environment;
-
then click on the Complete certificate button:
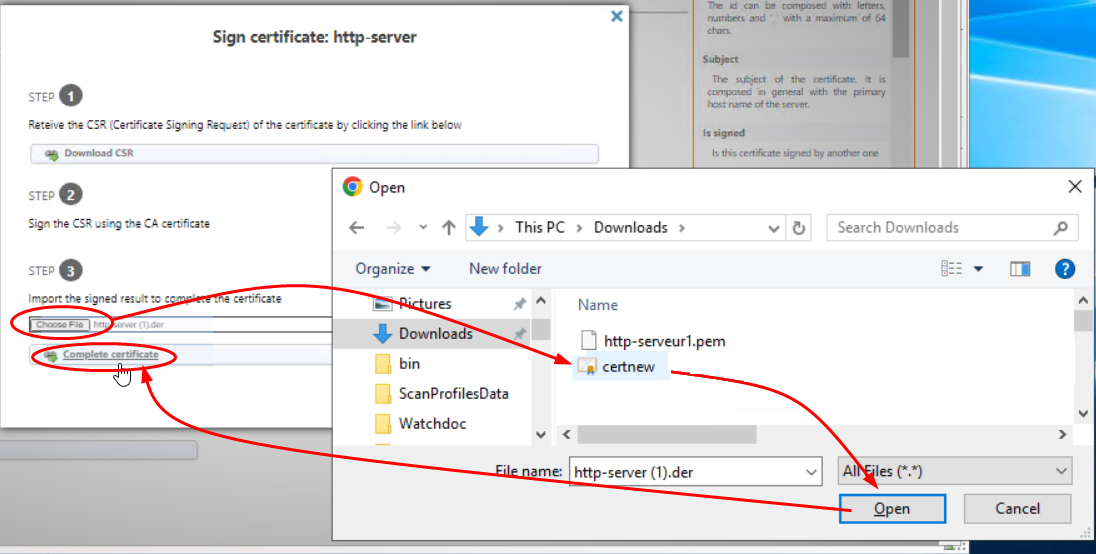
èIn the list, the ‘Certificate signed’ logo is displayed next to the certificate that has just been signed:
èYou can then designate it as the current certificate.
Associate a certificate with a web server endpoint
-
In the Web Server interface, DSP section, in the list of web server endpoints, add an endpoint or click the button to modify an existing endpoint:
-
In the Web server endpoint interface, complete the fields (see Create an endpoint) then, in the Certificates list, select the newly added certificate.
-
Complete the other settings, then click to confirm the association between the certificate and the endpoint:
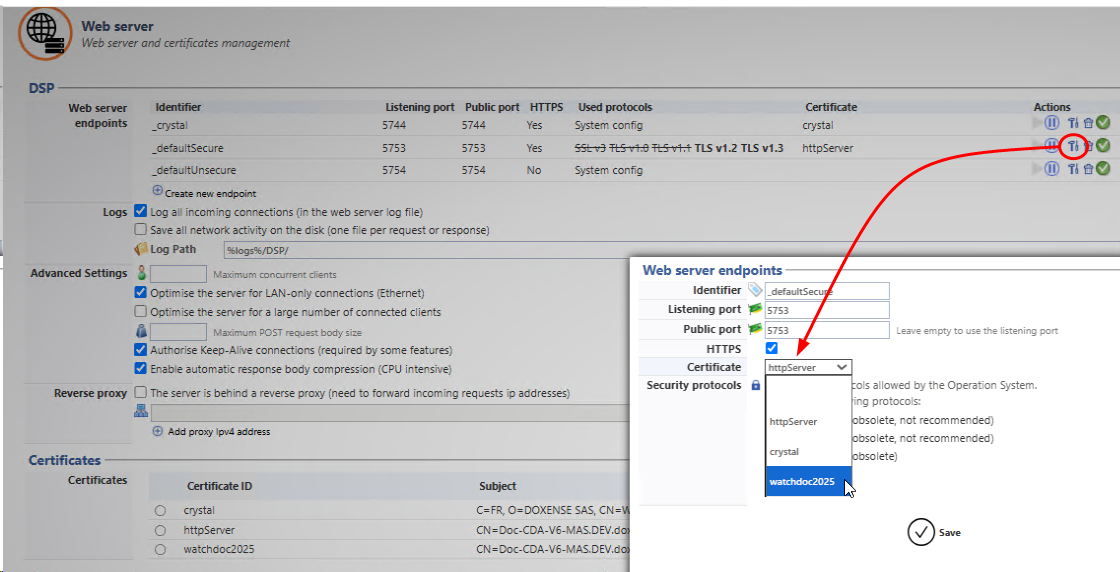
èYou can then delete the other certificates if you wish.