Filters and rules - Creating and configuring a filter and applying it to a queue - Procedure
Create a Filter
To create a filter:
-
In the list of filters, click on the Create a new filter
 button:
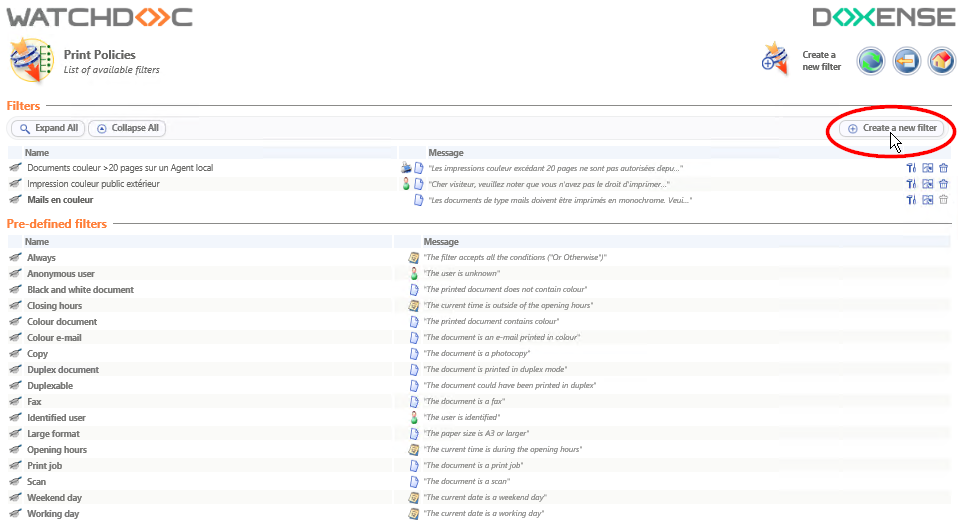
→ You will access the Create a filter interface comprising the 2 sections Filter and Rules (conditions):
Configure the Filter
Configure the Filter section
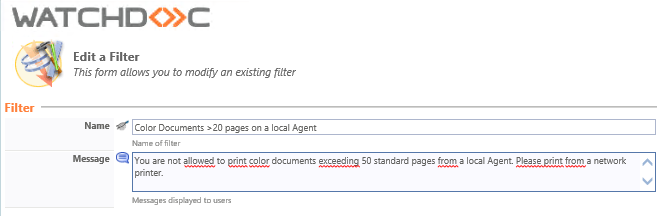
Use this section to specify the general information on the filter:
-
Name: Assign an explicit name to the filter. This name is the one displayed in the administration interface.
-
Message: Enter a message explaining the rules applied in the filter. This message is intended for users to justify, whether by e-mail or by notification, the print preferences imposed, the redirection or the rejection of the print-out. For example: "You do not have permission to print e-mails in colour", "As an outside party, you do not have permission to print in colour", etc.
Configure the Rules (conditions) section
An policy is an instruction given to Watchdoc to process print requests according to conditions. These conditions are managed by filters.
The policy uses filters and sometimes roles.

-
Condition: Choose the condition forming your rule, from the list. The conditions cover:
-
Characteristics relating to documents: Colour or monochrome, number of pages, print or copy, paper size, etc.
-
Characteristics relating to users: Ones that match a specific name, belonging to a group, a domain, a role, etc.
-
Characteristics relating to the date and/or time: A specific day, opening hours, before or after a set time, etc.,
-
Workstation: Has a specific IP, matches a specific DNS name, etc.
-
The type of billing: The billing code matches a specific customer, the cost is more or less than a certain sum, etc.,
-
The print queue status: The file contains a specific tag, the queue belongs to a specific group of queues, etc.
-
Another (miscellaneous) criteria: The document must validate or not validate a preset filter condition.
-
-
Parameters: When the data entry field is active, enter the value that matches the condition to be met.
-
If true: Select the action performed when the condition is true:
-
Continue: The check continues and moves to the next condition,
-
Select: The analysed element is selected as it meets the condition,
-
Reject: The check stops and the analysed element is rejected as it does not meet the condition.
- If false: Select the action performed when the condition is not true:
Continue: The check continues and moves to the next condition,
Select: The analysed element is selected as it meets the condition,
Reject: The analysed element is rejected as it does not meet the condition and the check stops.
Validate and apply the filter
-
Click on the
 button to Create your filter.
 -
Then apply your filter (e.g. on a print queue), to check its operation.
Apply the filter to the queue
-
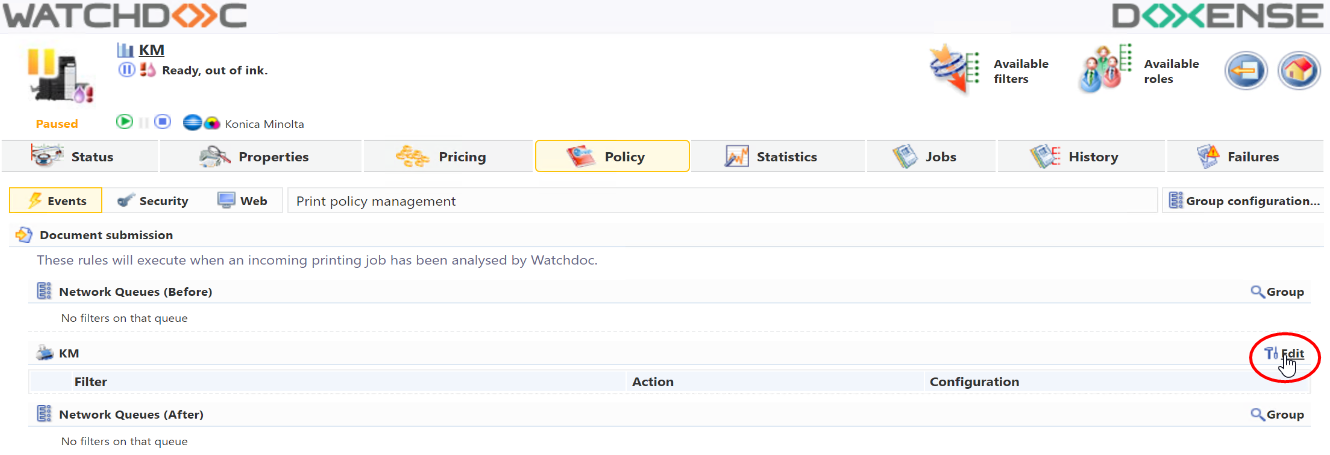
From the Main Menu, Production section, click Print Queues, Locations, Queue Groups & Pools. This takes you to the list of queues and groups of queues.
-
In the list, click on the print queue (or Queue Group) to which you wish to apply the filter.
-
In the management interface, click on the button to access the queue Policy management interface.
-
In the Events > Document submission section (Before) list, click on the Edit button:
-
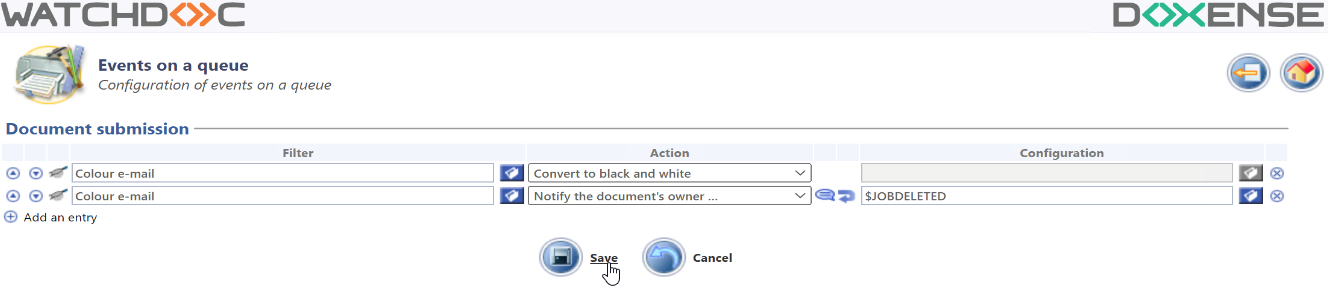
In the Events on a queue interface, in Document submission, select the Filter previously created.
-
Then select the Action to be applied when the filter is checked. These actions are predefined and some can be supplemented by a parameter. Please note that :
-
the "Suggest conversion" action is dependent on the "WES spool transformation" functionality associated with the file.
-
The "Notify document owner..." action is used to email the message entered when configuring the filter.
-
-
Click on the button
to Save the rule set on the queue. -
Check that the rule applies to your line.