Configure WEScan
Steps
To configure WEScan, the steps are the following:
-
Configure the scans destinations.
-
Enable the Scan feature in the WES profile associated to the queue.
-
Enable the WEScan feature on the concerned queue.
Configure scan destinations
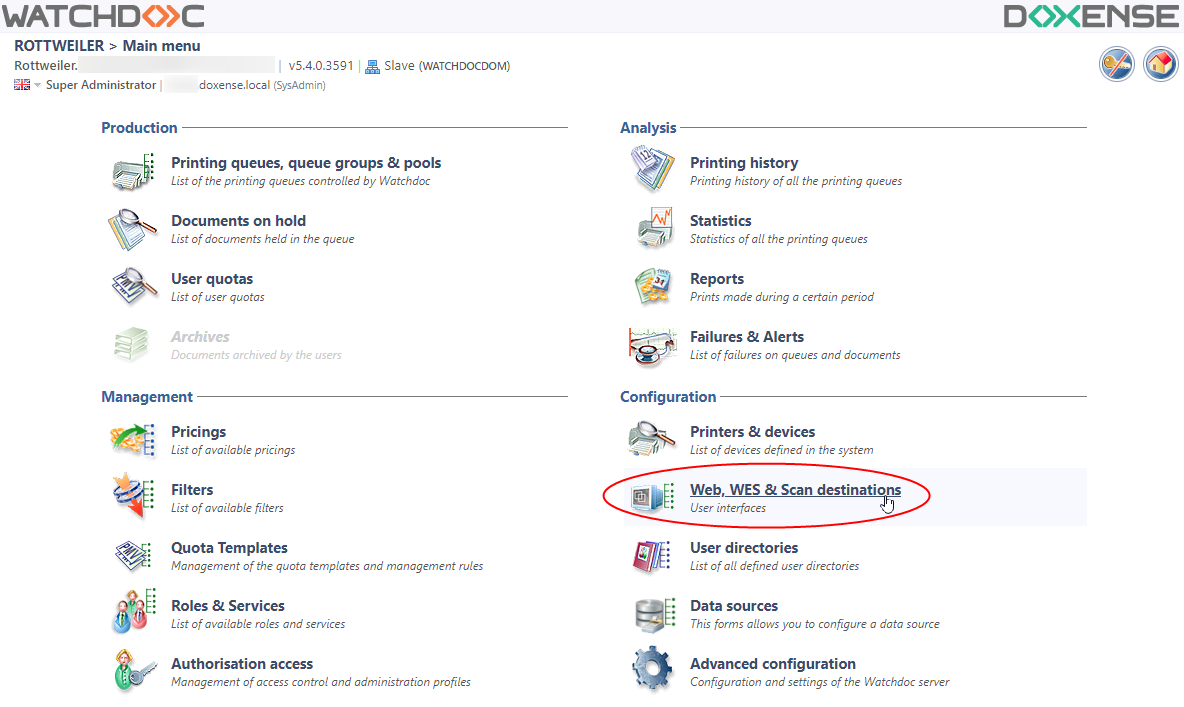
Access the configuration interface
-
Access the Watchdoc® administration interface as an administrator.
-
From the Main Menu > Configuration section, click on Web, WES & Scan destinations section:
-
In the Web, WES & Scan destinations interface, in the Scan destinations section, the configured destinations are displayed. For each destination in the Scan destinations list, there are several tools:
-
button
 allows to edit settings of a destination in order to modify them.
 -
button
 Duplicate allows to create an other scan destination from a existing;
 -
button
 allows to delete a scan destination (upon confirmation).
-
To create a destination, click on one of the following buttons:
 ,
,  , or
, or  :
:

Configure a Scan to My mail destination
-
In the Scan destinations section, click on
button. -
In the Scan Destination creation interface, complete the following settings.
-
Settings section:
-
Label: indicate in this field the label of the destination.
-
Destination type: select in the list on of the three default destinations.
-
Global: tick the box if the server belongs to a domain and the destination, configured on the Master server, is to be replicated on the Slave servers.
-
-
E-Mail section:
-
File name: indicate in this field the name given to the scanned document attached to the e-mail.
-
Can be edited by user in the WES interface (this box is associated to other settings): tick this box to allow the user to modify the setting from the device panel.
-
Maximum files size (Mo): indicate the size the scanned documents can not exceed (below this size, an e-mail informs the user that the document exceeds the allowed size and therefore cannot be sent and is replaced by a download link).
-
E-mails in copy: click on the button r
 , then complete the e-mail addresses in the following field if you want to send a copy to other recipients.
 -
Deletable: tick this box to allow the user to delete the copy sent to other recipients.
-
User can add more e-mail addresses: tick this box to allow the user to add other recipients, then complete the e-mail addresses.
-
E-mail object: enter the e-mail object introducing the scanned document.
-
E-mail body message: enter the e-mail object of the scanned document.
-
Sent from user's personal e-mail: tick this box so that this e-mail address may be displayed as the e-mail sender address.
-
Add the user in copy: tick this box for the user to receive a copy or the e-mail (not necessary if the destination is "Scan to me").
-
-
Restrict this destination: section. Tick this box so that the destination can only be used by certain users or groups of users:
-
Mode : select whether this destination can be used by all users (default) or tick All users below will not be able to use this destination to restrict. The precise:
-
one or several Groups in the list: these users groups will not be authorised to use this destination.
-
one or several Users in the list: these users will not be authorised to use this destination.
-
-
-
Click on the
 button to create the destination.
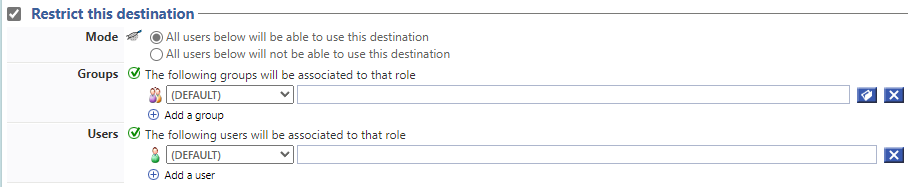
Configure a Scan to E-mail destination
-
In the Scan destinations section, click on
button; -
In the Scan Destination creation interface, fill the following settings.
Settings section:
Label: indicate in this field the label of the destination.
Destination type: "Scan to Mail" is selected by default
Global: tick the box if the server belongs to a domain and the destination, configured on the Master server, is to be replicated on the Slave servers.
E-Mail section:
File name: indicate in this field the name given to the scanned document attached to the e-mail.
Can be edited by user in the WES interface (this box is associated to other settings): tick this box to allow the user to modify the setting from the device panel.
Maximum files size (Mo): indicate the size the scanned documents can not exceed (below this size, an e-mail informs the user that the document exceed the allowed size and therefore can not be sent and is replaced by a download link).
Recipients: click on the button
E-mails in copy: click on the button
Deletable: tick this box to allow the user to delete the copy sent to other recipients.
User can add more e-mail addresses: tick this box to allow the user to add other recipients, then complete the e-mail addresses.
E-mail object: enter the e-mail object introducing the scanned document.
E-mail body message: enter the e-mail message accompanying the scanned document.
Sent from user's personal e-mail: tick this box so that this e-mail address may be displayed as the e-mail sender address.
Add the user in copy: tick this box for the user to receive a copy or the e-mail (not necessary if the destination is "Scan to me").
Restrict this destination: section. Tick this box so that the destination can only be used by certain users or groups of users:
Mode : select whether this destination can be used by all users (default) or tick All users below will not be able to use this destination to restrict. The precise:
one or several Groups in the list: these users groups will not be authorised to use this destination.
one or several Users in the list: these users will not be authorised to use this destination.
3. Click on the
Configure a Scan to Folder destination
-
In the Scan destinations section, click on
button; -
In the Scan Destination creation interface, fill the following settings.
Settings section:
Label: indicate in this field the label of the destination.
Destination type: "Scan to Folder" is selected by default
Global: tick the box if the server belongs to a domain and the destination, configured on the Master server, is to be replicated on the Slave servers.
Folder section:
Target folder: indicate in this field the path and the name of the folder in which is to be registered the scanned document attached to the e-mail.
Can be edited by user in the WES interface: tick this box to allow the user to modify the setting from the device panel (WES).
Create folder if it doesn't exists: tick this box to allow the system to create automatically the folder;
Sub folder: indicate in this field the name of the path-folder in which is to be registered the scanned document attached to the e-mail.
Can be edited by user in the WES interface: tick this box to allow the user to modify the setting from the device panel (WES).
Create sub folder if it doesn't exists: tick this box to allow the system to create automatically the sub-folder;
File name: enter in the field the name given to the scanned document;
Maximum files size (Mo): indicate the size the scanned documents can not exceed (below this size, an e-mail informs the user that the document exceed the allowed size and therefore cannot be sent).
Restrict this destination: section. Tick this box so that the destination can only be used by certain users or groups of users:
Mode : select whether this destination can be used by all users (default) or tick All users below will not be able to use this destination to restrict. The precise:
one or several Groups in the list: these users groups will not be authorised to use this destination.
one or several Users in the list: these users will not be authorised to use this destination.
-
Click on the
button to create the destination.
Activate the Scan feature in the WES profile
From the Main menu> Configuration section, click on Web, WES & Scan destinations.
In the Web, WES & Scan destination interface, in WES profiles list, click on the concerned profile to edit it.
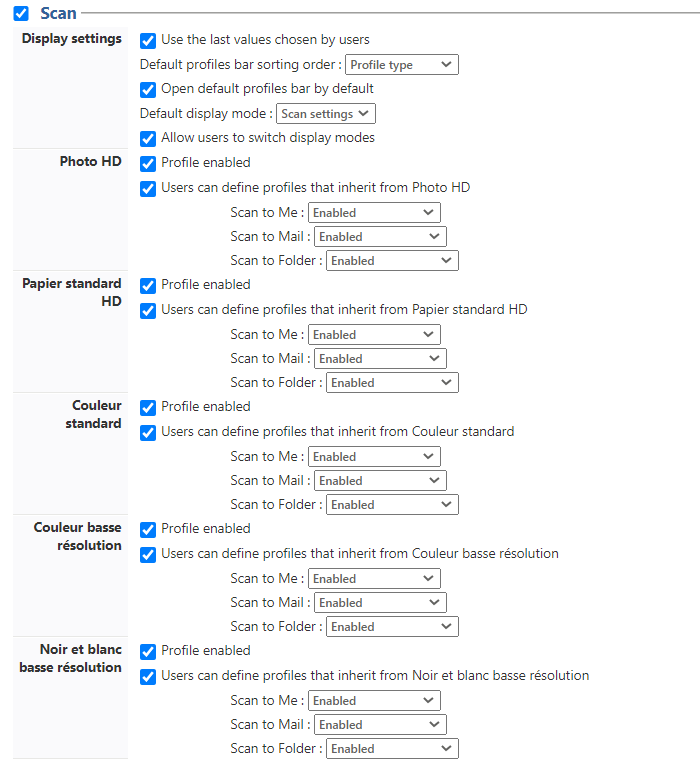
In Configure a WES profileinterface..., Scan section, tick the scan options boxes:
-
Display settings:
-
Default profiles bar: allow to offer scanning profiles (predefined settings) to users, that saves time when the scanning uses are often the same;
-
Scanning settings: propovides an interface in which the user has a choice between all the scan settings, which is usefull when scanning for a wide variety of purposes.
-
[Documents Types (photo, paper, colour, etc.)]: define options for each document type:
-
Enabled profile: tick the box to make the profile available to users:
-
Users can define profiles that inherit from...: tick the box to give users the right to modify the default profile.
-
Scan to folder, Scan to Mail, Scan to Me: for each destination, indicate if its enabled, disabled or if it is the default destination.
-
WEScan offers 3 types of scan:
-
Scan to Me: scans and sends the scan to the user's email.
-
Scan to Mail: scans and sends the scan to an email specified by the user;
-
Scan to folder: scans and sends the scan in a predefined folder of the user workspace and accessible by the user;
Collecte information in Slack
-
In the Slack application, select the channel (generic or specific) to which you want to send your scans.
-
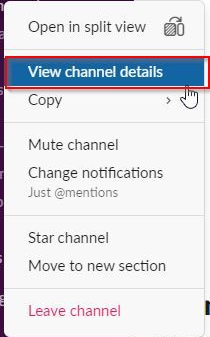
Right-click to access the menu, then click on
-
View channel details (if you've selected a group of people)
-
or Show conversation information (if you've selected a single person):
-
-
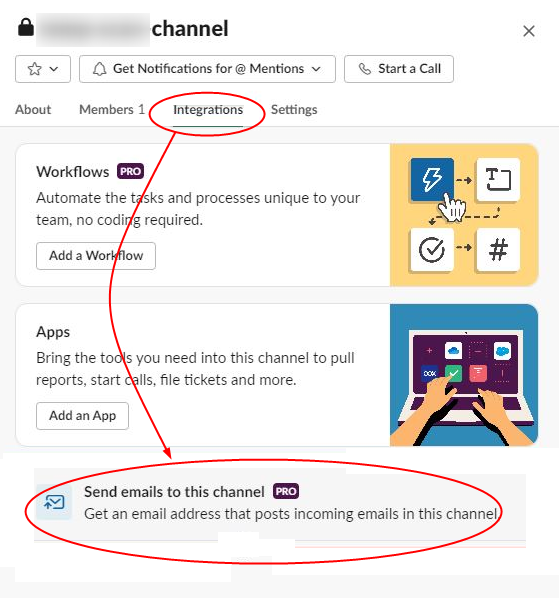
click on the Integration tab
-
then click on Send emails to this conversation :
-
In the interface Send emails to..., click on Copy the Slack e-mail address:
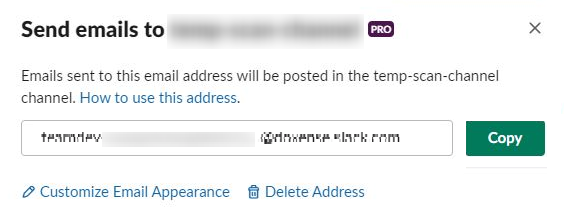
-
You can then use this address copied into Slack to set up a WEScan to e-mail destination.
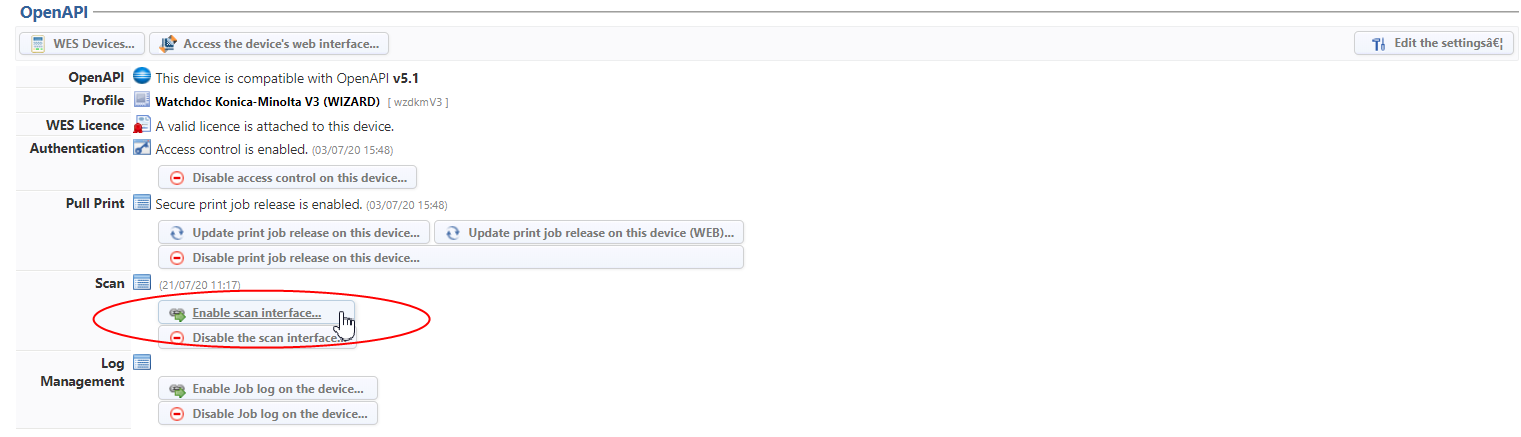
Enabled the Scan feature on the printing queue
To enable the Scan feature:
-
In the Watchdoc® administration interface,from the Main menu > Production section, click on Printing queues, queues groups & pools.
-
Click on the printing queue on which you want to enable WEScan.
-
In the queue's configuration interface, click on Properties tab.
-
In the WES section, click on Enable Scan button: