WEScan - Presentation
Access the WEScan
-
From the device screen, log in regarding the authentication mode expected (card, account, PUK code or PIN code);
-
Once authenticated, click the Applications button (on the device screen) to access the list of applications available on the device;
-
then click the Watchdoc scan
 button: you access the Watchdoc WEScan interface:
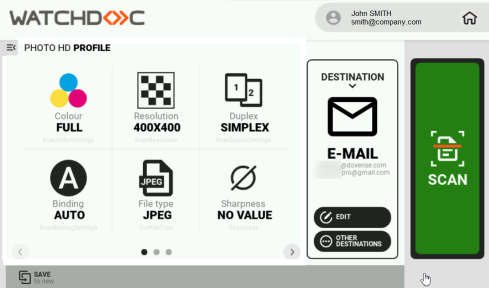
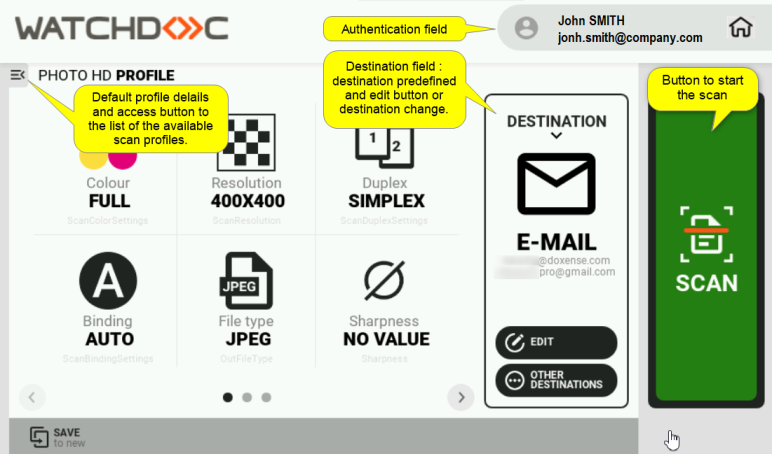
Interface presentation
The interface contains:
-
the authentication field that displays the identifier and the user e-mail;
-
the list (short or detailled) of the available profiles (A scan profile is a sum of parameters (format, colour, orientation, type of document, etc.) defining the way in which a document is scanned. Saved in a JSON file, the scan profile can be modified using the ScanProfilesCustomizer executable.
N.B.: in a domain, to guarantee the availability of scan profiles on all slaves servers in the event of a failure of the interserver database, it is advisable to duplicate all the scan profile JSON files from the master server to the slaves servers.
To do this, copy the custom scan profiles folder (in which you have saved your scan profiles) from your master server to the slave server(s).); -
a default destination (among the destinations available):
-
Scan to Me: scans and sends the file to the user's email;
-
Scan to Mail: scans and sends the file to an email specified by the user;
-
Scan to folder: scans and sends the file in a predefined folder of the user workspace and accessible by the user;
-
-
the button to start the scan:
Procedure
Steps
To scan a document, it's necessary to:
-
choose a profile;
-
choose a destination;
-
launch the scan.
Choose a scan profile
-
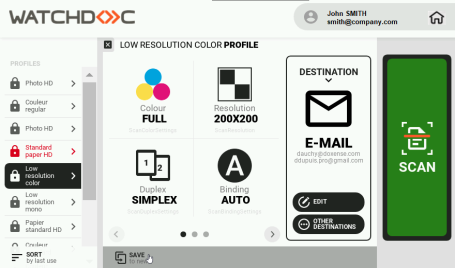
In the profiles section, a profile (the most used) is selected by default. The detailed settings are displayed.
-
All the settings of the default profile are displayed on the central section:

-
To select another profile, click the
 button to access the profiles list;
 -
The profiles are sort by type, either regarding their use or their type. Click the Filter button
 to change the sort order:
-
In the list, select an other profile:
-
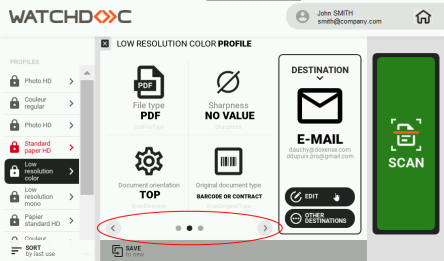
the main settings are displayed. To discover all settings of the profile, click on the arrows:
-
you can click on a setting to edit it and select another in the displayed window:

-
once the profile is chosen and modified (if necessary), click the
 button to close the profiles selection list.
Choose the destination
In the destinations section, a destination (the most used) is selected by default: the detail of its settings is displayed. To select an other destination:
-
click the button Other destinations
 to access the list of other available destinations;
 -
in the list, select an other destination:

-
Settings of the new destination are displayed. To modify the settings, click the
 button.
 -
In the box "Edit the destination [destination_type] ", modify the settings you need to change (folder name, message body, email object, receivers), then click on
 ;
; -
the new settings that have been defined are displayed on the "Destination" section.
Scan
When the profile and the destination are choose (and modified if necessary), click the  button.
If no error message is displayed, it's that the scan has been successful: check that the document has been received or saved.