Watchdoc - Web site profile ("My account" page) - Configure
Configuring the Properties section
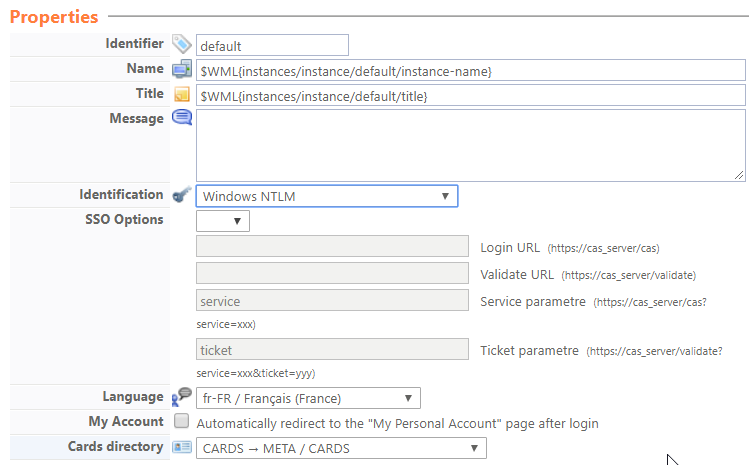
In this section, you indicate the web site profile main properties:
-
Identifier: tape the web site profile identifier. It may be composed with letters, figures and with the '_' character and can not exceed 64 characters. This identifier is only displayed on the administration interfaces.
-
Name: enter the web site profile name. This explicite name is only displayed on the administration interfaces.
-
Title: enter the web profile title that is displayed on the end-user dedicated interface;
-
Profile type: select the display mode of the page "My account". The sections displayed on the "My Account" page depend on the display mode selected:
-
Web release: corresponds to the old graphic design and includes a print release function;
-
My account v. 2 : To enable the new version of the web profile (the “My Account” page without document unlocking), starting with Watchdoc v. .
-
Note: The My Account v. 2 version does not include as many features as the previous version (for example, it does not display the job release page). If you choose this version, it is normal to have access to only some of the settings sections listed below.
-
-
Message: if necessary, enter a message, displayed on the release interface home page (on the authentication form). This message may be used to help the user.
-
Identication: define the mode with which the user authenticate himself in the interface.
-
Anonymous: this mode allows to use Watchdoc without authentication;
-
Form (Login + MdP): this mode allows to display in the web site a form in which users will authenticate themselves with their login and password;
-
Windows NTLM: this mode allows to authenticate users in Watchdoc thanks to their MS Windows identifier automatic transfert;
-
Station: this mode allows to identify the station from which the print job is launched ;
-
Station with automatic connection: this mode allows to identify the station from which the print-job is launched;
-
SSO: this mode allows you to identify the users in Watchdoc by automatically transferring their identifier already entered into another application. In case you opt for this authentication mode, complete the following section. select the SSO protocol with which Watchdoc should interoperate, and then complete the parameters allowing interoperability:
-
URL Login:enter the SSO protocol url used to transfer the login;
-
validation URL: enter the SSO protocol URL used for the authentication validation;
-
service parameter name: enter the protocol url parameter;
-
Ticket parameter url: enter the protocol ticket parameter url ;
-
-
-
Language: in the list, select the language in which the interface must be displayed;
-
My account: tick the box if you want the user to be redirected to the "My personal Account" page after login ; this interface gives access to the user account so that he may recredit his VP(s) accounts, to check the balance of his different counters, for example etc
Configuring the Network configuration section (My Account v. 2)
In this section, select the secure entry point (protected by a trusted certificate) that has been validated by the browsers on user workstations to access the My Account v. 2 page.

By default, Watchdoc is secured using a self-signed certificate.
The secure entry points listed here are configured in the Web Server interface. If you want to secure the My Account v. 2 page using a different certificate and have not yet configured the entry points, click the Configure endpoints link to access the dedicated interface (see Configuring the Web Server and Certificates).
Configuring the Payment section
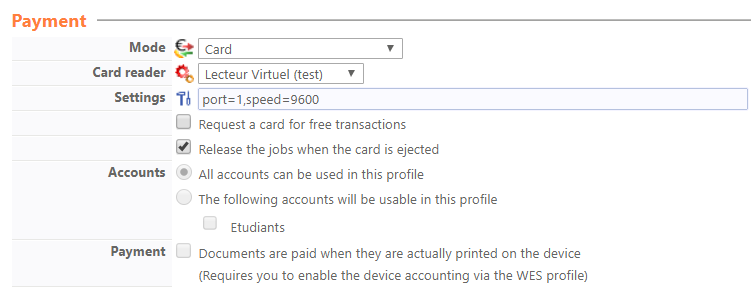
In this section, specify the payment terms of the print-jobs the users release from the web site:
-
Mode: from the list, select the print-job payment mode:
-
Free: this mode allows the users to print freely;
-
Mode: this mode allows users to pay their print-job with a card in which their credit is registered. If you choose this mode, it's necessary to precise:
- Card reader: specify the model of the card reader used for the transaction;
- Settings: specify, if necessary, the parameters which allow Watchdoc to interoperate with the card-reader (port number or reading speed, for example);
-
-
Request a card for free transactions: tick the box if the user must have a card even for free printing. This function can be usefull for the printing statistics;
-
Release the jobs when the card is ejected: tick the box if the print jobs must be printed on the card ejected from the reader. This functtion helps the user not to forget his card in the card reader.
-
Quota: this mode allows users to pay their print-jobs with a quota in which their credit is registered. If you choose this mode, you must specify:
Quota + Card: this mode allows the users to pay their print-jobs, either with a card or with a quota in which the credit user is registered. If you choose this mode, specify;
All accounts can be used in this profile: tick this box to give access to all the quotas available;
The following accounts will be usable in this profile: tick this box, then select the quota to display if ou want to specify the quota you want to display in the web site.
External: this mode needs a external payment system operator intervention (sucha as PayBox®, Moneo®, Cartadix®), responsible for crediting the print-job user dedicated account.
-
Payment: tick the box if you want the user account to debit the account when the jobs are printed and not when the jobs are released. This can be usefull when there is a dysfunction between the spooler and the printer that prevents printing.
Configuring the User Interface section
-
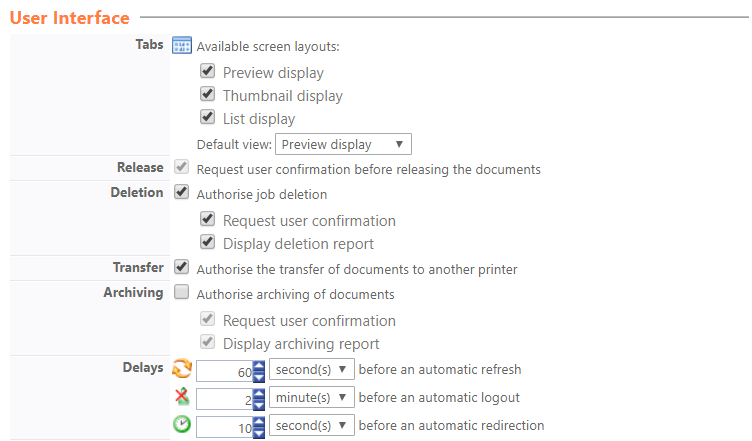
Tabs: tick the boxes corresponding to the interface's tabs you want to make avaibable to the users, then, in the list, select the tab displayed by default when the user accesses the Watchdoc web site ;
-
Preview display: interface in which the job to be printed is displayed page per page. The pagination tools allow to browse the document entirely.
-
Thumbnail display: interface in which the document to print is displayed as thumbnails, with pagination tools allowing to browse the entire document:
-
-
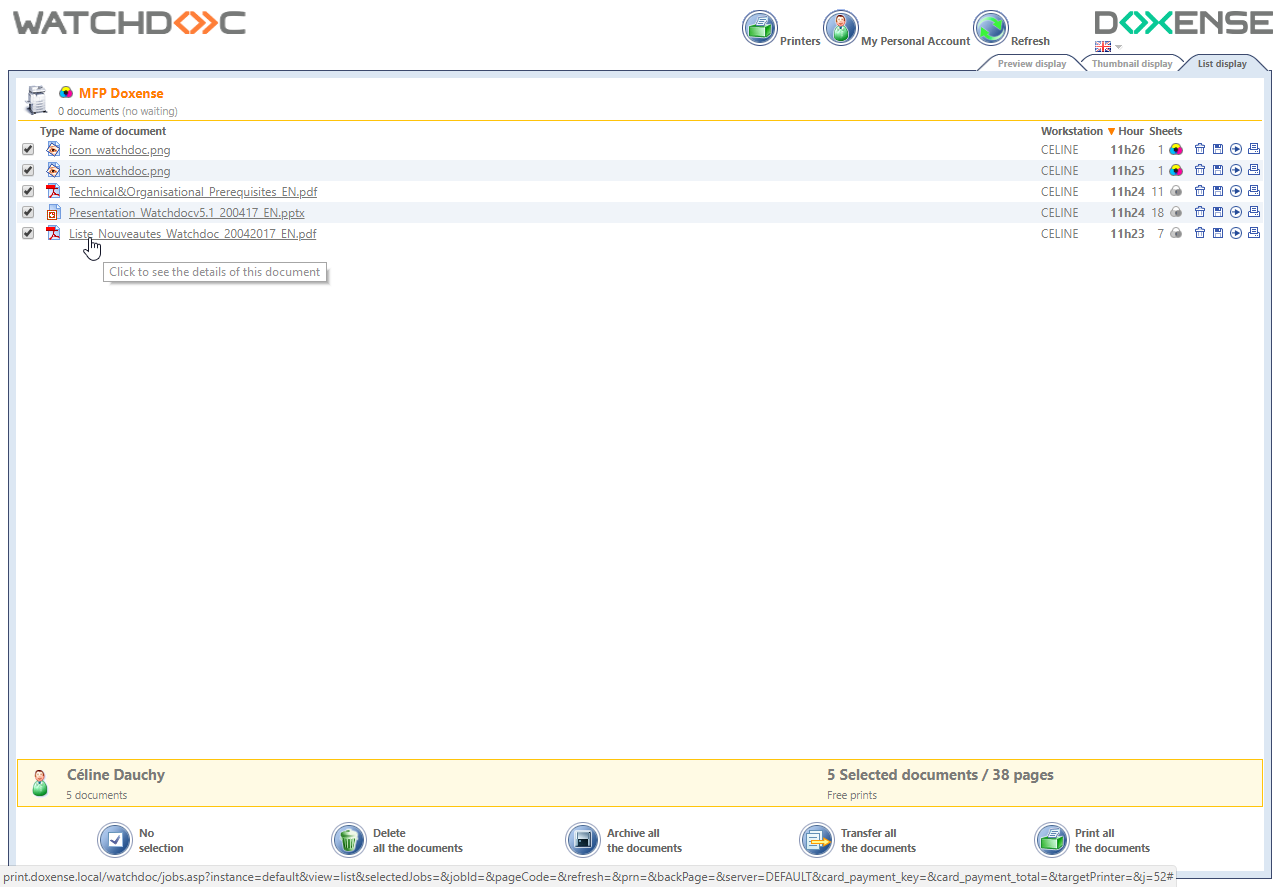
by list: interface in which the print-jobs are displayed in a list. A link allow s users to access the detailed document:
-
Release - Request user confirmation before releasing the documents: when the printing is free, specify if the document must automatically be printed after the printing demand, or if the user must valid his print-jobs from the release interface.
-
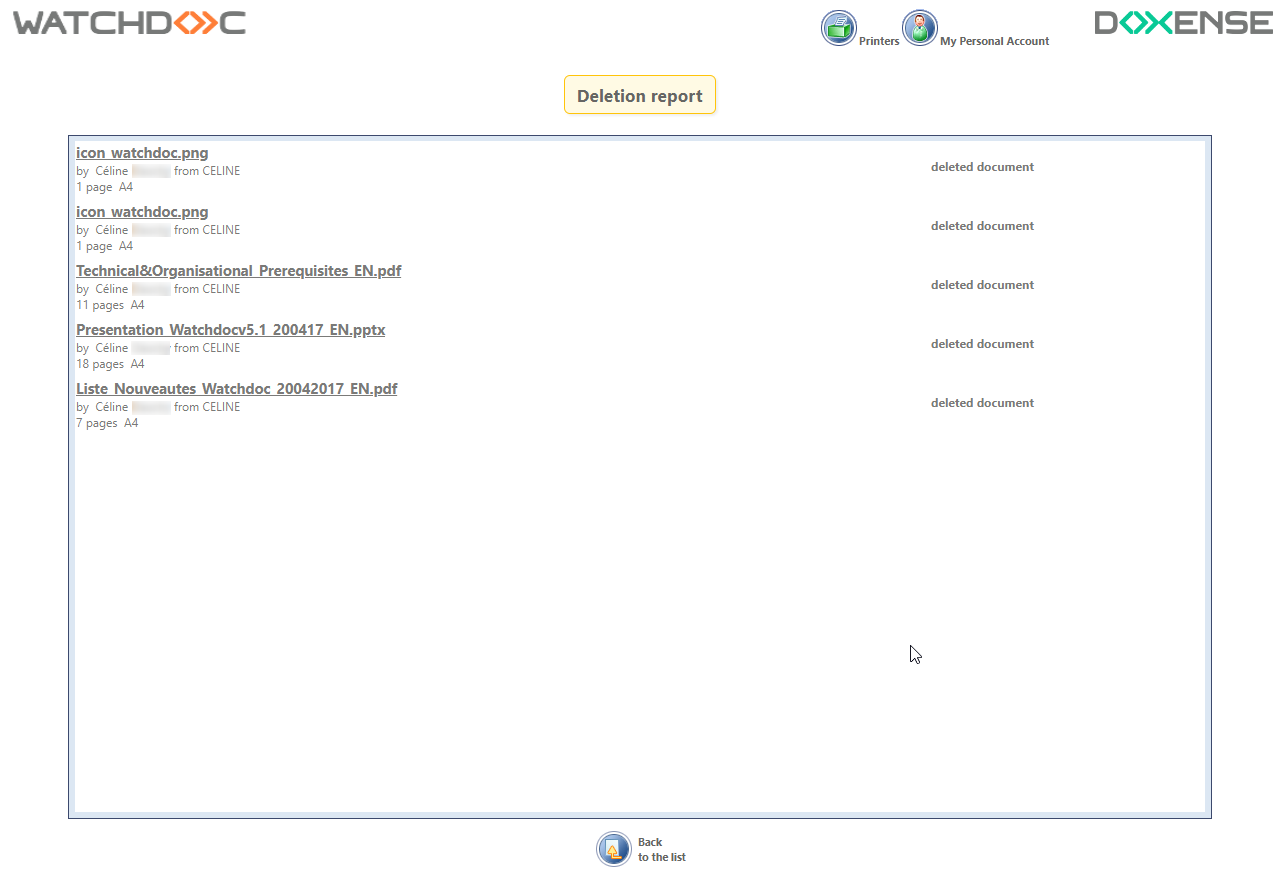
Deletion - authorise job deletion: tick the box if you want that the user may delete the print-job asked, then specify:
-
Request user confirmation: tick this box if the user must confirm his deletion's request to be completed;
-
Display deletion report: tick this box if a deletion report must be displayed to the user;
-
-
Delays: specify, in seconds, minutes or hours, the time beyond which, if Watchdoc detects no mouse movement from the user, it:
-
refresh the pages where no authentication is required;
-
disconnect the user when he is on a page where no authentication is required;
-
redirect automatically the user from the release information page to pending documents page.
-
Configuring the visible Queues Files section
-
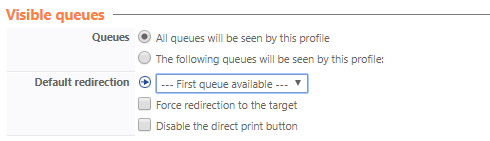
Queues: in this section, indicate the print queues you want to activate in the web profile:
-
All queues will be seen in this profile: tick this bix to allow the web profile to use all the configured files in the Watchdoc solution.
-
The following queues will be seen by this profile: tick this box if your want to put only a few queues.available to users. Select then the print queues in the displayed list.
-
-
Default redirection: in this section, indicate the print-job redirection process. The redirection allows to send the print job to an other print queue if the first one fails:
-
in the displayed print queue list, select the queue which you want to redirect to;
-
Force the redirection towards the target: check this box if you want to redirect the requested print jobs towards an other device;
This feature is useful when the device needs to continue running in maintenance to allow testing, but no longer needs to receive print jobs that are directed to an operational device.
-
Disable the direct print button: tick this box if print-jobs are stored in a virtual queue before been sent toward the redirect queue.
-
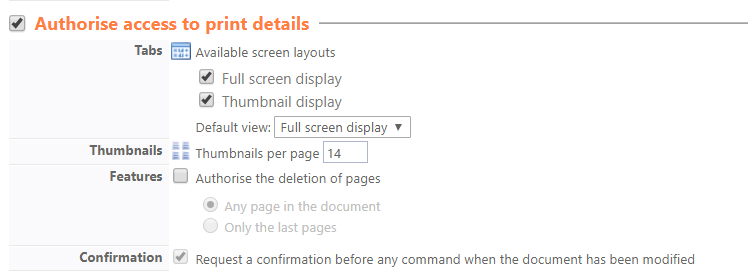
Authorising access to print details
By default, print jobs are displayed in a list, sorted by chronological order or in reverse chronological order. the box to provide users other consulting interfaces.
-
Tabs: indicate additional tabs put available to users, then precise which one must be displayed by default;
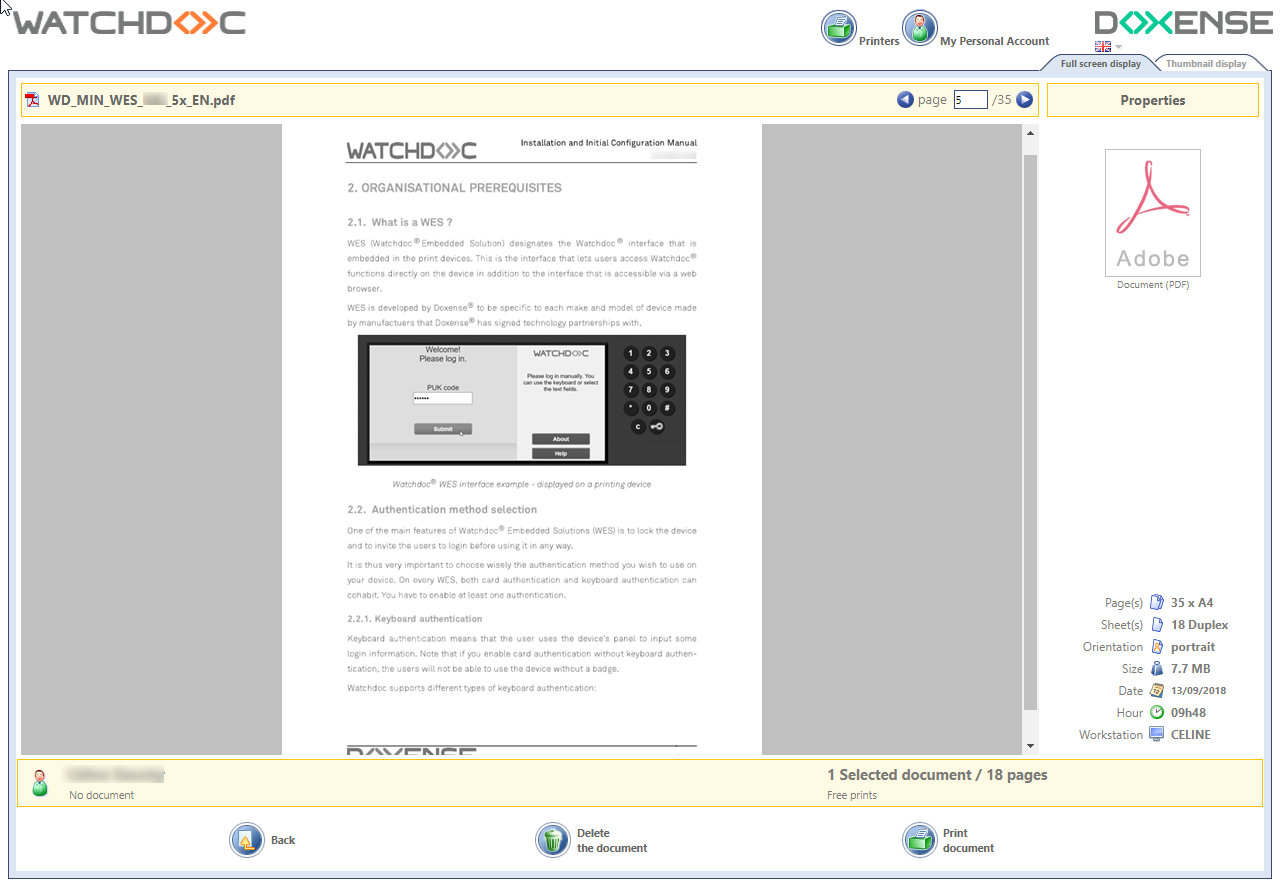
Full screen display: tick this box to activate the interface in which the print-jobs are display page per page, with theis propriety and with a pagination tools:
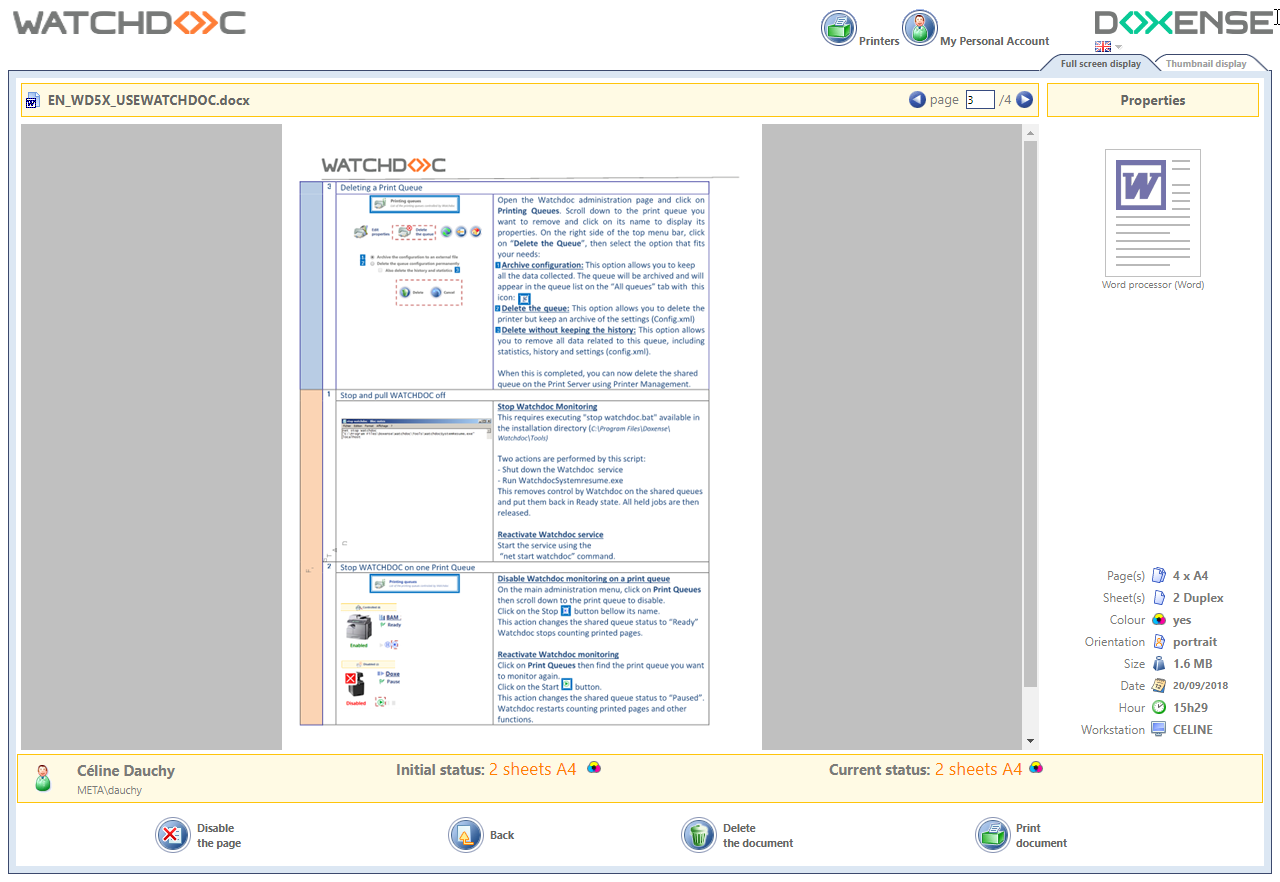
Thumbnail display: tick the box to activate the interface in wich the user printer jobs are displayed as thumbmails with their proprieties and a pagination toool. In this tab, the user can click on a thumbnail to access each page detail.
Precise then the thumbnails number to display in the tab:

-
Features: indicate the features put available on the tabs (displayed as buttons):
-
Authorise the deletion of pages: tick this case to allow users to delete some pages of the print-job demanded:
Any page in the document: tick this box so that the user may delete any page in the document, wherever they may be ;
- only the last pages :tick this case so that the user may only delete the last pages of his print-jobs.
-
Confirmation: the box to request a confirmation to the user before any command when the document has been modified:
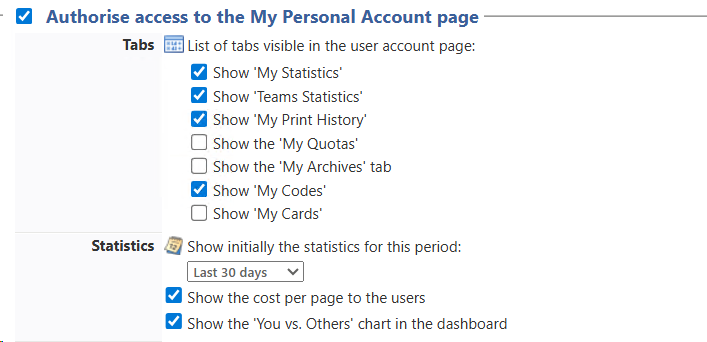
Autorising My Personal Account page access
The My Account page allows the user to access his personnal information. This page may contains tabs more or less tabs depending on its configuration.
-
Authorise access to the My Personal Account: the box to put the page available to users, then precise which tabs must be displayed;
-
Tab Show 'My Statistics': allows the user to access a summary of his use and to his environmental impact of his printing activity in a period.
-
Tab Show 'Teams Statistics': allows the user to access a summary of the use and the environmental impact of the printing activity of his team in a period. Precise then, in the Statistics section:
-
if you want to display the cost per page to the users;
-
the period for which you want to display the statistics;
-
if you want to display the section "You and the others" which allows you to compare the printing activity of the user to the one to the other members of the group.
-
-
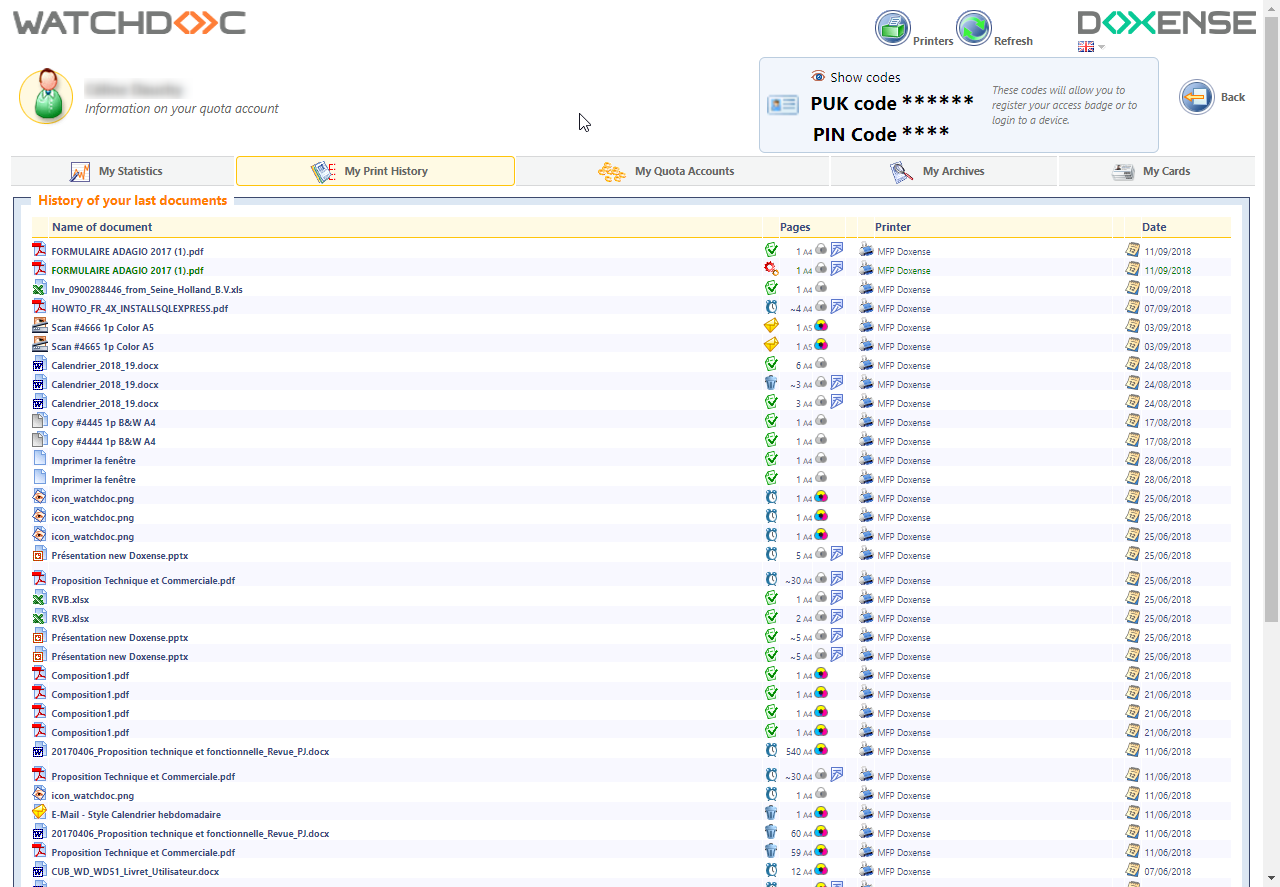
Show 'My prints' tab: allows the user to access the My Print Jobs tab - History of your latest documents list : their last 50 jobs (printing, scanning, photocopying and faxing):
-
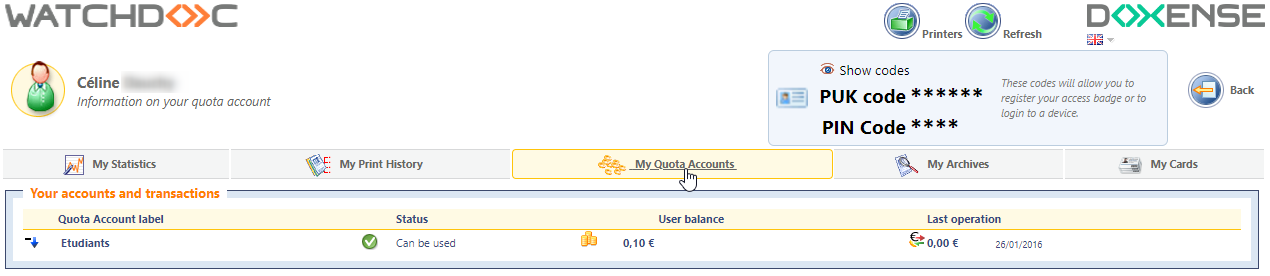
Show 'My Quota Accounts' tab : allows the user to access his Quota Accounts summary and the balance of his account, when his printings are subject to quotas :
-
Show 'My Archives' tab: allows the user to access his documents he archived*
-
Show 'My Codes" tab: allows the user to see his codes (PUK, PIN) ;
-
Show "My Cards" tab: allows the user to see the number(s) of his card(s).
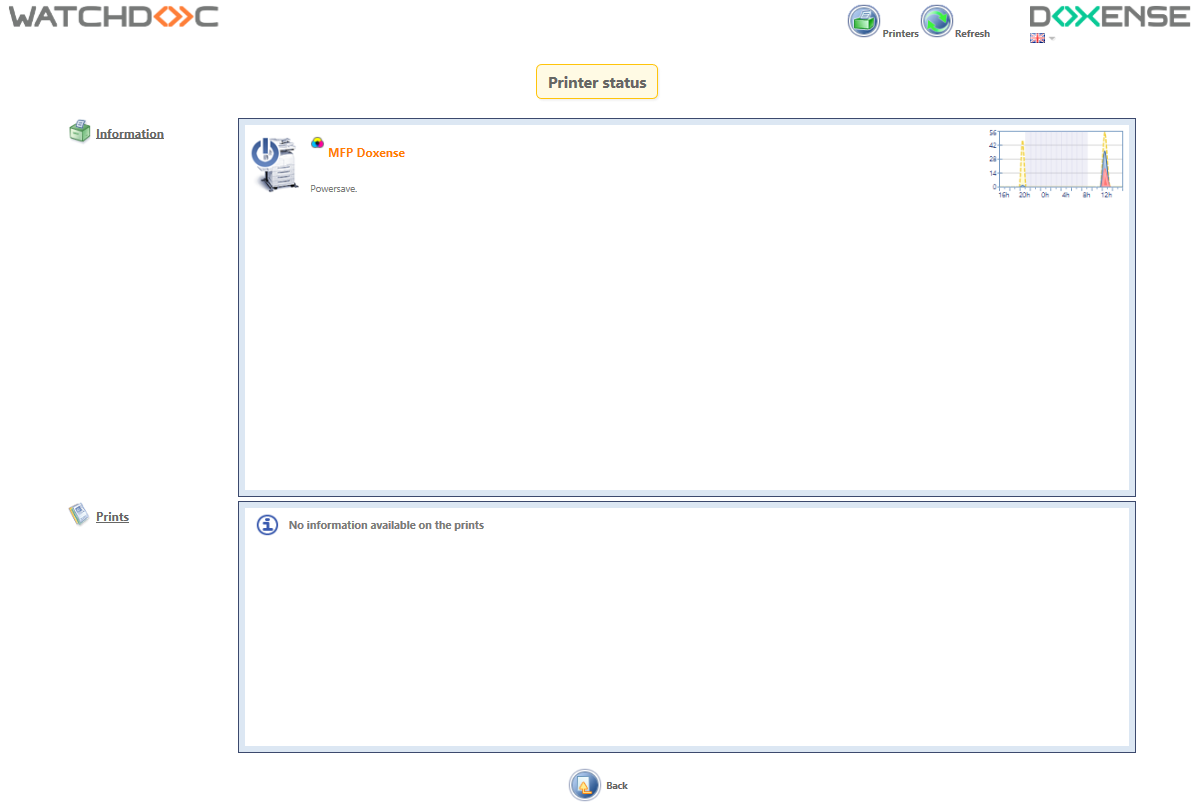
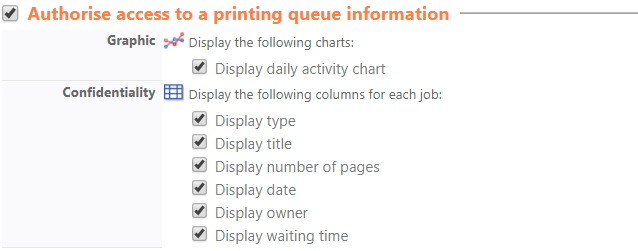
Authorising acccess to a print queue information
-
Tick this box to allow the user to access the information about printing queues that are put available to him. The user can click on the print queue name to access the Device status page.
-
Display daily activity chart: tick this box so that the users can see graphical chart of the printing device daily activity ;
-
Display the following columns for each job:tick the box of the information to be displayed to users:
-
type of the documents;
-
title of the documents;
-
number of pages of the documents;
-
date of the printing request;
-
owner print job user's identity;
-
time waiting time before printing.
Authorize the credit of quota accounts
When printing is subject to paiement, tick the box to allow the account reload from the user interface:
-
Debit: in the list, select the support (card or quota) and the account that must be debited;
-
Credit: in the list, select the support (card or quota) and the account that must be credited.
When an account is not selected by default for the Debit or for the Credit, users can choose among his accounts available in his interface.
-
Card reader: if the media used are cards, select the model of card reader used from the list:
-
Settings: specify the settings of the card reader connected to the release workstation. Each card reader model uses specific settings. For example: "port=1;speed=9600" indicates to the card reader to use the COM 1 port and a 9600 bauds speed.
-
PayBox parameters: if the supports work with the PayBox® solution, specify the amounts made available to users to top up their quotas. Enter amounts in centimes, without full stops or commas (for example, 100 cents for 1 euro).