Watchdoc - Interserver on-demand printing - Configuring the interserver on-demand printing
Prerequisites
To implement the inter-server printing function, the following conditions must be met:
-
Print servers must depend on the same Watchdoc servers domain;
-
all servers in the domain must communicate via HTTPS SSL port 5753 (the HTTP not SSL 754 port is not recommanded);
-
servers and print devices must be able to communicate between them via port 9100 RAW port , or IPP/IPPS port;
-
all servers must have be connected to the same database (MS SQL® database);
-
domain device drivers must be compatible;
-
each server must have at least one virtual queue and one physical queue;
-
the bandwidth between the servers must be sufficient for the data to be communicated from one to the other.
Steps
The configuration of inter-server printing is based on the following steps:
-
enable the inter-server printing function on all affected servers;
-
configure a pool if default pools are not enough;
-
configure virtual queues to associate the pool where the print spools will be shared;
-
configure the physical queues to associate the pool where they can fetch print spools.
Activating the inter-server printing on the server
To activate the inter-server printing on the server:
-
from the Main Menu, section Configuration, click on the Advanced Configuration;
-
in the Advanced Configuration list, click on the System configuration;
-
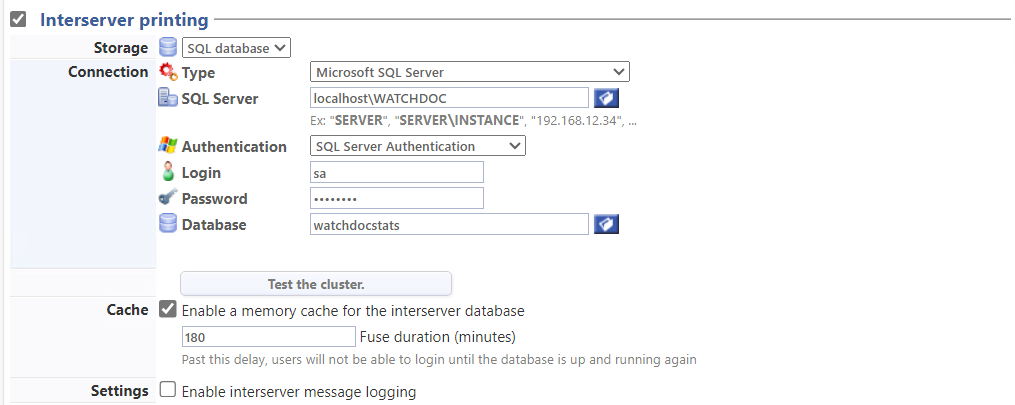
in the System configuration interface, section Inter-server section, tick the box to activate the inter-server feature and set the feature's conditions :
-
Global: if the configuration takes place on the master server of a domain (master/slave configuration), tick the "Global" box if you want to replicate the data source on all Watchdoc servers that depend on the master server (from version 6.1.0.4968);
-
Storage: select the database type used to store the configuration files for the queues (and user data), either SQL® database;
-
Connection:
-
Type: select the database type and complete the configuration:
-
SQL Server:if it's a SQL database, click on the
 button to browse the drop-down list on which is installed the SQL database; *
 -
Authentication: select the authentication mode.
For SQL server authentication, set the following parameters :-
Login: enter the database administrator account login;
-
Password: enter the database administrator account password.
-
-
Database: browse the network space to select the database founded on the server.
-
-
Test the cluster: click on the button
 to check that the databases in the cluster are connected. A message informs you of the success of the configuration. If the base is not correctly configured, messages inform you of the nature of the connectivity problem between the bases.
 -
Cache: tick the box to activate a memory cache and specify the duration of the fuse in seconds in the next field. This setting allows users to authenticate to the WES to unblock their pending jobs even if the interserver database fails. After this time, users can no longer authenticate to the device as long as the base remains unreachable.
-
Settings: tick the box to enable message logging for analysis purposes in the event of a problem or failure.
It is recommended that you only activate logging on a one-off basis, for analysis purposes in the event of a malfunction, as it requires significant resources and storage space.
-
-
click on the
 button to validate the new system configuration.
Configuring the pool
If the two pools #Local and #Global configured by default in Watchdoc are not enough, follow these steps to create other pools:
-
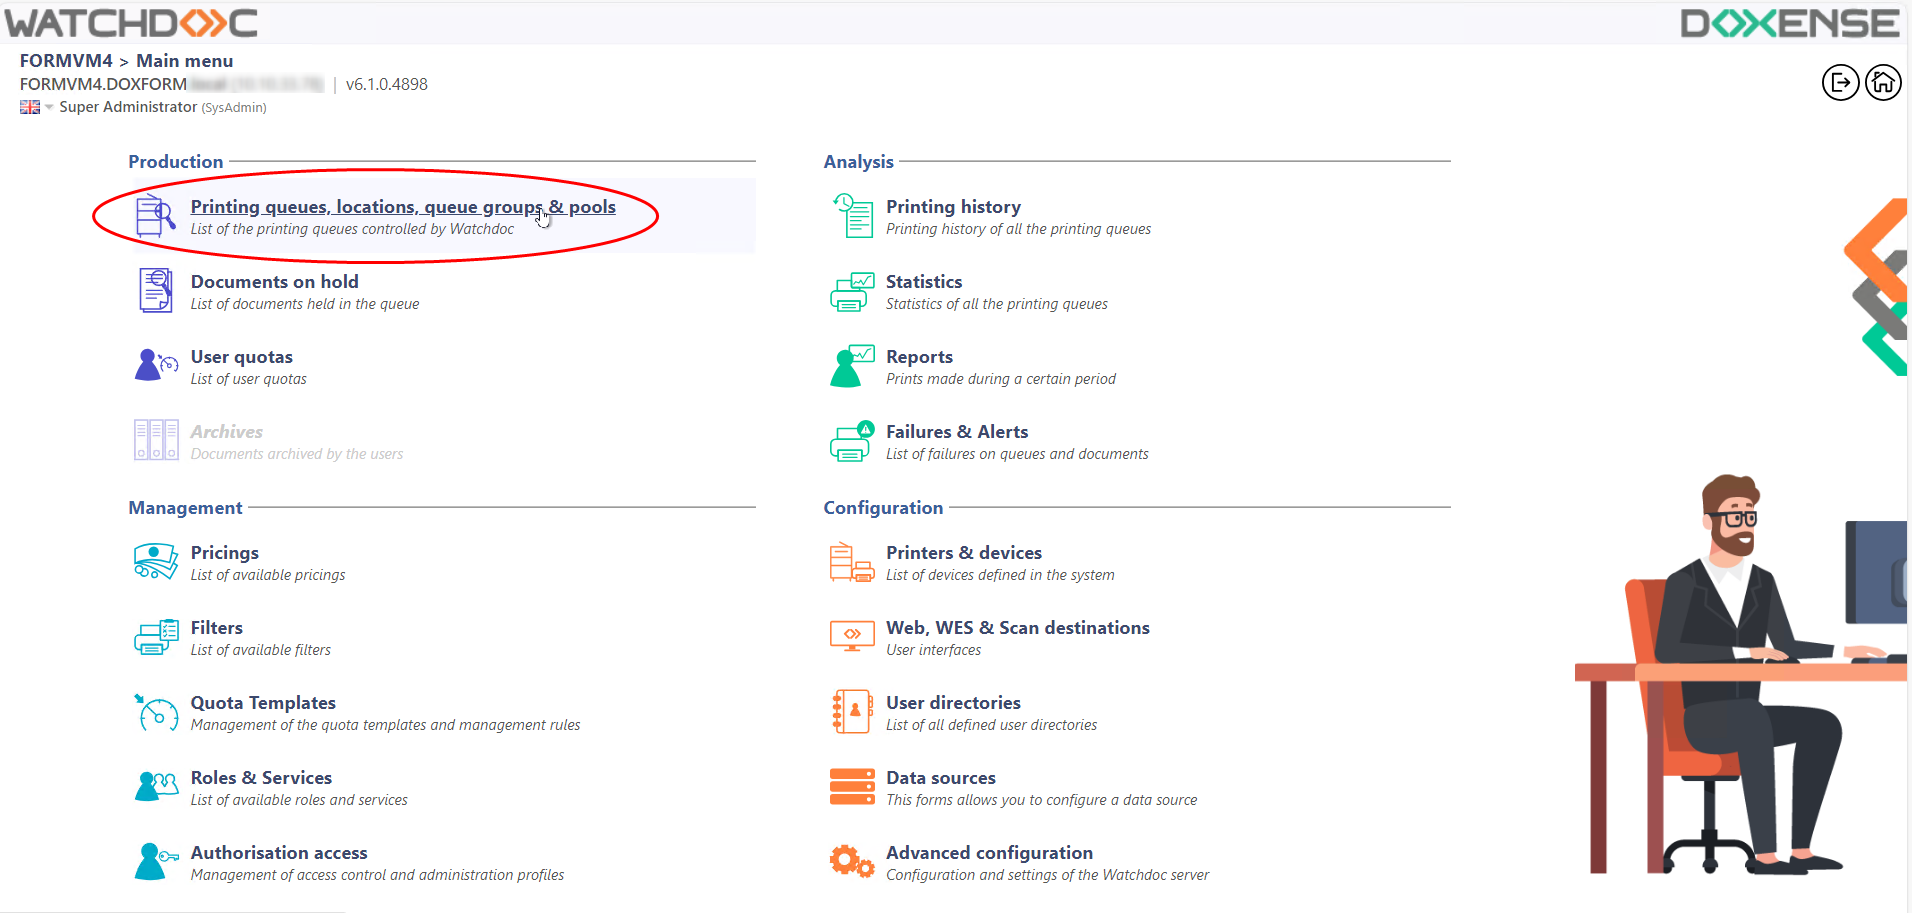
from the Watchdoc Main Menu, Production section, click on Printing queues, queue groups & pools;
-
in the Printing queues, queue groups & pools interface, click on the Job Pools tab;
-
in the list are displayed the two default pools #Local et #Global;

-
click on the
 Create a new pool button;
 -
in the Create a new job pool interface, fill the following fields:
-
Identifier: enter an identifier for your pool. Use the uppercase, lowercase letters, digits, and the "_" separator to dial an identifier up to 64 characters long. Once registered, this unique identifier in the system can not be changed (for example: "liverpool" for all the available devices in the Liverpool subsidiary ; "1st_floor" for all devices located on the first floor of a building).
-
Name: the pool name is for display purpose only, and can be changed at any time;
-
Comment: if necessary, enter more information about the role and purpose of this pool only visible to administrators and not dedicated to users, etc.
-
Sharing mode: in the list, select the pool operating mode:
- Off: choose this mode if the pool must only request queues that are local to this server, and if there is no need to expose the virtual queues that are only targeting this pool t other servers.
- Peer to Peer: tchoose this mode if the pool must also query other servers in the network to list any print job that would be available on other locations. Since this can add some latency (network issues, offline servers, ...) this should only be enabled when required.
-
Tags: enter an internal keywords used for the non-hierarchical classification of the pool. The keywords are separated by spaces, and can be used by the filters and/or custom deployment scenarios. Use an underscore if a keyword already includes a space character (for exzmple: "mfp vendor_acme city_liverpool");
-
-
click on the
button to create the pool :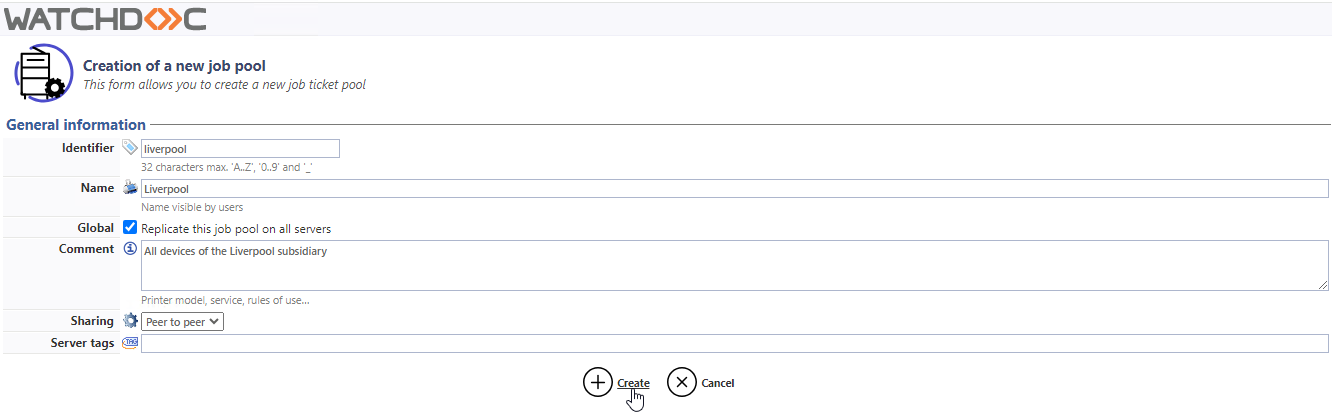
èThe created pool is then displayed in the pool's list and can be associated to the queues.
Configuring virtual queues
To configure a pool on a virtual queue:
-
from the Main Menu, Productionsection, click on Printing queues, queue groups & pools;
-
in the Printing queues list, select the virtual queue whose printing spools will be stored to the job ticket pool;
-
in the device managing interface, click on the
 Edit proprerties button;
 -
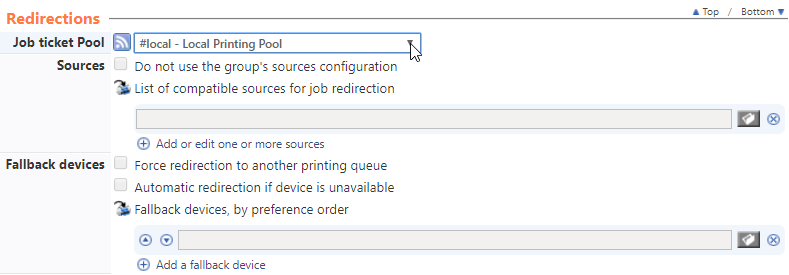
in the Printing queue properties interface in the Redirections section, Job Ticket Pool parameter, in the drop-down list select the pool which the virtual queue must be associated to:
Job Ticket Pool: from the drop-down list, sele ctthe pool in which the print spools of the virtual queue will be stored in order to be made available to the physical queues. In this list are the two default pools (#local; #global) and the pools you may have created (see chapter above);
-
click on the
button to validate the new queue configuration.
Configuring the physical queue or the physical queue's group
To configure a pool on a physical queue or on a physical queue's group:
-
from the Main Menu, Productionsection, click on Printing queues, queue groups & pools;
-
in the Printing queuesor in the Queue groups list, select the physical queue or the physical queues group that will be able to print the job spool stored in the job ticket pool;
-
in the device management interface, click on the
Edit properties button; -
in the Printing queue properties, Redirections section, Source parameter, select in the drop-down list the job ticket pool to which the physical queue or the physical queues group must be associated:
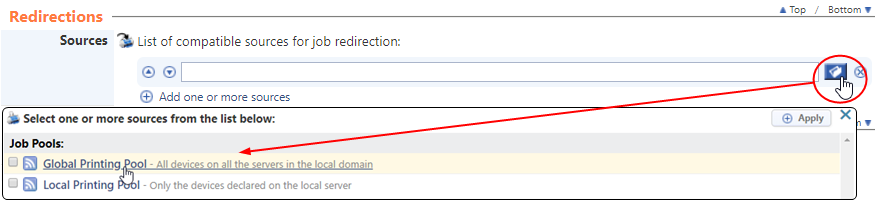
-
click on the
button to validate the queue's new configuration.