Watchdoc - Enable IPP printing on Mac® workstations
On Mac® workstations, it may be necessary to activate IPP![]() The Internet Printing Protocol (IPP) is a specialized communication protocol for communication between client devices (computers, mobile phones, tablets, etc.) and printers (or print servers). It allows clients to submit one or more print jobs to the network-attached printer or print server, and perform tasks such as querying the status of a printer, obtaining the status of print jobs, or cancelling individual print jobs.
(Source: Wickpedia) printing.
The Internet Printing Protocol (IPP) is a specialized communication protocol for communication between client devices (computers, mobile phones, tablets, etc.) and printers (or print servers). It allows clients to submit one or more print jobs to the network-attached printer or print server, and perform tasks such as querying the status of a printer, obtaining the status of print jobs, or cancelling individual print jobs.
(Source: Wickpedia) printing.
Enable IPP server on Watchdoc
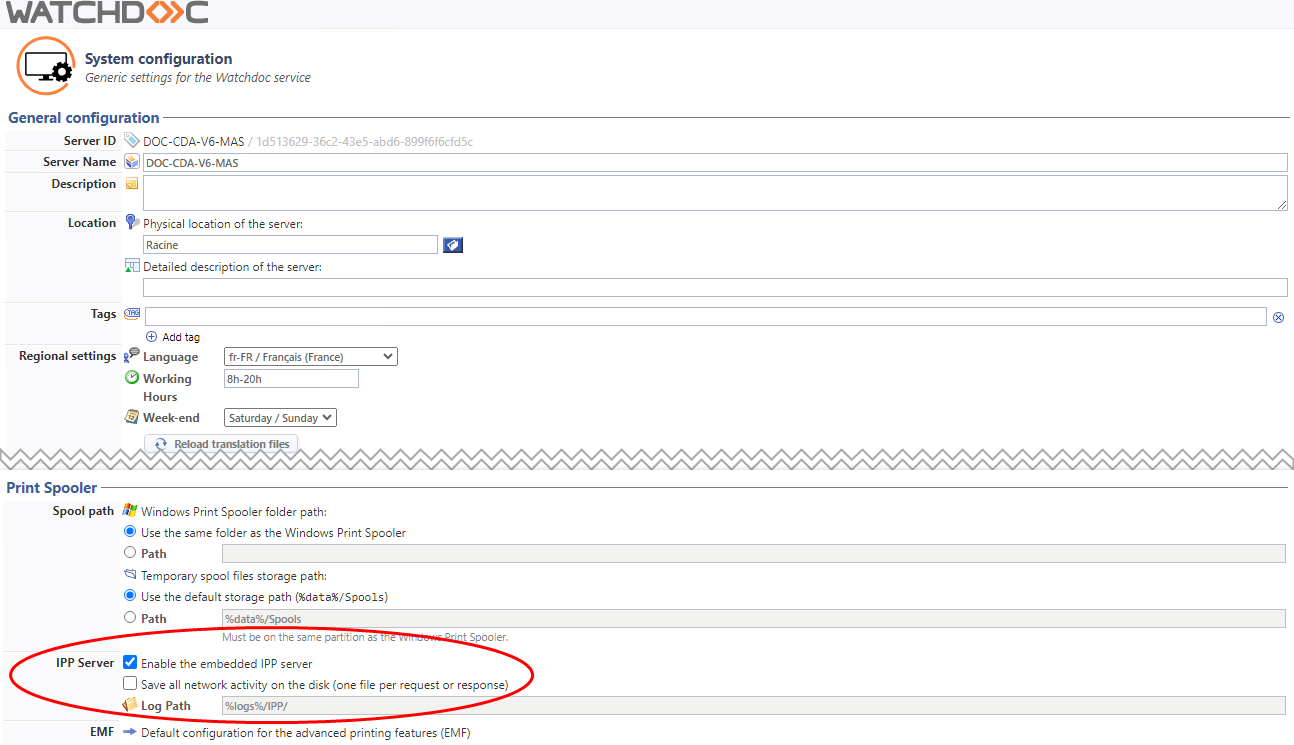
To enable the IPP server on Watchdoc :
-
from the Main Menu, Configuration section, click on Advanced Configuration;
-
in Advanced configuration, click on System configuration;
-
In System Configuration, go to the Print Spooler section;
-
Tick the Enable embedded IPP server box;
-
tick Save all network activity if you want to keep a record of network activity, then specify the path of the folder in which the logs will be saved:
-
Validate the System Configuration.
Select the queue connection uri
To retrieve the queue connection uri:
-
from the Main Menu, Operations section, click Printing queues, locations, queue groups & pools;
-
click on the file you wish to install on your Mac;
-
click on the Queue Properties tab;
-
in the IPP Server section, locate and select the IPPS address (we recommend copying the uri corresponding to Basic mode, which requires account/password authentication):

Install a printing queue on a Mac® workstation
Prerequisites
Check that port DSP 5753 has a domain certificate.
N.B.: this configuration may disrupt communication between your print devices and the server.
Check that port 5753 from the workstation to the print server is open:
-
in a browser, paste the url copied from Watchdoc;
-
check that the browser displays the message "Hello IPP world!"

è If the message is not displayed, check that the URL does not contain an error and make sure that port 5753 is open before trying again:
Using the queue URL, create the print queue on the Mac® using the following procedure:
-
access the Mac® as administrator ;
-
visit the official website of your printing device manufacturer;
-
from this site, download the driver corresponding to the device to be installed and the OS version of your Mac® ;
-
install the driver;
-
in the workstation administration menu, click on System Settings > Printers and Scanners;
-
in the Printers and Scanners module, click on Add;
-
Click on the
 IP icon:
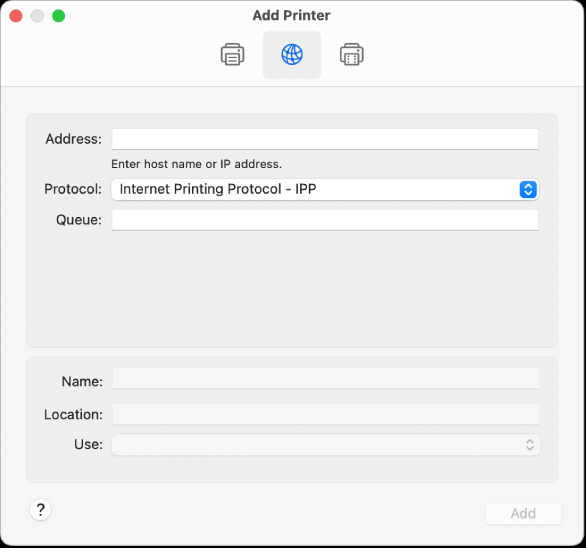
-
in the interface, complete the fields:
-
Address: paste the URL address copied from Watchdoc;
-
Protocol: select Internet Printing Protocol - IPP;
-
Queue: enter the name of the print queue associated with the url address entered. If you don't know it, leave the field blank;
-
Name: enter the name of the printer to identify it in the menu;
-
Location: indicate the location of the printing device;
-
Use: select the previously downloaded driver;
-
-
click on Add;
-
in the Configuration interface, select the printer options you wish to add, then click on OK;
-
from the Mac®, launch a print job by selecting the previously added printer device, and check that it prints correctly.