WES Sharp - WES installation not possible
Context
When installing WES on Sharp MX-M2651, MX-M3051, MX-M3551, MX-M4051, MX-M5051 or MX-M6051 devices, the following error message appears in the report, preventing WES installation:
WES Java request to [IP Adress] failed with statuts 404 Not Found
Login failed (check credentials)
In the device configuration interface, under the System Settings > Sharp OSA Settings > Standard Application Settings tab, in the Application Name section, "Not determined" is displayed.
Cause
This problem is due to the AMX2 (application communication module) and AMX3 (external accounting module) modules not being installed on the device*. The device cannot communicate with Watchdoc.
* These modules are installed by default on the MX-M3071, MX-M3071S, MX-M3571, MX-M3571S, MX-M4071, MX-M4071S, MX-M5071, MX-M5071S, MX-M6071, or MX-M6071, but must be installed on the MX-M2651, MX-M3051, MX-M3551, MX-M4051, MX-M5051, or MX-M6051 printing devices.
Resolution
To resolve this issue, contact Sharp Support,
-
activate the AMX2 on the printing devices
-
Using a browser, access the device's web interface;
-
Log in with an administrator account;
-
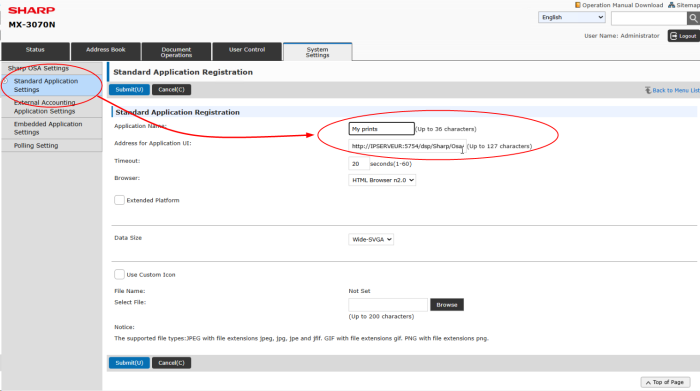
in the menu, click System Settings > Sharp OSA Settings > Standard Application Settings ;
-
in the Standard Application Registration interface, click Add and complete the following fields:
-
Application name: enter the name of the "Watchdoc" or "My Prints" application;
-
Application user interface address: enter the url http://IPSERVEUR:5754/dsp/Sharp/Osa/2.0/Web/Jobs
or, if you are using SSL, enter the url https://IPSERVEUR:5753/dsp/Sharp/Osa/2.0/Web/Jobs
-
-
Activate the AMX3 - BP-MX11 option
-
Using a browser, access the device's web interface;
-
Log in with an administrator account;
-
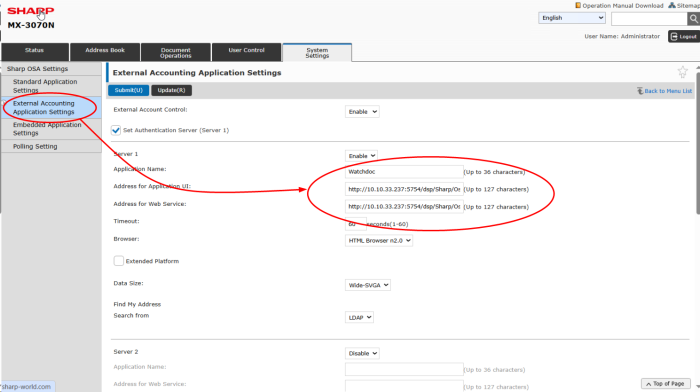
in the menu, click on System settings > Sharp OSA Settings > External Accounting Application Settings;
-
in the interface External Accounting Application Settings, set the parameters and complete the following fields;
-
External Account Control: select Enable;
-
Set Authentication Server: tick the box;
-
Application Name: enter the name of the ‘Watchdoc’ or ‘My prints’ application;
-
Address for Application UI: enter the url http://IPSERVEUR:5754/dsp/Sharp/Osa/3.0/Web/Login
or, if you are in SSL, https://IPSERVEUR:5753/dsp/Sharp/Osa/3.0/Web/Login
-
Address for Web Service: enter the url http://IPSERVEUR:5754/dsp/Sharp/Osa/1.0/Service
or, if your are in SSL, https://IPSERVEUR:5753/dsp/Sharp/Osa/1.0/Service
-
Timeout: keep the value chosen as the time during which the device talks to the server:
-
-
-
Once the 2 options activated, check that these 2 options are displayed on the tab System Settings > Sharp OSA settings >Standard Application Settings.