Principle
When the user sends their print request by email to the dedicated Skyprint email address, Skyprint checks which email addresses are authorised to submit print jobs. If the sender's email address is authorised, Skyprint checks for the presence of a user account (associated with the email address) in the default directory configured in Watchdoc. If the user does not have an account in any of the directories but Skyprint authorises the creation of an account, Skyprint creates an account in the WSC Guests database.
Procedure
-
As an administrator, access the Skyprint configuration interface.
-
In the menu, click on Job Configuration.
-
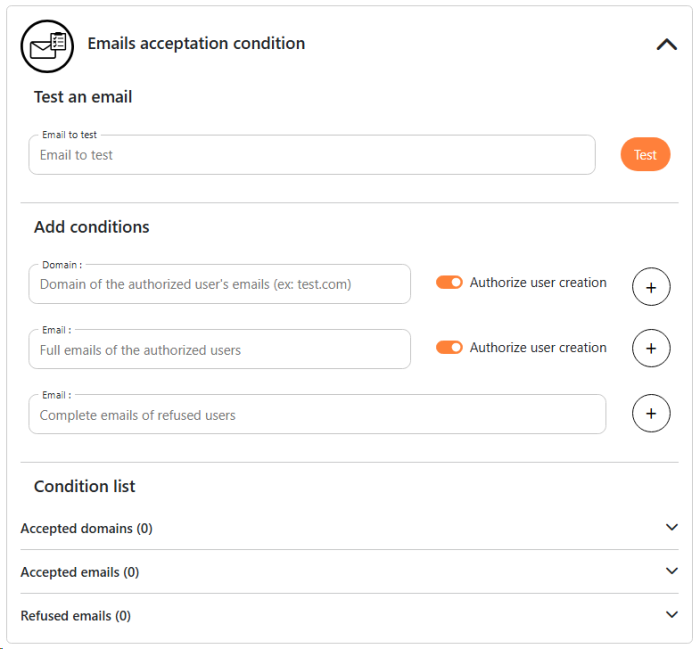
In the Email Acceptance Conditions section, complete the fields in the Add Conditions section:
-
Domain: Enter a domain name for users authorised to use Skyprint. You can enter multiple domain names using a semicolon (;) as a separator.
-
Email: enter the email address(es) of users authorised to use Skyprint;
-
Email: enter the email address(es) of users (belonging to an authorised domain) who are not authorised to use Skyprint.
N.B.: this configuration can be useful for prohibiting the use of Skyprint by a former employee whose email address is still operational. Addresses from the domain ‘@organisation.com’ are authorised, but the user ‘d.dupont@organisation.com’ is prohibited.
-
-
Allow user creation: press the button to allow unregistered users to use Watchdoc SkyPrint. This means that when a user who is not registered in the directory or in the Guests database (and whose email address meets the acceptance criteria) sends an email to Skyprint, Skyprint automatically creates a Guest account in WSC. The user is then authorised to print via Skyprint. If user creation is not authorised, only users already registered in the organisation's directory or in the Guests database can use Skyprint if their email address meets the conditions.
-
For each domain or address entered, click the button to confirm the addition.
-
The domains and addresses added are displayed below in the List of conditions > Accepted domains/emails or Rejected emails:
-
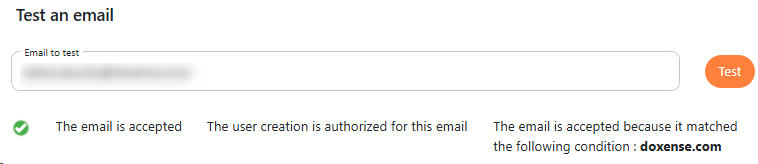
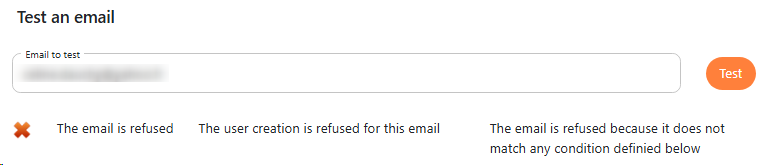
To test the application of the conditions, enter an email address in the Test an email field, then click Test.
-
Check the test report to ensure your configuration is correct, or readjust it before testing again:
-
Once the conditions have been validated, click Save to confirm these settings.