Principle
Skyprint's role is to handle print jobs sent as email attachments by registered users (in the organization's directory or the WSC Guest database). You must therefore configure the supervised mailbox(es), i.e., the mailbox(es) where print requests are received.
Configure the mail box
In this section, you configure the server and email address to which print requests are sent.
-
As an administrator, access the Skyprint configuration interface.
-
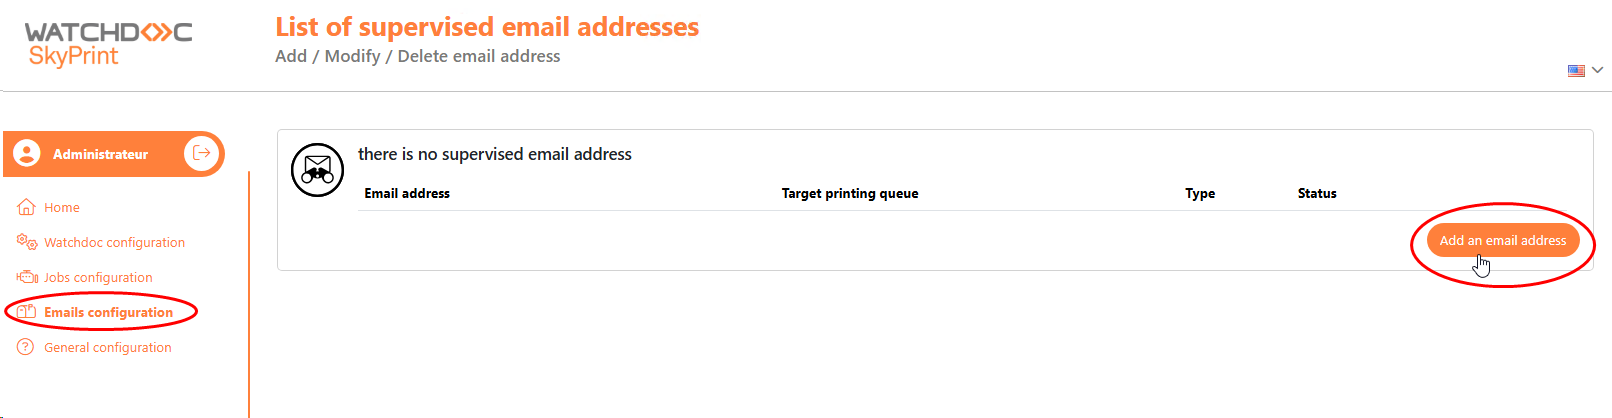
In the menu, click Emails Configuration.
-
In the list of supervised mailboxes, click the Add an email Address button:
-
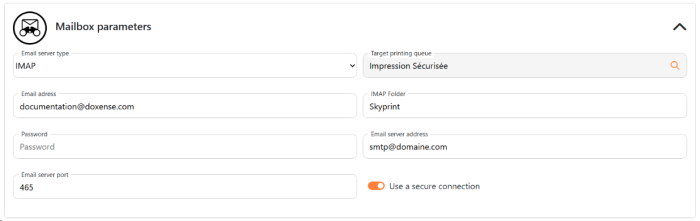
In the Editions interface of a mailbox, select the type or protocol used for receiving mail from the list. Complete the mailbox settings (variables depending on the type of mailbox).
IMAP mailbox
-
Complete the following fields:
-
Email address: enter the email address to which print request emails are sent (for example: print@nom-entreprise.com);
-
Mail server address: enter the address of the server that manages emails;
-
Port: specify the port for accessing the mail server;
-
Password: enter the password associated with the mail server address;
-
Target print queue: specify the ID of the print queue responsible for handling print jobs. This ID is defined in Watchdoc (or in WSC) when configuring the queue (see Configuring a print queue).
-
IMAP folder: if necessary, specify a folder in the mailbox where print requests are saved. This setting allows you to group print requests intended for Skyprint if the mailbox is not dedicated solely to this purpose :
-
-
Click Save to confirm the mailbox settings.
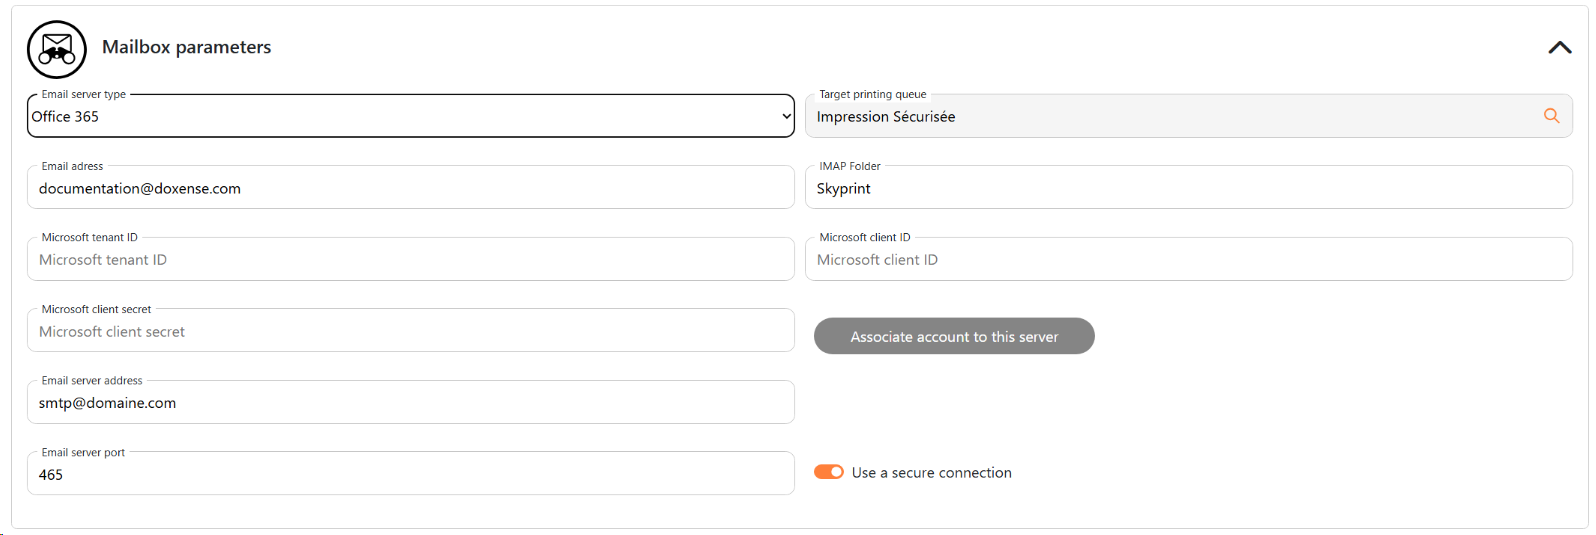
Office 365 mailbox
-
For Office 365, complete the following fields (all these settings will be provided by your Microsoft Office 365 representative):
-
Email address: enter the email address to which print request emails are sent (for example: print@organisation.com);
-
Target print queue: specify the ID of the print queue responsible for handling print jobs. This ID is defined in Watchdoc (or in WSC) when configuring the queue (see Configuring a print queue).
-
Mail server address: enter the address of the server that manages emails;
-
Microsoft tenant ID: enter the ID of the account used to access the Microsoft mail server (Tenant ID);
-
Microsoft client (application) ID: enter the ID for the Microsoft mail server access account;
-
Microsoft client secret: enter the password for the email address;
-
Port: specify the port for accessing the mail server;
-
IMAP folder: if necessary, specify a folder in the mailbox where print requests are saved. This setting allows you to group print requests intended for Skyprint if the mailbox is not dedicated solely to this purpose.
-
-
Once you have completed the fields, click Associate with this account to associate the information you have entered with the configured email address:
-
When the message ‘Account successfully linked’ appears, click Save to save the mailbox settings.
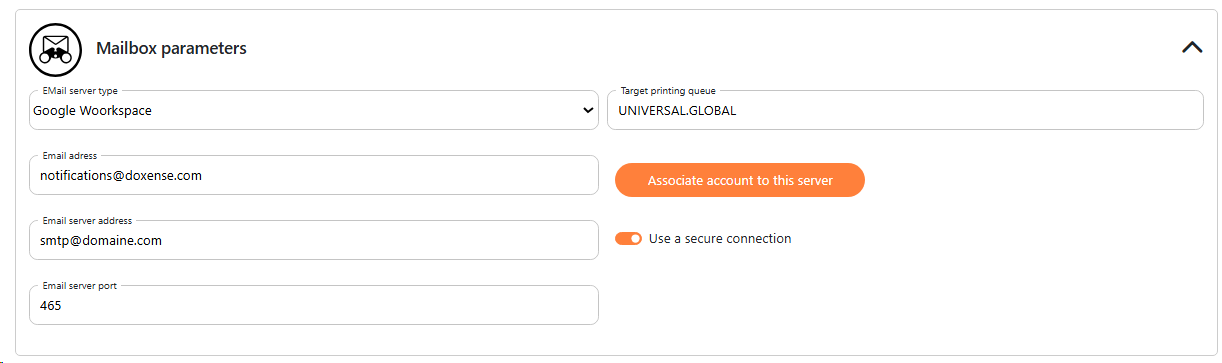
Google Workspace mailboxmail
-
For Google Workspace, complete the following fields:
-
Email address: enter the email address to which print request emails are sent (for example: print@nom-entreprise.com);
-
Target print queue: specify the ID of the print queue responsible for handling print jobs. This ID is defined in Watchdoc (or in WSC) when configuring the queue (see Configuring a print queue).
-
Mail server address: enter the address of the server that manages emails;
-
Port: specify the port for accessing the mail server;
-
IMAP folder: if necessary, specify a folder in the mailbox where print requests are saved. This setting allows you to group print requests intended for Skyprint if the mailbox is not dedicated solely to this purpose.
-
-
Click on Associate with this account to associate the information entered with the configured email address:
-
When the message ‘Account successfully linked’ appears, click Save to save the mailbox settings.
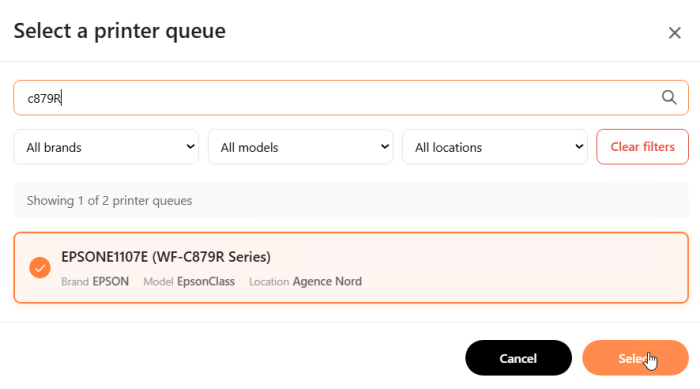
Select a print queue
Select the queue to which the mailbox sends print jobs using the following tools:
-
in the field, enter a search criterion to find the print queue (model, brand, item entered in the queue properties);
-
if necessary, use the available filters to narrow down the results: brands, models, and/or location;
-
select the desired queue;
-
click the Select button:
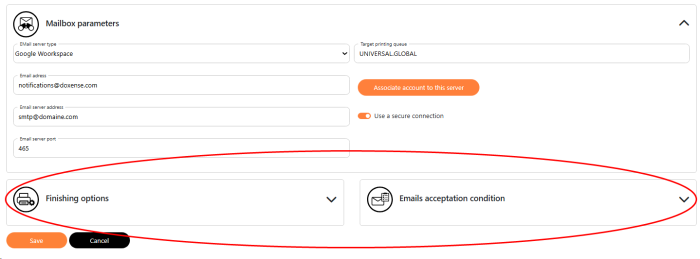
Configure finishing options and acceptance conditions
Finishing options and email acceptance conditions are configured in the Job Configuration interface. These are generic settings that apply to all mailboxes.
However, you can configure specific finishing options and acceptance conditions for the mailbox you are configuring. In this case, in the Edit a Mailbox interface, complete the following if necessary:
-
the Finishing Options section (in the same way as for generic options, see Configuring finishing options);
-
the Mail Acceptation Conditions section (in the same way as for generic conditions, see Configuring finishing options);
-
once these settings have been entered, click Save to confirm the mailbox configuration: