Annexe - Set up an Office 365 mailbox in Microsoft Entra
Principle
Microsoft Outlook 365 requires OAuth2 authentication for external applications that wish to access a mailbox. It is therefore necessary to first register Watchdoc Skyprint among the applications authorised to access MS Outlook 365, then configure this application.
This configuration is carried out in the Microsoft Entra management interface.
Procedure
Register the Watchdoc Skyprint application in Entra
-
Log in as an administrator to your MS Entra portal.
-
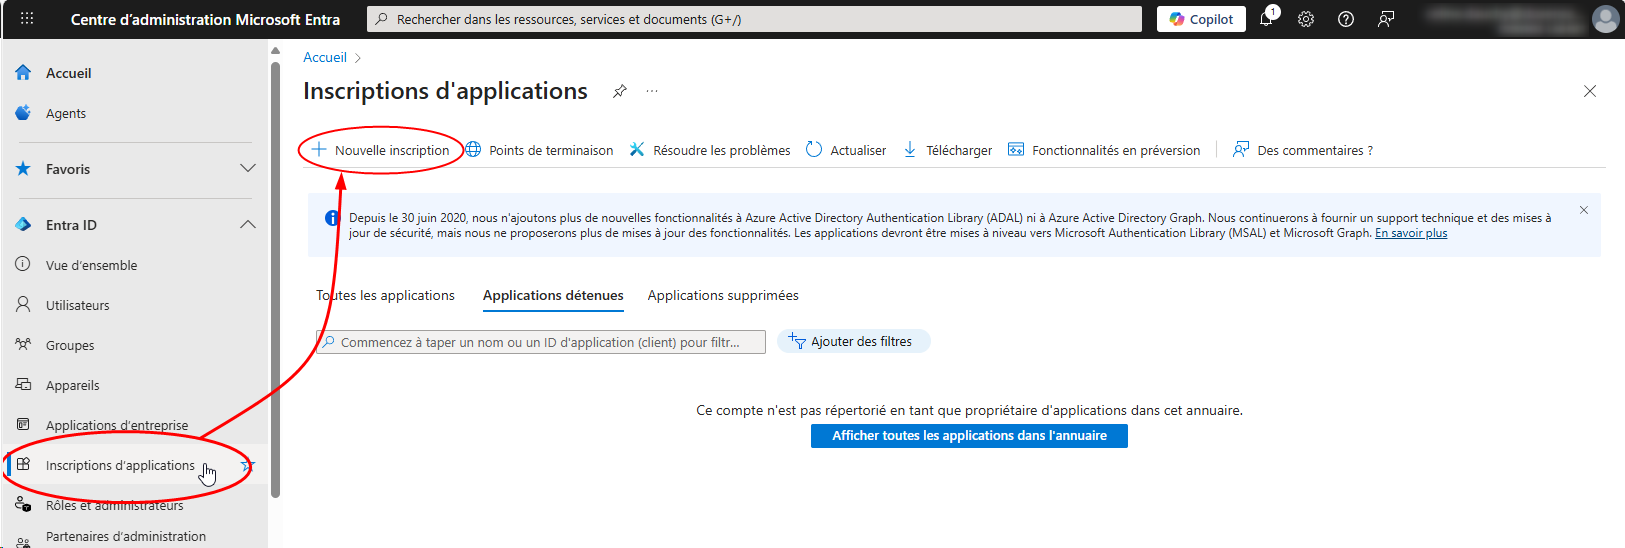
In the Entra ID menu, click App registration:
-
In the App registration interface, click New registration:
-
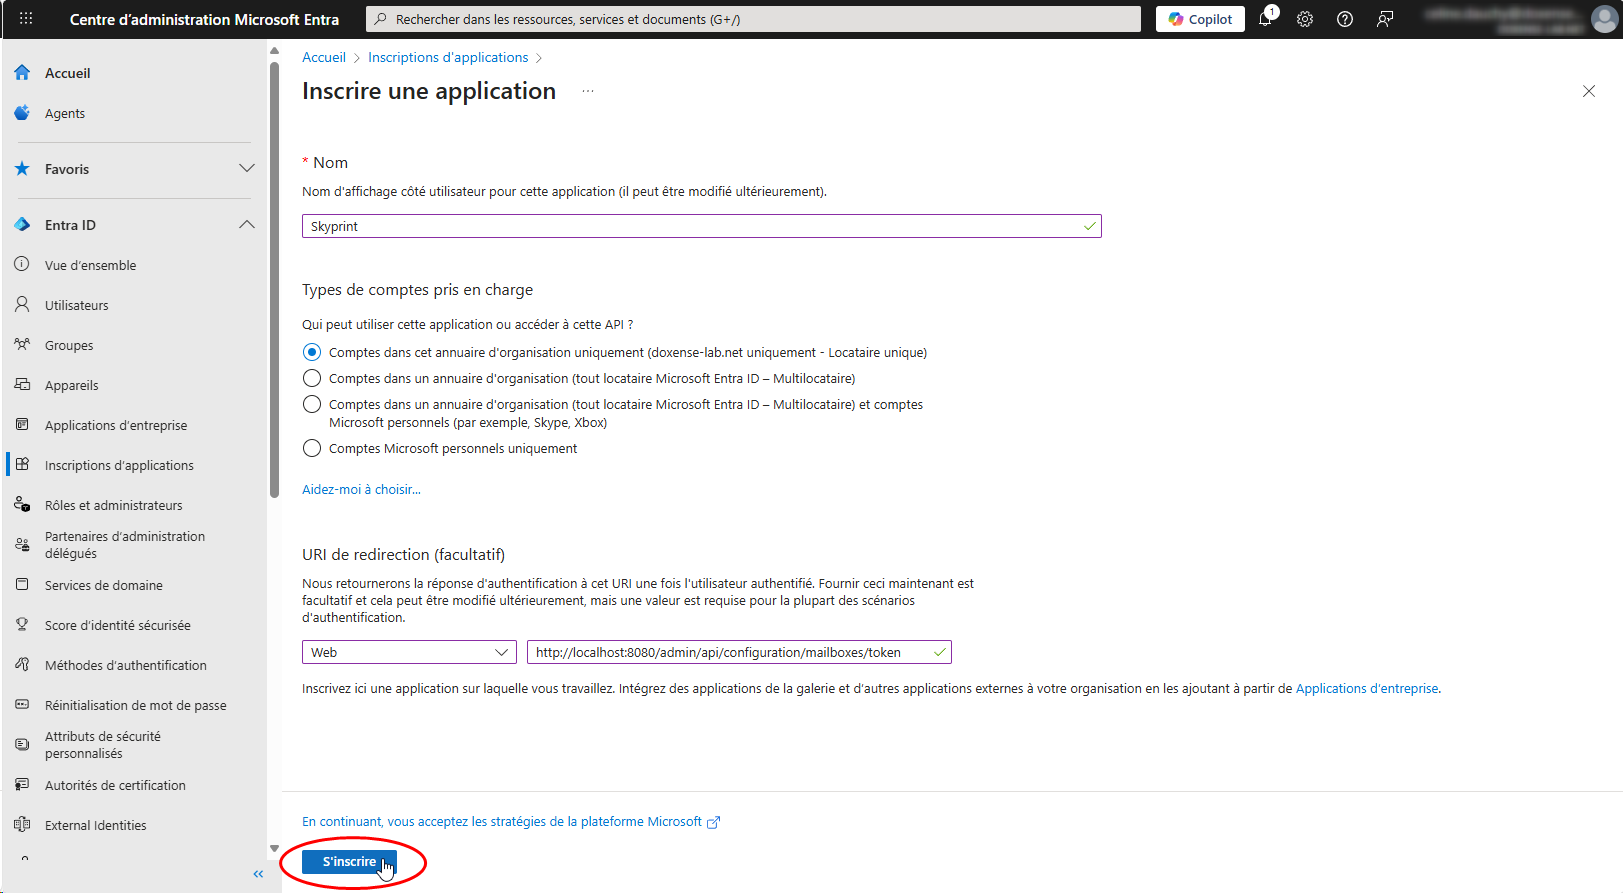
In the Register an application (Registration) interface, complete the following fields:
-
Name: give the application a name (Watchdoc Skyprint, for example). This name is only displayed in the Entra administration interface.
-
Account types supported: select Accounts in this organisation directory only - Single tenant, in order to limit the use of the application.
-
Redirect URI:
-
select the Web type,
-
enter the URI used to receive the authentication token once the user has been authenticated: http://[Skyprint_server_IP:port]/api/v0/oauth/office365/ack (e.g. http://skyprint:5780/api/v0/oauth/office365/ack - 5760, default port).
-
-
-
click on Register:
-
In the Overview interface of the created application (Skyprint), the information required for the subsequent configuration of the Outlook 365 mailbox in Skyprint is displayed:
-
Application (client) ID: identifier of the application as registered in MS Entra
-
Directory (tenant) ID: application ownership identifier.
-
Manage API permissions
-
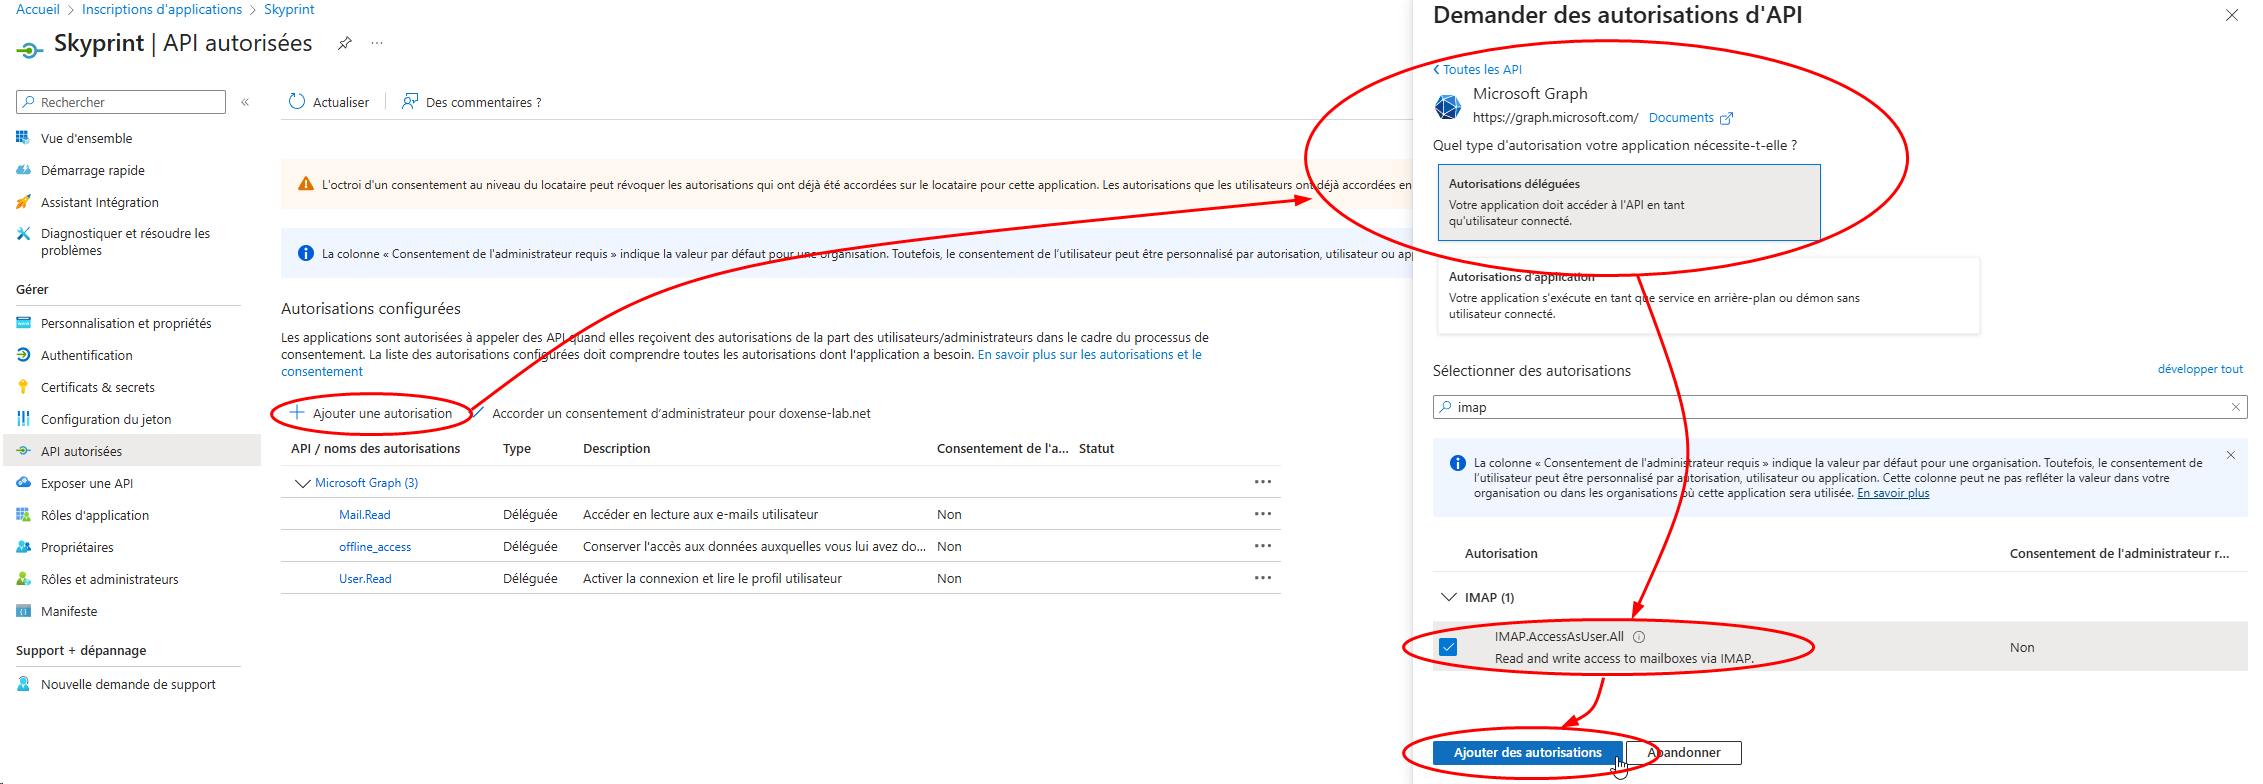
In the Overview interface of the created application (Skyprint), click Authorised APIs in the menu;
-
in the interface, click Add Authorisation.
-
Select the Microsoft Graph API set > Microsoft Graph:
-
Then select Delegated permissions:
-
In the search engine, search for and select the following permissions:
-
email (display users' email addresses)
-
IMAP.AccessAsUser.All (read and write access to mailboxes via IMAP).
-
offline_access (retain access to data you have given them access to),
-
User.Read (enable login and read user profile).
-
-
Then click Add permissions:
-
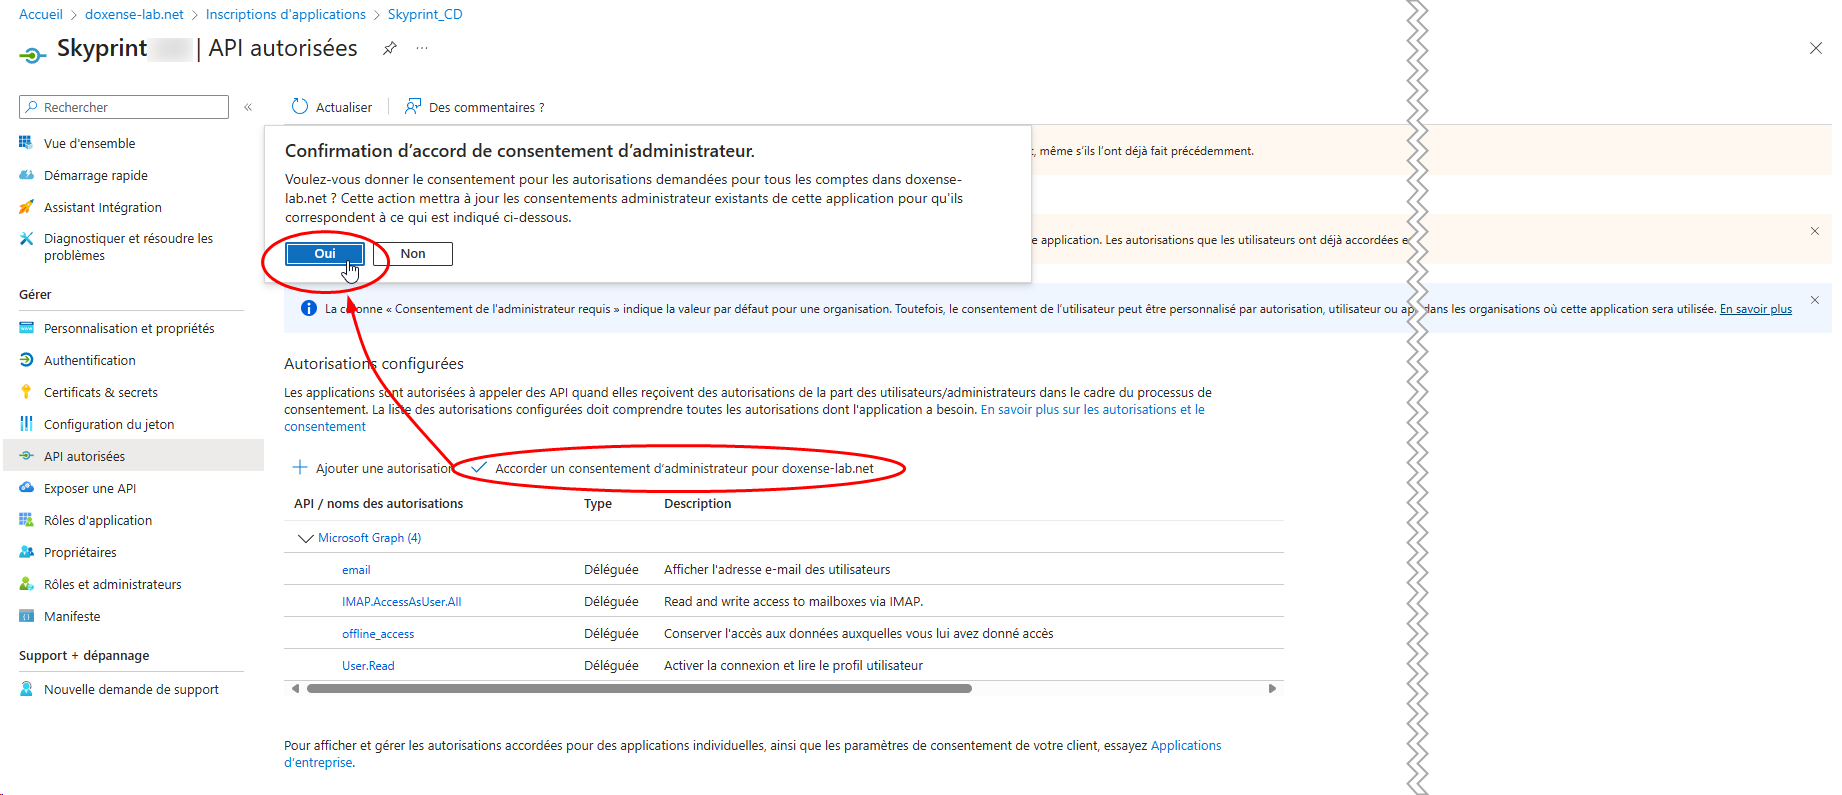
The added authorisations are displayed in the Configured Authorisations interface.
-
Click on the Grant Administrator Consent for [Organisation Name] button.
-
Confirm your consent agreement.
-
Grant administrator consent
The Office 365 Exchange Online permission appears in the list with the status Not granted for [Organisation_Name].
Click the Grant administrator consent for [Organisation_Name] button:
Then confirm the administrator consent agreement:

Define a Secret
You must assign a password specific to the application (Secret).
-
In the Application Overview interface (Skyprint), Manage menu, click Certificates & Secrets:
-
click New Client Secret:
-
in the Add Client Secret interface, complete the following fields:
-
Description: enter a description for the password (which will be automatically generated by Entra);
-
Expiration date: the date on which the secret expires. Once this date has passed, you will need to generate a new one and update the Skyprint configuration.
-
-
Click Create:
