WRS - Install manually Watchdoc for Reporting Services
If you install the WRS® reports set for a SQL 2012 or higher server, the install process is the following:
-
create a folder;
-
create a database;
-
deploy the reports.
Create the folder
-
Access the reports manager of Reporting Services (http://servername/Reports_WATCHDOC);
-
Click on New folder;

-
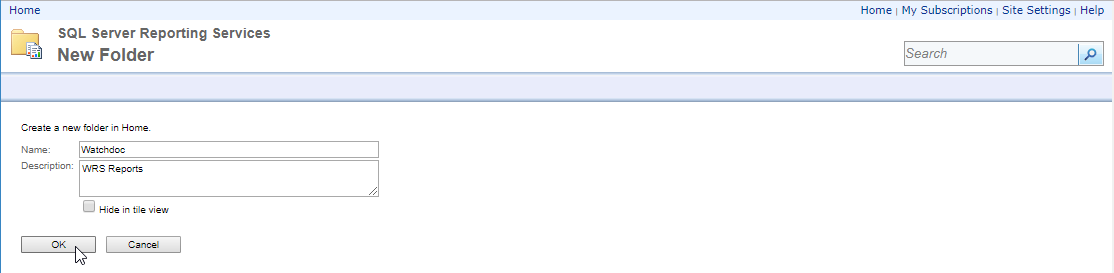
In the New Folder interface, enter the name of the file in which will be saved the WRS reports:
-
Click the OK button to validate the file adding;
-
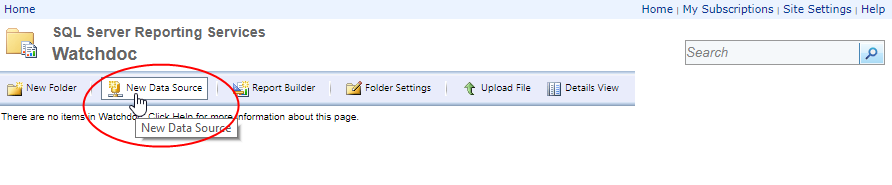
Click the New Data Source button to access the configuration form:
-
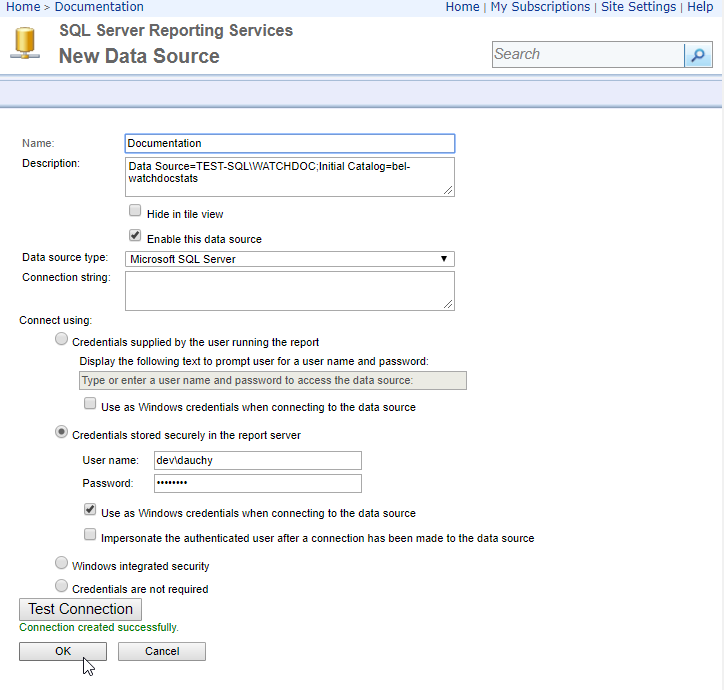
in the form, fill the following fields:
-
Name: enter in this field the database name;
-
Connecting string: enter in this field:
-
Data Source= enter the path to the database instance;
-
Initial Catalog= enter the database name.
-
tick the radio button radio cochez le bouton radio corresponding to the choosen authentication mode;
-
click on the Test connection button to check the provided data validity;
-
click the OK button to add the data source.
Deploy the reports
-
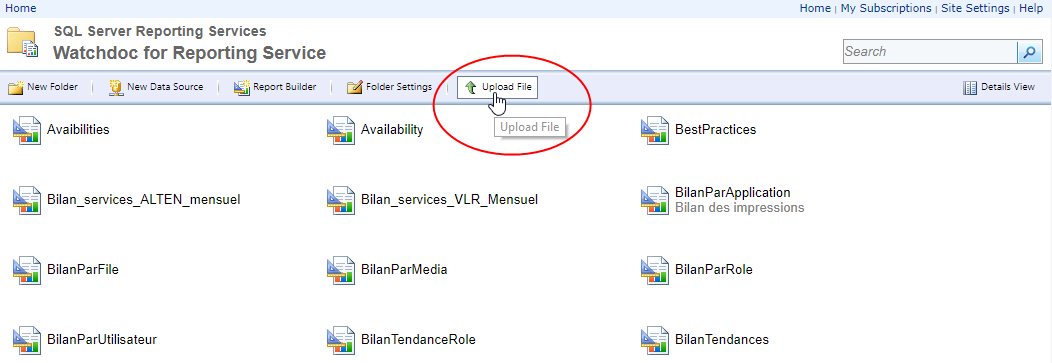
In SQL Server Reporting Services, go to the Watchdoc file;
-
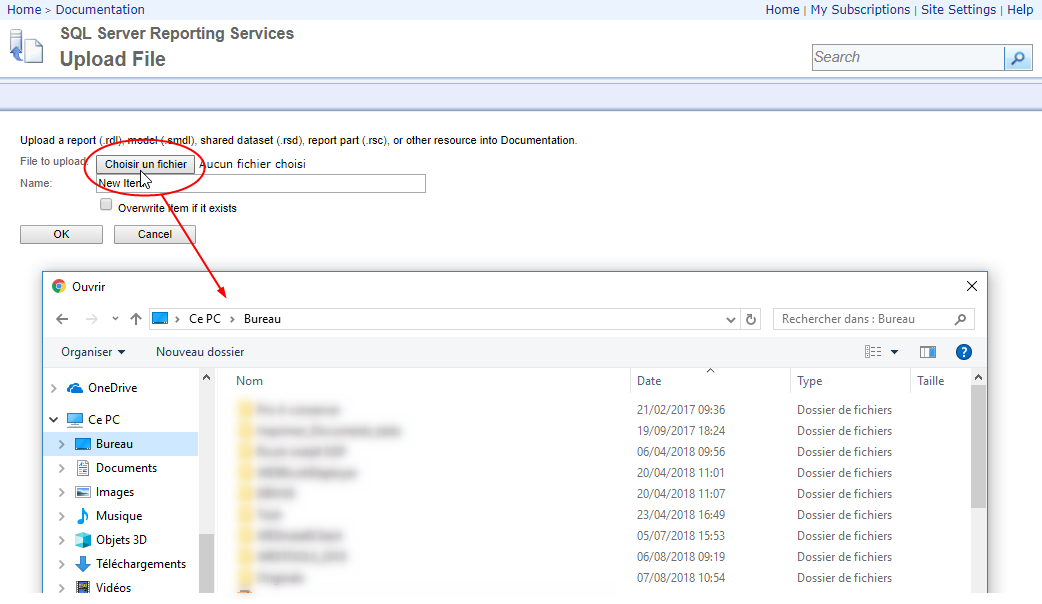
in the file menu, click the Upload file button;
-
Click on Browse and browse your workspace to select the first .rdl report (named Reports in the WRS sub-folder);
-
click on OK to validate the report choice:
-
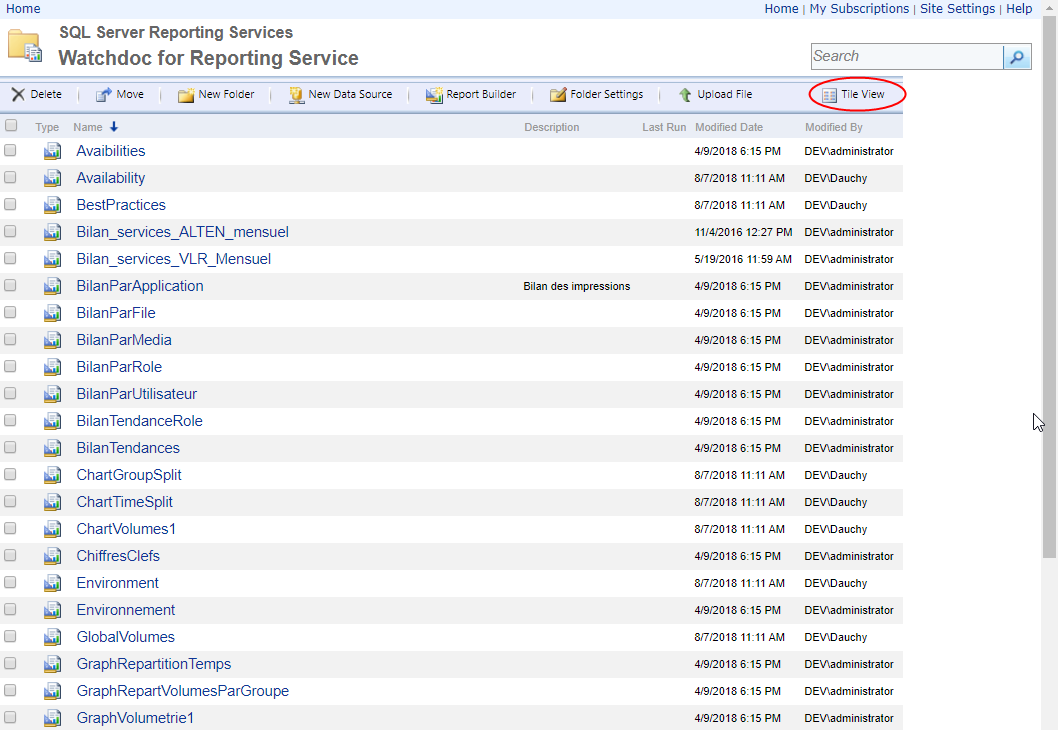
Repeat this process for each .rdl file of the Reports folder;
-
Once finish, you can change the view by clicking on Detail Mode on right top to display the reports as lists.
-
Click on Statement to open the reports manager;
-
in the reports manager, specify the period for which you want to know the statistics, then click on Display the report.
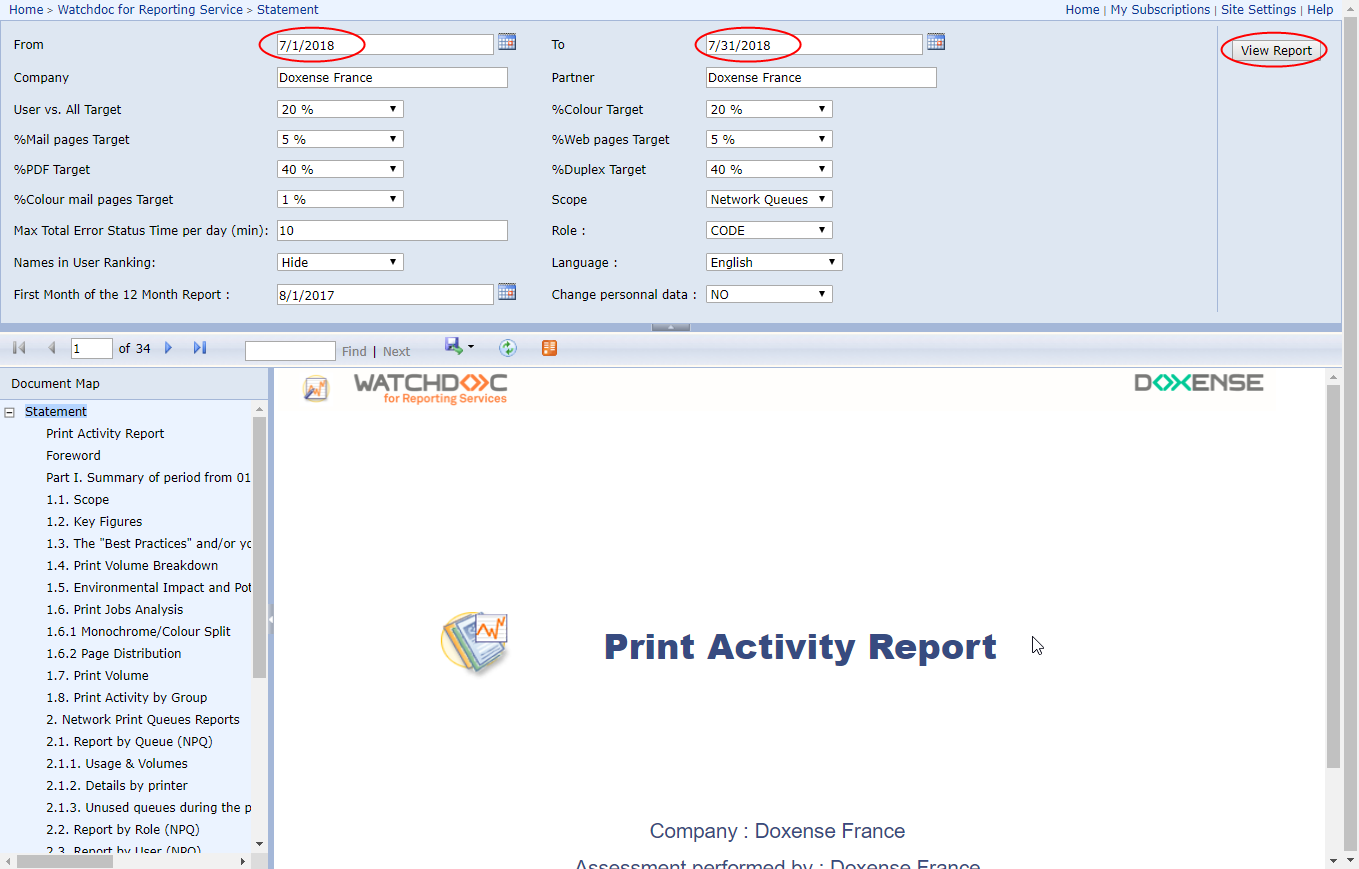
→ The WRS reports setting is completed.