Watchdoc - Usage - Use the "My account v. 2" page
Presentation
The “My Account” page is Watchdoc's user-facing web interface. For versions higher than Watchdoc v. 6.1.15612, this interface has been available in two versions: the old version and the new version (v. 2).
Regardless of which version is used, the URL is typically provided to all users by the Watchdoc administrator.
Configured by the administrator, it can be used for a variety of purposes. It allows you to view:
your identification information, such as your ID numbers and badges;
-
print statistics for yourself and your team;
-
details of your print quotas;
-
documents you have archived;
-
connections to external services (such as storage spaces).
Sign in to the “My Account” page
-
From your computer, open a web browser and enter the URL provided by your administrator (or click on the link provided by your Watchdoc representative);
-
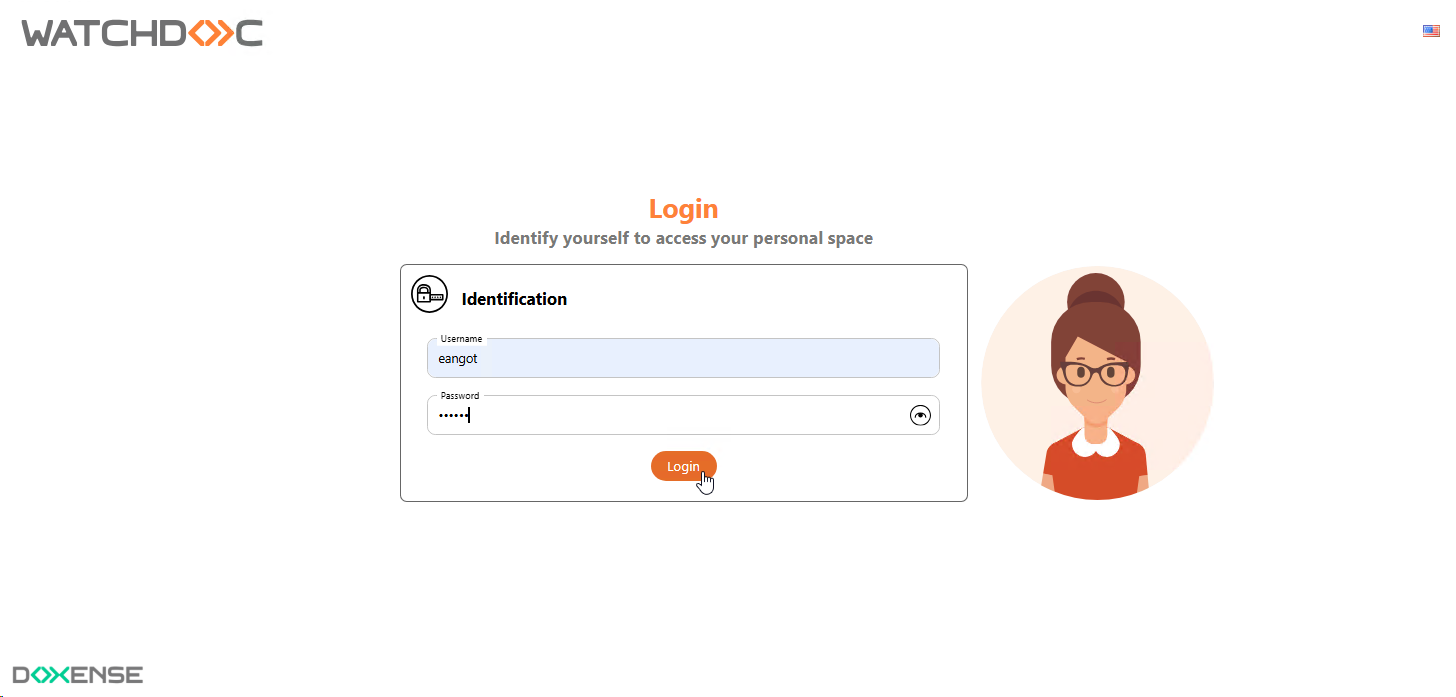
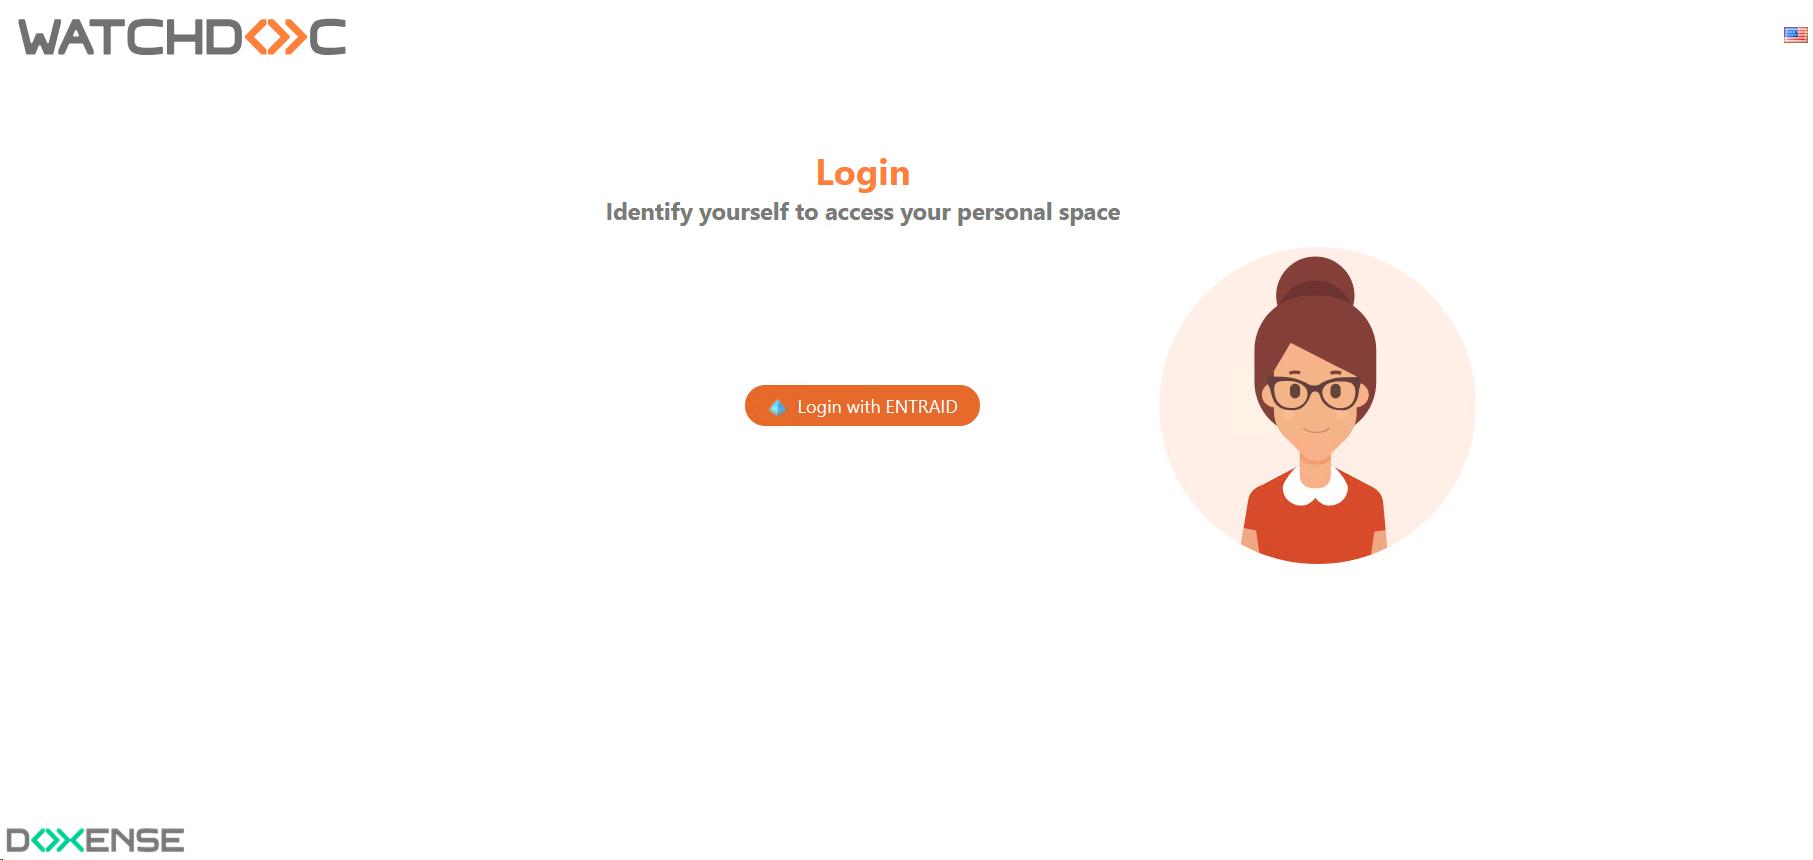
Sign in in the page Login. The method you use to sign in depends on the configuration set by your administrator:
-
Username and password;
-
Windows Integrated: This method allows you to sign in using your Microsoft Windows® account;
-
External: this mode allows you to log in using your account defined in an external directory (such as Entra ID, for example):
-
If you are unsure about the authentication method, contact your Watchdoc administrator.
èOnce you have logged in, you will be taken to your Dashboard: 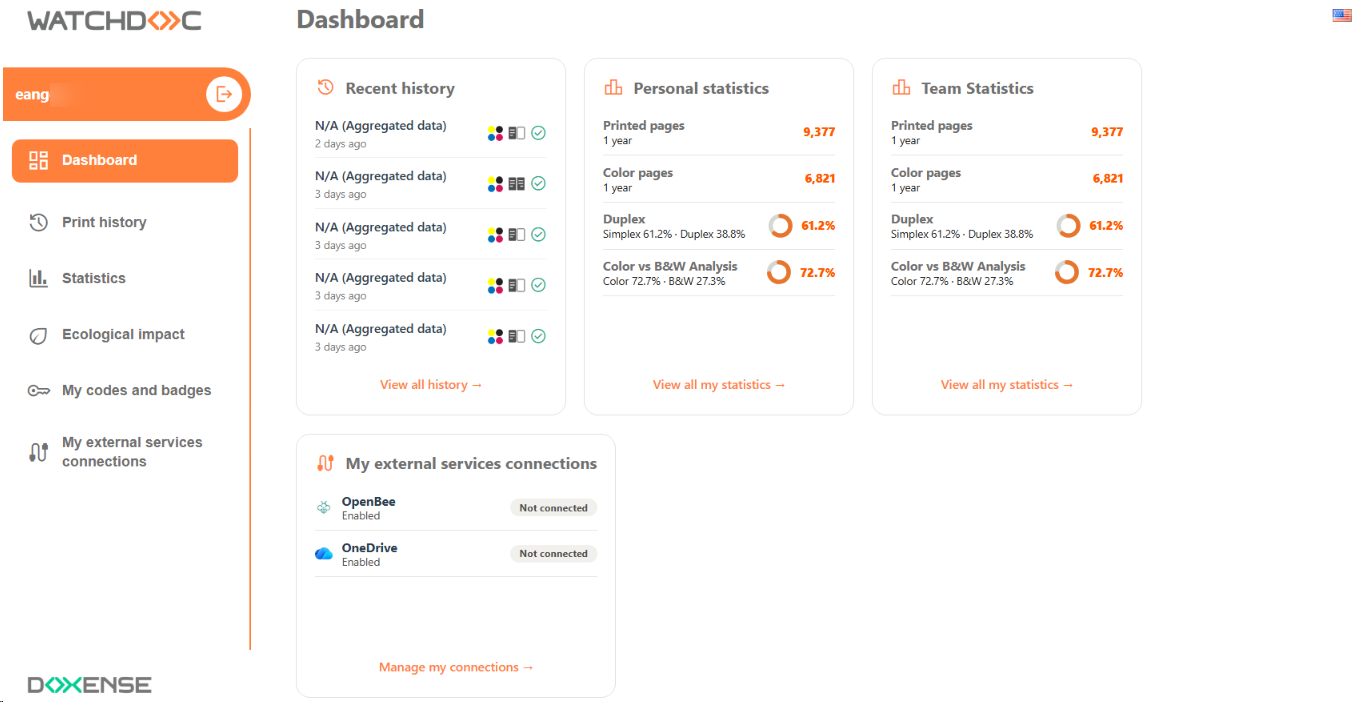
View my print history
To view your recent print history:
-
In the menu, click on My Print History;
-
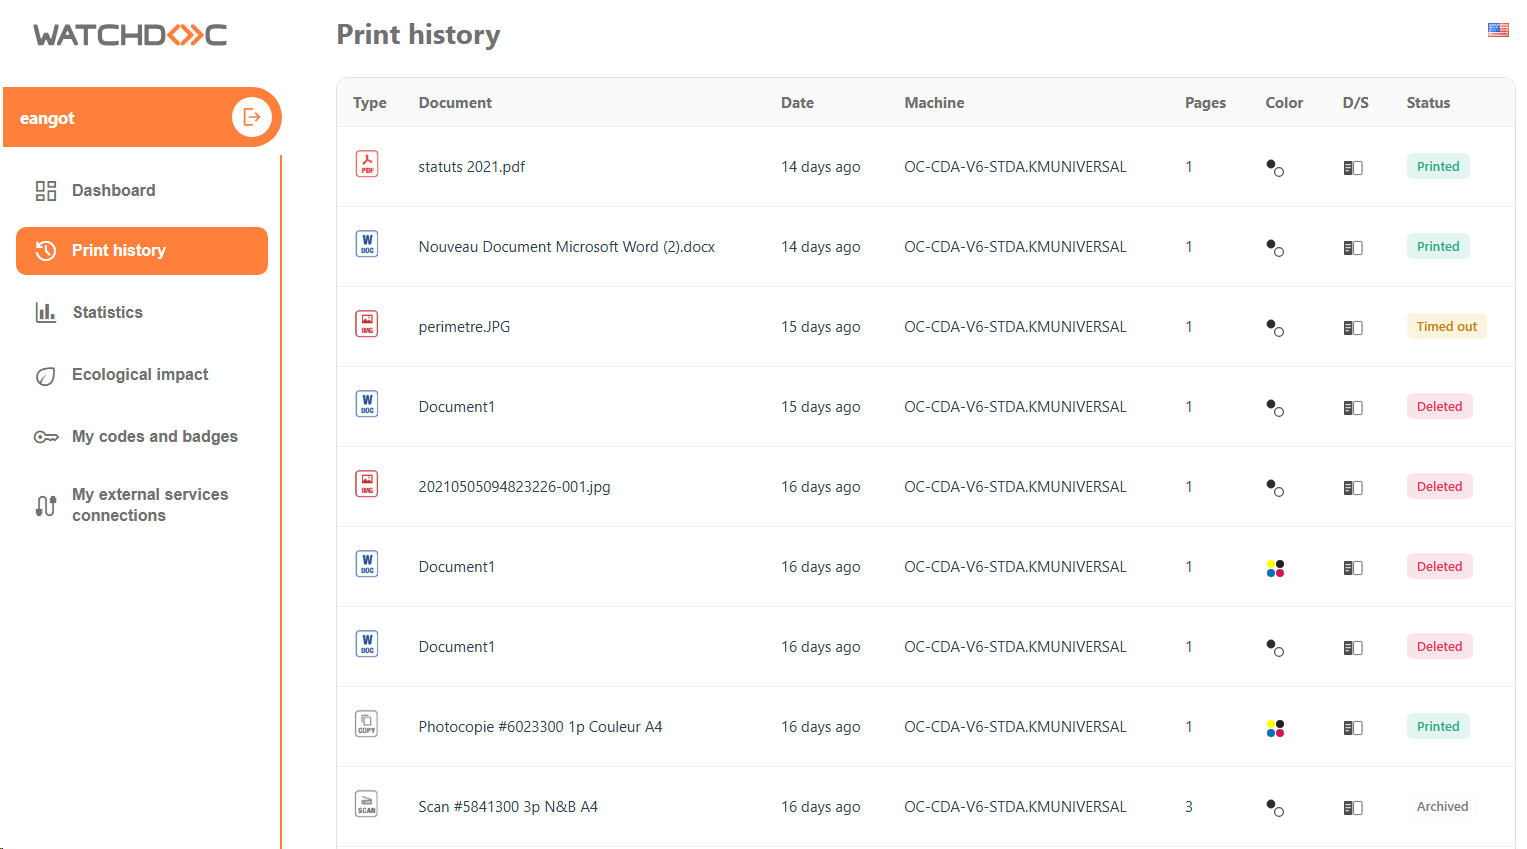
The Print history list shows all the documents you have requested to be printed. The number of documents in the list varies depending on the settings configured by the administrator.
-
The list includes various indicators (their order varies depending on the settings):
-
an icon indicating the document type/format (.pdf, .txt, .doc, .xls, .jpg, etc.)
-
the document name. This name may be a generic title (“my document”) if the administrator has enabled the “replace title” feature;
-
the print date;
-
the name of the printer that processed the print job;
-
the number of pages printed;
-
the document’s color mode: color or black & white;
-
single-sided or double-sided mode
-
the document status:
-
printed;
-
archived;
-
deleted: indicates a document deleted either by you or automatically due to a specific print policy;
-
timed out: indicates a document deleted after remaining in the queue beyond the configured “lifetime” without having been explicitly printed or deleted
-
-
-
View my statistics
Depending on your organization's printing policy, you may have access to your personal statistics, or to both your personal statistics and your team's statistics.
Personal statistics
-
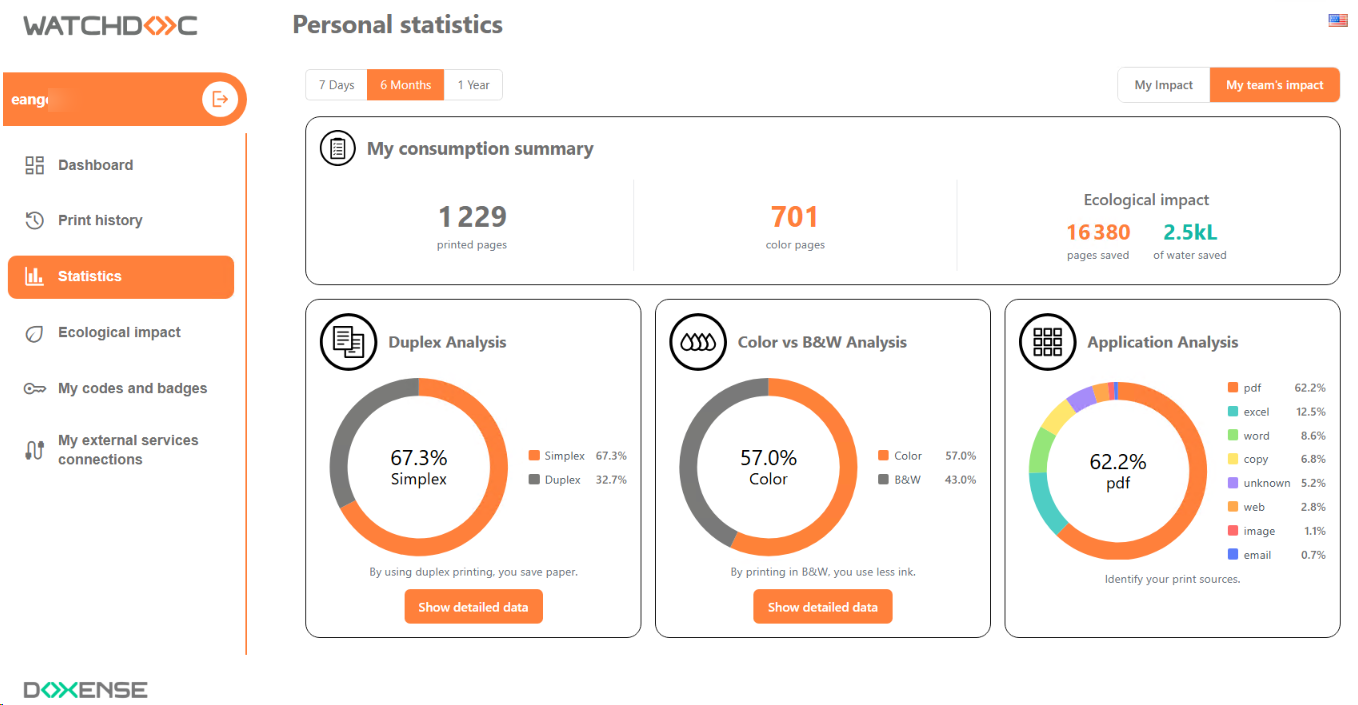
In the menu, click on Statistics ;
-
in the My personnal statistics page, select the time period for which you want to view the statistics (7 days, 6 months or 1 year) ;
èYour statistical data is displayed in graph form;
-
If you would like more information, click the “View detailed data” button:
-
Click on the My Statistics tab: you'll be taken to a screen that displays your Watchdoc usage data and the resulting environmental impact:
Teams statistics
If you are part of a team set up in Watchdoc, you can view your statistics alongside those of your team.
-
From the menu, click on Statistics;
-
in the My Personal Statistics interface, click on the My Team's Impact button:
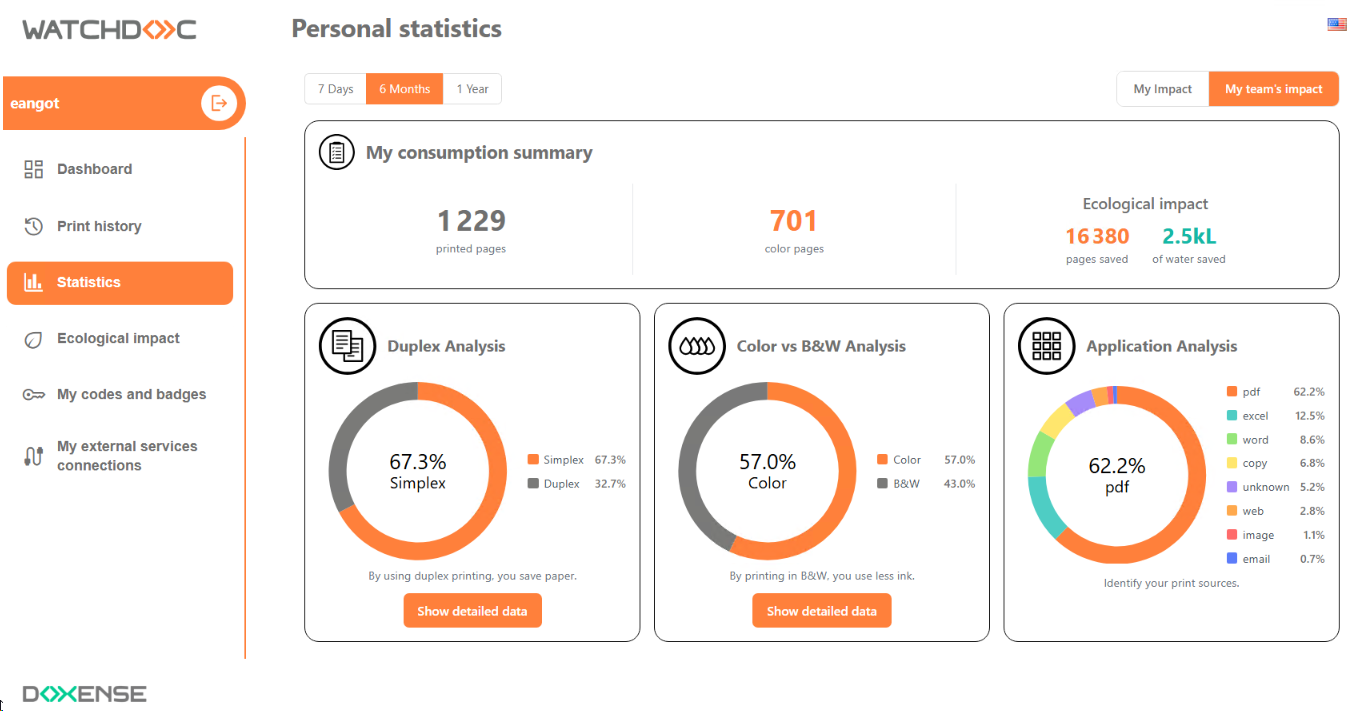
N.B.: If you don't belong to any team, the statistics displayed in this interface are your personal statistics:
Check my carbon footprint
The information displayed in this interface is intended to assess the environmental impact of your printing activities based on calculation methods and data provided by ADEME.
-
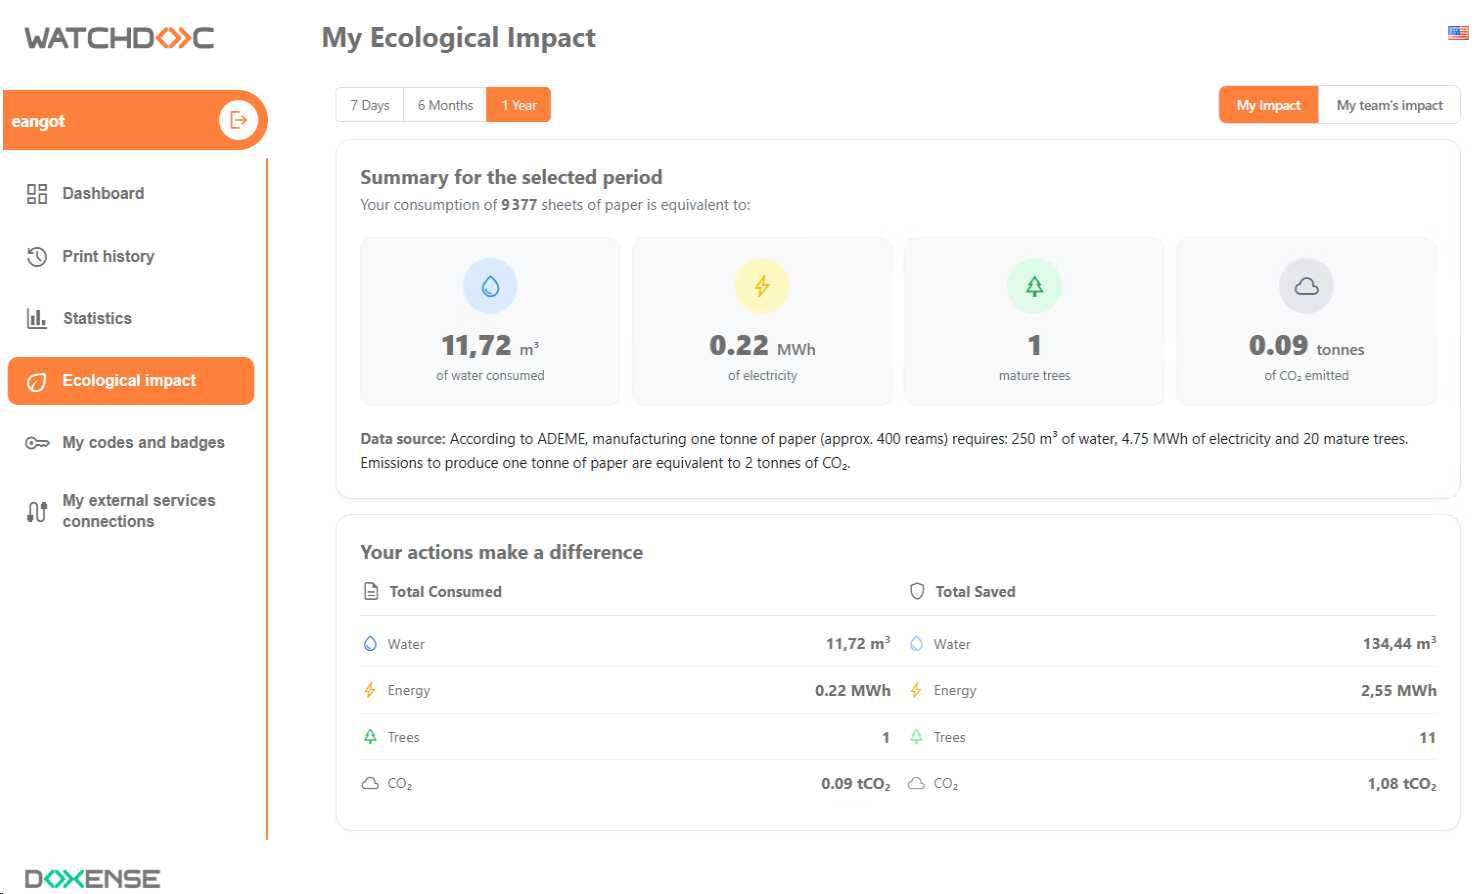
In the menu, click on My Carbon Footprint;
-
in the My Carbon Footprint page, select the time period (7 days, 6 months, or 1 year) for which you want to view the statistics;
-
the Summay section displays your printing data converted into energy consumption figures (water, electricity, trees, and CO2 emissions);
-
the Your actions make a difference section shows the savings achieved by following the suggestions provided by your organization during the printing process. For example, when you agreed to print in black and white instead of color, double-sided instead of single-sided, or a single copy instead of three:
-
View my codes and badges
View
-
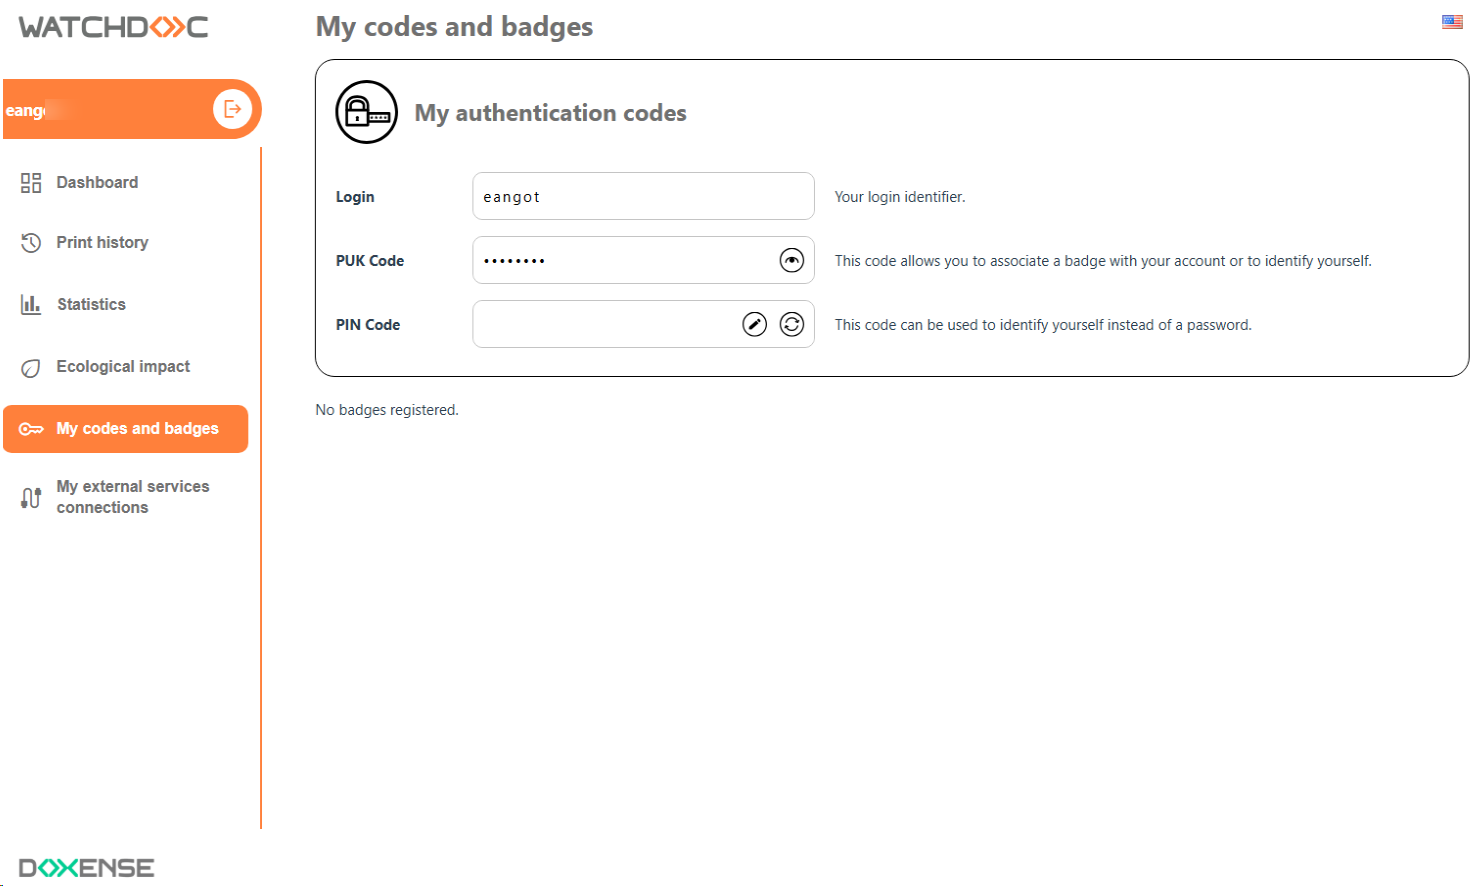
In the menu, click on My Codes and Badges;
-
In this interface:
-
the My Authentication Codes section contains a number of codes (PIN, PUK, print codes) depending on the configuration set by the administrator. If the code is hidden, click the View button to display it in plain text;
-
the My Registered Badges section contains the badge(s) you can use to log in to a WES. These badges can have several statuses:
-
active: badge usable until the displayed expiration date;
-
expired: badge used, but now inactive because it has passed its expiration date;
-
locked: badge that you have locked and can unlock;
-
lost: badge that you have reported as lost;
-
Enter my PIN and/or print code
If you need to log in to WES using a PIN or a print code, you must set it up on the “My Codes and Badges” page:
-
PIN: a code consisting of at least 4 digits (length specified by the administrator);
or
-
print code: an alphanumeric code that must be between 4 and 16 characters long and must not contain more than 2 digits (length specified by the administrator).
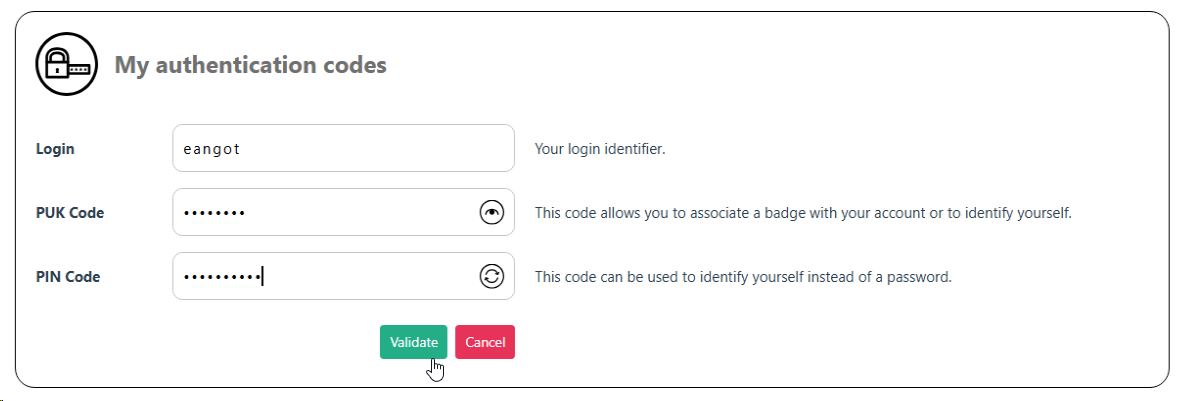
To enter your code (PIN or print code):
-
on the My Account page, click the My Codes and Badges tab;
-
in My authentication codes section, click the Edit button
 for the PIN or print code;
 -
enter your code in the field;
-
click the Validate button:
Connect external services
Principle
If you have an external storage service (such as OneDrive or Open Bee, for example), you can add them from the My Account page as destinations for your scans.
This way, documents you scan with WEScan can be sent directly to these third-party storage spaces. You can then log in to these third-party services to perform the desired actions on your scanned document
(such as filing, sending to another workflow, archiving, etc.).
Connect my Open Bee® account
Copy the Open Bee® API Key
To link your Open Bee® account, you need its API key.
This API key can be found in your Open Bee® account:
-
Go to your Open Bee® account and log in;
-
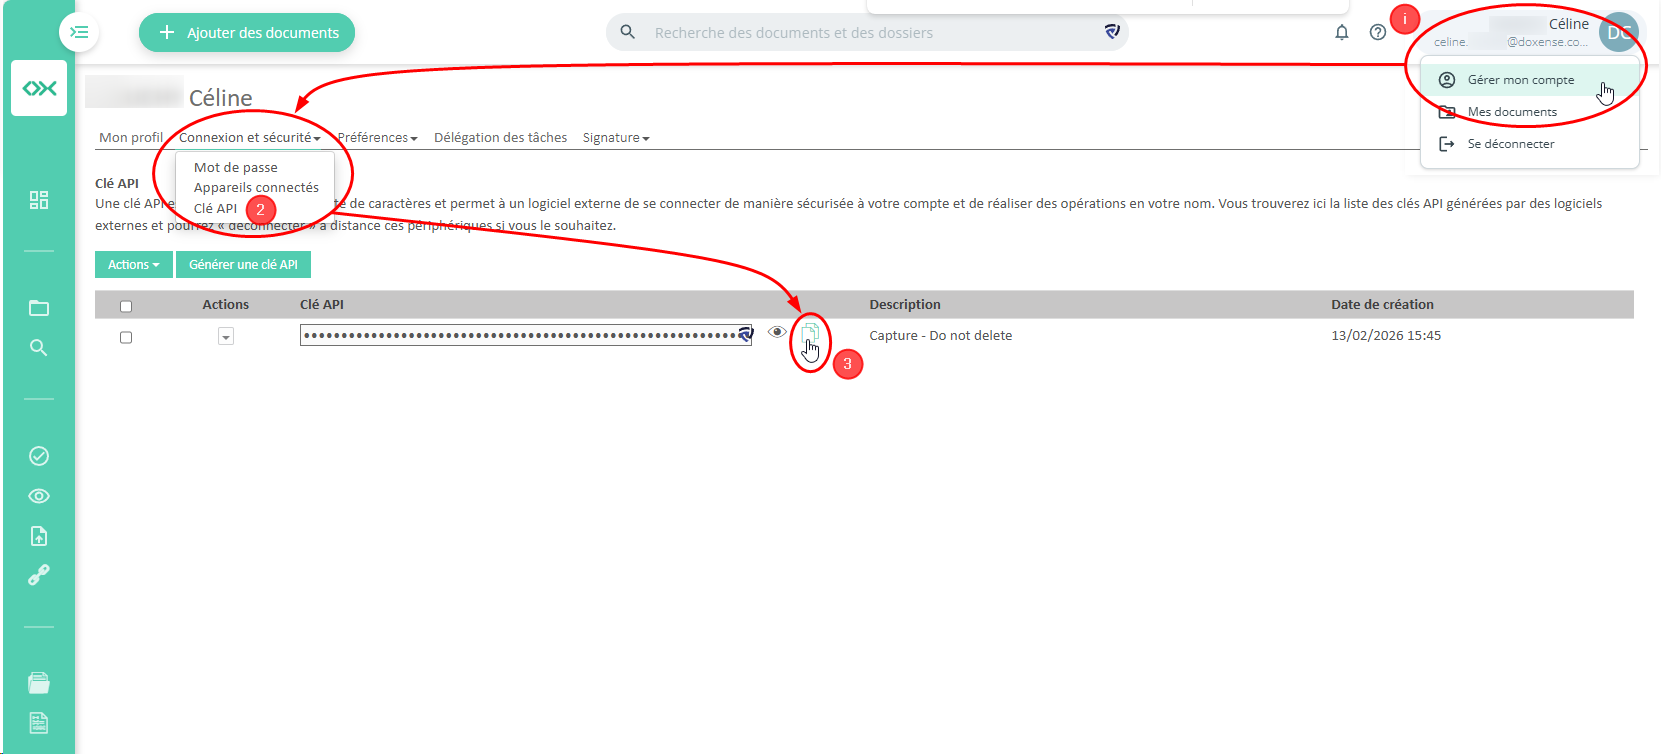
in your account, click on your profile in the top right corner to access the menu;
-
in this menu, click on Manage My Account;
-
in the My Account interface, click on the Login and Security section;
-
then click on API Key;
-
in the API Key interface, the key is displayed in an input field, masked for security;
-
click on the Copy button to the right of the field;
-
save this data to your computer’s clipboard or paste it into a text editor.
Configure the Open Bee® connexion
-
Go to your “My Account” page and log in;
-
On the My Account page, click the My external services connections tab:
-
In the My external services connections interface, under the Open Bee section in the API Key field, paste the key you copied earlier;
-
Click the Save button:
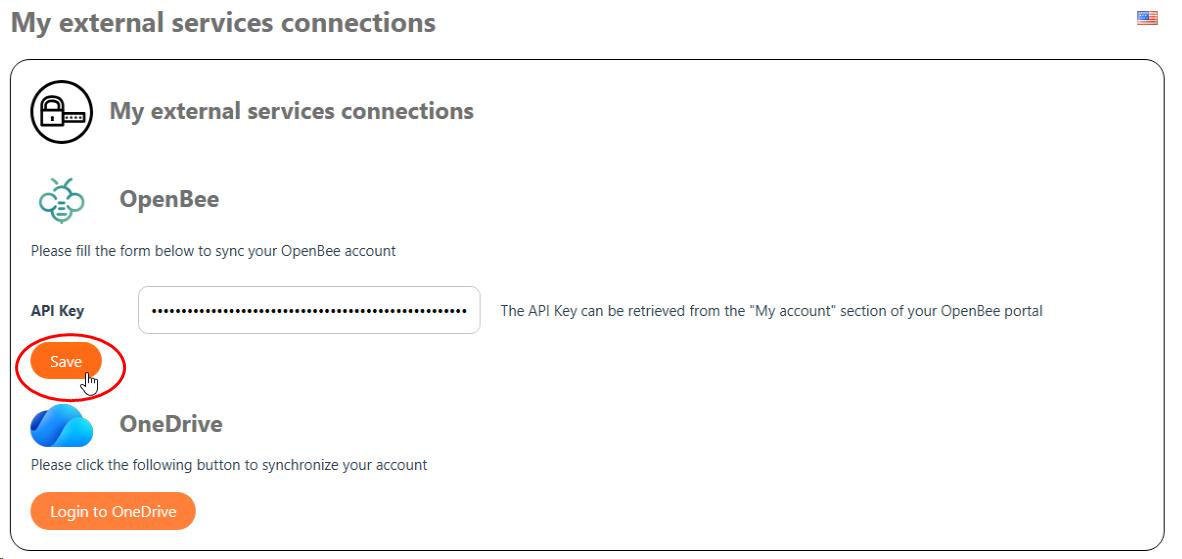
èA message will notify you that the connection was successful. From then on, when you access this interface, the message “The Open Bee API key was synchronized on [date-time]” indicates that your Open Bee account is properly synchronized. When you scan a document using WEScan, you will see a scan destination labeled Open Bee.
èIf the synchronization fails, contact your Watchdoc administrator.
Connect my OneDrive® account
-
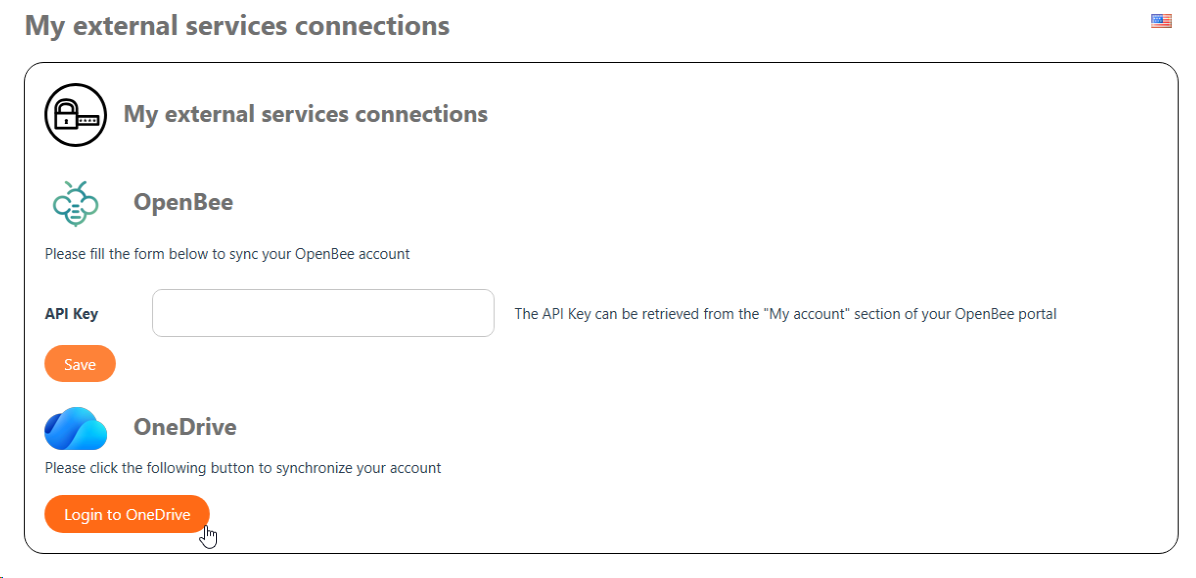
In the “My Connections to External Services” interface, under the OneDrive section, click the “Connect to OneDrive” button:
-
In the MS Windows interface, enter:
-
your username
-
your password
-
-
Confirm the message indicating that the connection has been established.
èWhen your OneDrive® space is connected, a message will inform you that the connection token has been synchronized. You can now use the OneDrive destination from WEScan.