Watchdoc Print Client for Chrome® - Installation
Steps
To install Watchdoc Print Client for Chrome®, follow these steps:
-
configure Watchdoc Print Client for Chrome® in Watchdoc ;
-
set up the Watchdoc Print Client for Chrome® extension in Google® Admin.
Configure Watchdoc Print Client for Chrome in Watchdoc
Prerequisites
The implementation of Watchdoc Print Client for Chrome requires the creation of a universal queue.
This universal queue (automatically created when Watchdoc is installed) is named Universal Print by default.
By default, this queue is configured to redirect spool files to the global print pool (#global).
Access the configuration interface
To access the Watchdoc Print Client management interface:
-
access to the Watchdoc Administration interface as an administrator.
-
from the Main menu, Configurationsection, click on Advanced Configuration:
-
in the Advanced Configuration interface, click on Watchdoc Print Client:
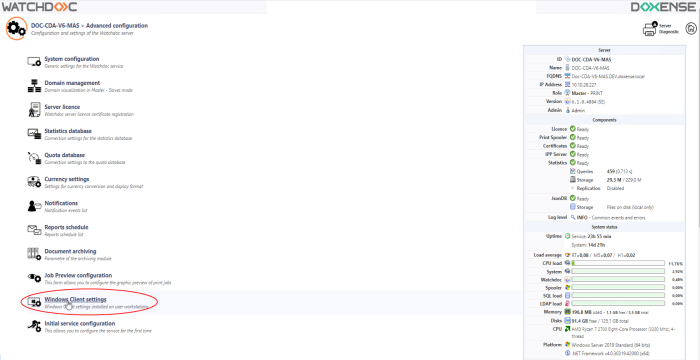
→ You access the Watchdoc Print Client interface.
Configure Watchdoc Print Client for Chrome
Global Configuration section
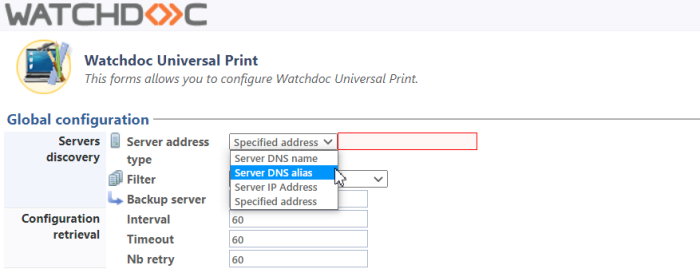
Create and configure locations
Create and structure your locations by following the procedure (see article Configure locations)
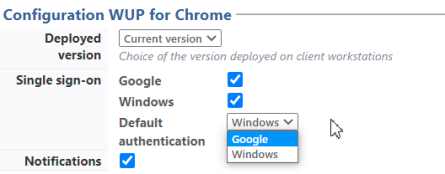
Configuration WPC for Chrome section
In the WPC for Chrome Configuration section you define the Watchdoc Print Client settings specific to its use on Chromebook® or Chrome® browser:
-
Deployed version: in the list, select the version of Chrome from which you wish to use WPC;
-
Single sign-on: Check the boxes corresponding to the accounts with which you allow the user to log on in SSO :
-
Google: Select this checkbox to allow SSO authentication from the user's Google® account;
-
Windows: Select this check box to allow SSO authentication from the user's Windows® account;
-
Default Authentication: If both authentications are allowed, select the authentication that will be offered by default from the list.
-
Notifications: Select the check box to allow sending WPC-related notifications in Chromebook® or the Chrome® browser.
Configure the Chrome®extension in Google Admin
-
As an administrator, access the Google Admin (https://Admin.google.com) administration tool.
-
In the menu, click on Devices > Chrome > Apps&Extension.

-
In the search engine, search and click on Doxense organization, to see all its extensions and applications.
-
In the extensions and applications list, among the tools on the bottom right click on the
 button to add an extension:
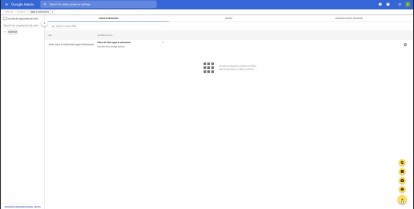
-
In Add the Chrome app or extension by ID interface, enter either the extension identifier in the Extension ID field, or its URL in the From a custom URL field, then click
 to validate:
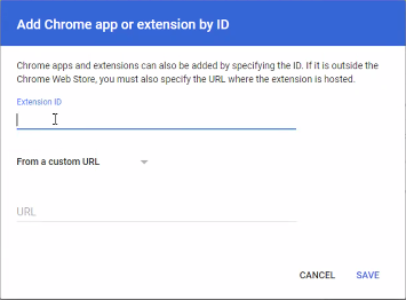
-
The extension appears in the available extensions list:
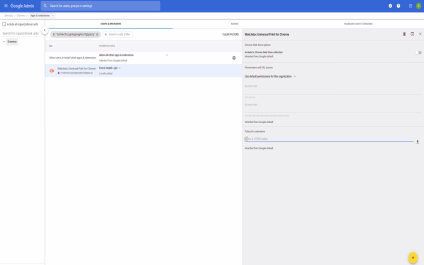
-
Click on Watchdoc Universal Print extension to complete its settings:
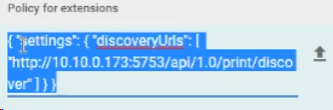
-
in the Policy for extensions field, to precise the extension policy, enter the following code:
{"settings":{"discoveryUrls":["http://10.10.0.173:5753/api/1.0/print/discover"]}}
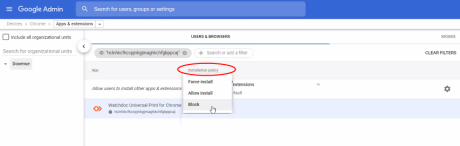
-
Then select the installation mode:
-
Force install: select this mode to install the extension by default onto all Chromebook® workstations or Chrome® browsers managed by the organization.
-
Allow install: select this mode to let the users install or not the this extension on the Chromebook® workstations or Chrome® browsers managed by your organization.
-
Block : select this mode to block the usage of this extension on the Chromebook® workstations or Chrome® browsers managed by your organization :
-
-
Then click on Security > Access and data control > API commands.
-
If there is more than one, find the organisational unit you wish to modify.
-
In the interface Display settings for the users of [organisational_unit], for the setting "Third-party applications not configured", select the option "allow users to access third-party applications that only require the basic information needed for the Sign in with Google feature":
-
Click on
 to validate the setting.
 -
Check the extension from a Chromebook® workstation or a Chrome® browser.