Watchdoc Print Client for Chrome - Usage
Access the extension
-
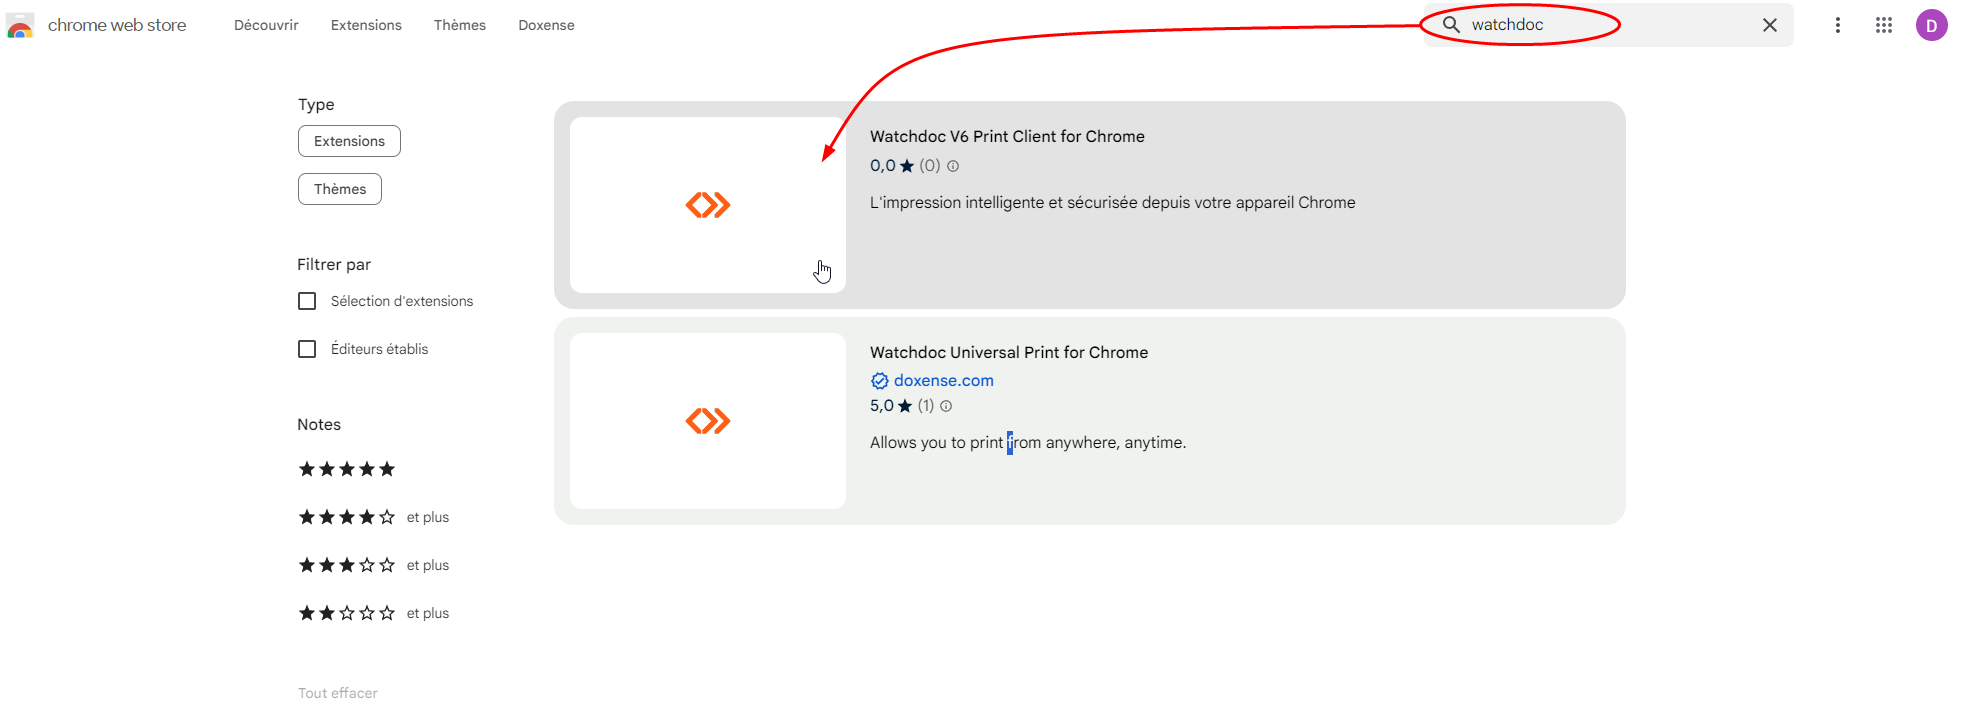
Go to the Chrome® web store.
-
Search for the Watchdoc extension.
-
In the list of suggested extensions, click on Watchdoc v6 Print Client for Chrome :
-
In the Watchdoc V6 Print Client for Chrome presentation interface, click the Add to Google Chrome button:
-
A message will inform you that the extension has been added to your Chrome® browser or ChromeBook®.
-
Click on the extensions logo (top right of your browser), then on the Watchdoc extension.
-
In the Watchdoc welcome interface displayed, enter the discovery server URL provided by your Watchdoc referrer.
-
Then click on Connect.
Log in the extension
When using for the first time, authentication is required. Once this authentication in WPC for Chrome extension has been performed, you will not need to repeat it.
Using the SSO system, authentication is based on your Google® account or your Windows® account, which is automatically detected by the Chrome browser. If you use the extension as a guest, you will need a dedicated code for this purpose.
In the window, select :
-
either the existing account from which you want to authenticate in SSO (Google® account or Windows® account);
-
or the "Guest" authentication option:

-
In the login box that is displayed:
-
enter your account and password, then click on the
 or
or  button;
 -
or enter your "guest code" that was given to you, then click on the
 button;
 -
when authenticated, the
 icon appears. Otherwise, repeat the authentication operation.
 -
You can also change your authentication mode by clicking on the label "Switch authentication method".
Interface presentation
Watchdoc Print Client for Chrome interface is composed of several areas: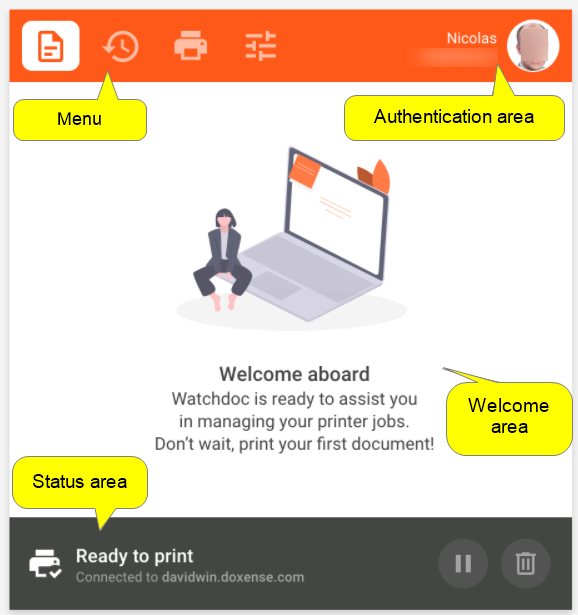
Click on the image to enlarge
The menu contains several buttons:
-
The
 button gives access to the pending documents ;
 -
The
 button gives access to the transferts history.
 -
The
 button gives access to a list of devices which are available in a geographical predefined area.
 -
the
 button give access to the printing settings.
 -
The authentication area displays the user identity.
-
The welcome area delivers a welcome and informs the user about possible actions from this interface.
-
the status area informs the user about the status of the printing devices and the actions in progress ("Ready to print", "Cannot print", "Transferring prints in progress", "Transfer success", "Waiting for server connection").
Principle
The WPC for Chrome can be installed in a wide variety of technical contexts. When printing is started, two scenarios may arise:
-
only one printing device is made available to you: printing is carried out in "direct" mode;
-
several printing devices are available. Once printing has started, you access a device and validate your jobs there: printing is carried out in "validation" mode.
Launch direct printing
If there is only one printing device available :
-
From your document, click on CTRL+P to start printing ;
-
In the WPC for Chrome's window, the default is set to the single printer device;
-
Access the print device and release your print-job.
Launch the printing with validation
If more than one printing device is available:
-
go to the device on which you want to print your document;
-
the extension transfers the documents to be printed to the print queue;
-
authenticate yourself on the device (using a badge, account or code);
-
print jobs are placed in a pending list: select the job(s) to be printed and confirm the printing.
Pause the transfer
The extension transfers print requests to the print server configured by default. However, it may be useful to start printing but not want them to be processed instantly. In this case, you can pause your print requests:
-
launch your print request.
-
in the list of documents being transferred, click on the button
 corresponding to the document not to be transferred immediately.
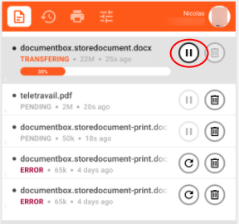
-
When it's possible to print, click the button again to allow the transfer to resume.
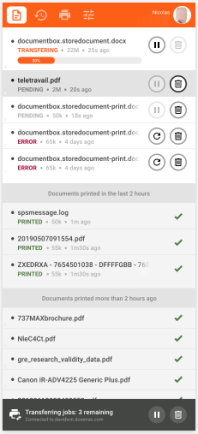
Consult the history of printing requests
The print requests transferred by the extension are kept in a history that you can consult at any time:
-
in the extension, click on the
 button : the interface displays the documents being processed and the documents processed (in an ante chronological order). In this list, the status of the documents is displayed:
-
in green when they have been transferred to the print device;
-
in red when they have not been transmitted and the print request can be restarted;
-
in grey when they are waiting to be transferred.
-
-
click on the
 button to re-send the documents not-transferred;
 -
click on the
 button to delete the documents not-transferred awaiting processing: