Customize Watchdoc Print Client for Windows
Principle
Like most WES and WEScan, the Watchdoc Print Client for Windows graphical interface can be customised with your own images, logo and colour.
Procedure
Test the images customization
Before modifying the default WPC for Windows images on the Watchdoc server (with an impact on all client workstations), you can carry out a customisation test from a client workstation:
-
As administrator, access a client workstation on which WPC for Windows is installed;
-
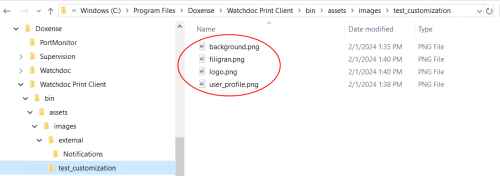
Using Explorer, go to the WPC images folder (C:\Program Files\Doxense\Watchdoc Print Client\binassets\images\);
-
Create a folder called test_customization ;
-
In this folder, create the 4 default images for the WPC for Windows interfaces, respecting the dimensions of the original images:
-
background.png: 211pt x 232 pt
-
filigran.png: 216pt x 100.5pt
-
logo.png: 330 pt x 36.75 pt
-
user_profile.png: 180.5 pt x 164 pt
N.B.: you can also copy the contents of the External folder, which contains the default images, and create your own custom images from these templates.


-
-
launch WPC for Windows to check the display of the customised images;
-
retouch them if necessary.
→ As soon as the personalised images are satisfactory, finalise the personalisation on the Watchdoc server.
Finalise image and colour customisation
When you are satisfied with the customised images, you can :
-
finalise the image customisation
-
Log in as administrator to the master server on which Watchdoc is registered;
-
On this server, create a folder to contain your customized images (for example: C:\Program Files\Doxense\Watchdoc Print Client\bin\assets\images\Custom);
-
In this folder, save the images contained in the test_customization folder;
-
Access the Watchdoc administration interface as an administrator;
-
From the Main Menu, Configuration section, click Advanced Configuration;
-
In the Advanced Configuration interface, click on Windows Client Settings;
-
in the Configuring the Windows Client section, enter the path to the folder containing the custom images:
-
-
customise the colour of the interface buttons:
-
in the Configuring the Windows Client section, select the hexadecimal value of the desired color:This colour is applied to the breadcrumb trail, the location information and the buttons on the interface;

-
-
Click te
 button to validate the WPC for Windows customization.
 -
Check in WPC for Windows that the custom images are displayed.