Print job release mode
When WES is enabled, print jobs are queued on the server until a user authenticates to a print device and validates them. Jobs are then printed via the print queue.
There are two ways of releasing print jobs:
-
secured printing ;
-
pull printing.
Secured Printing
This mode allows to hold all print jobs in the shared print queue which is configured on the user's computer. The user can release his print-job only on this device after authentication.
For this type of configuration, the print queues must be deployed on each users computer and the user must choose from among the devices configured on his remove space, the one on which he wishes to launch his printing jobs: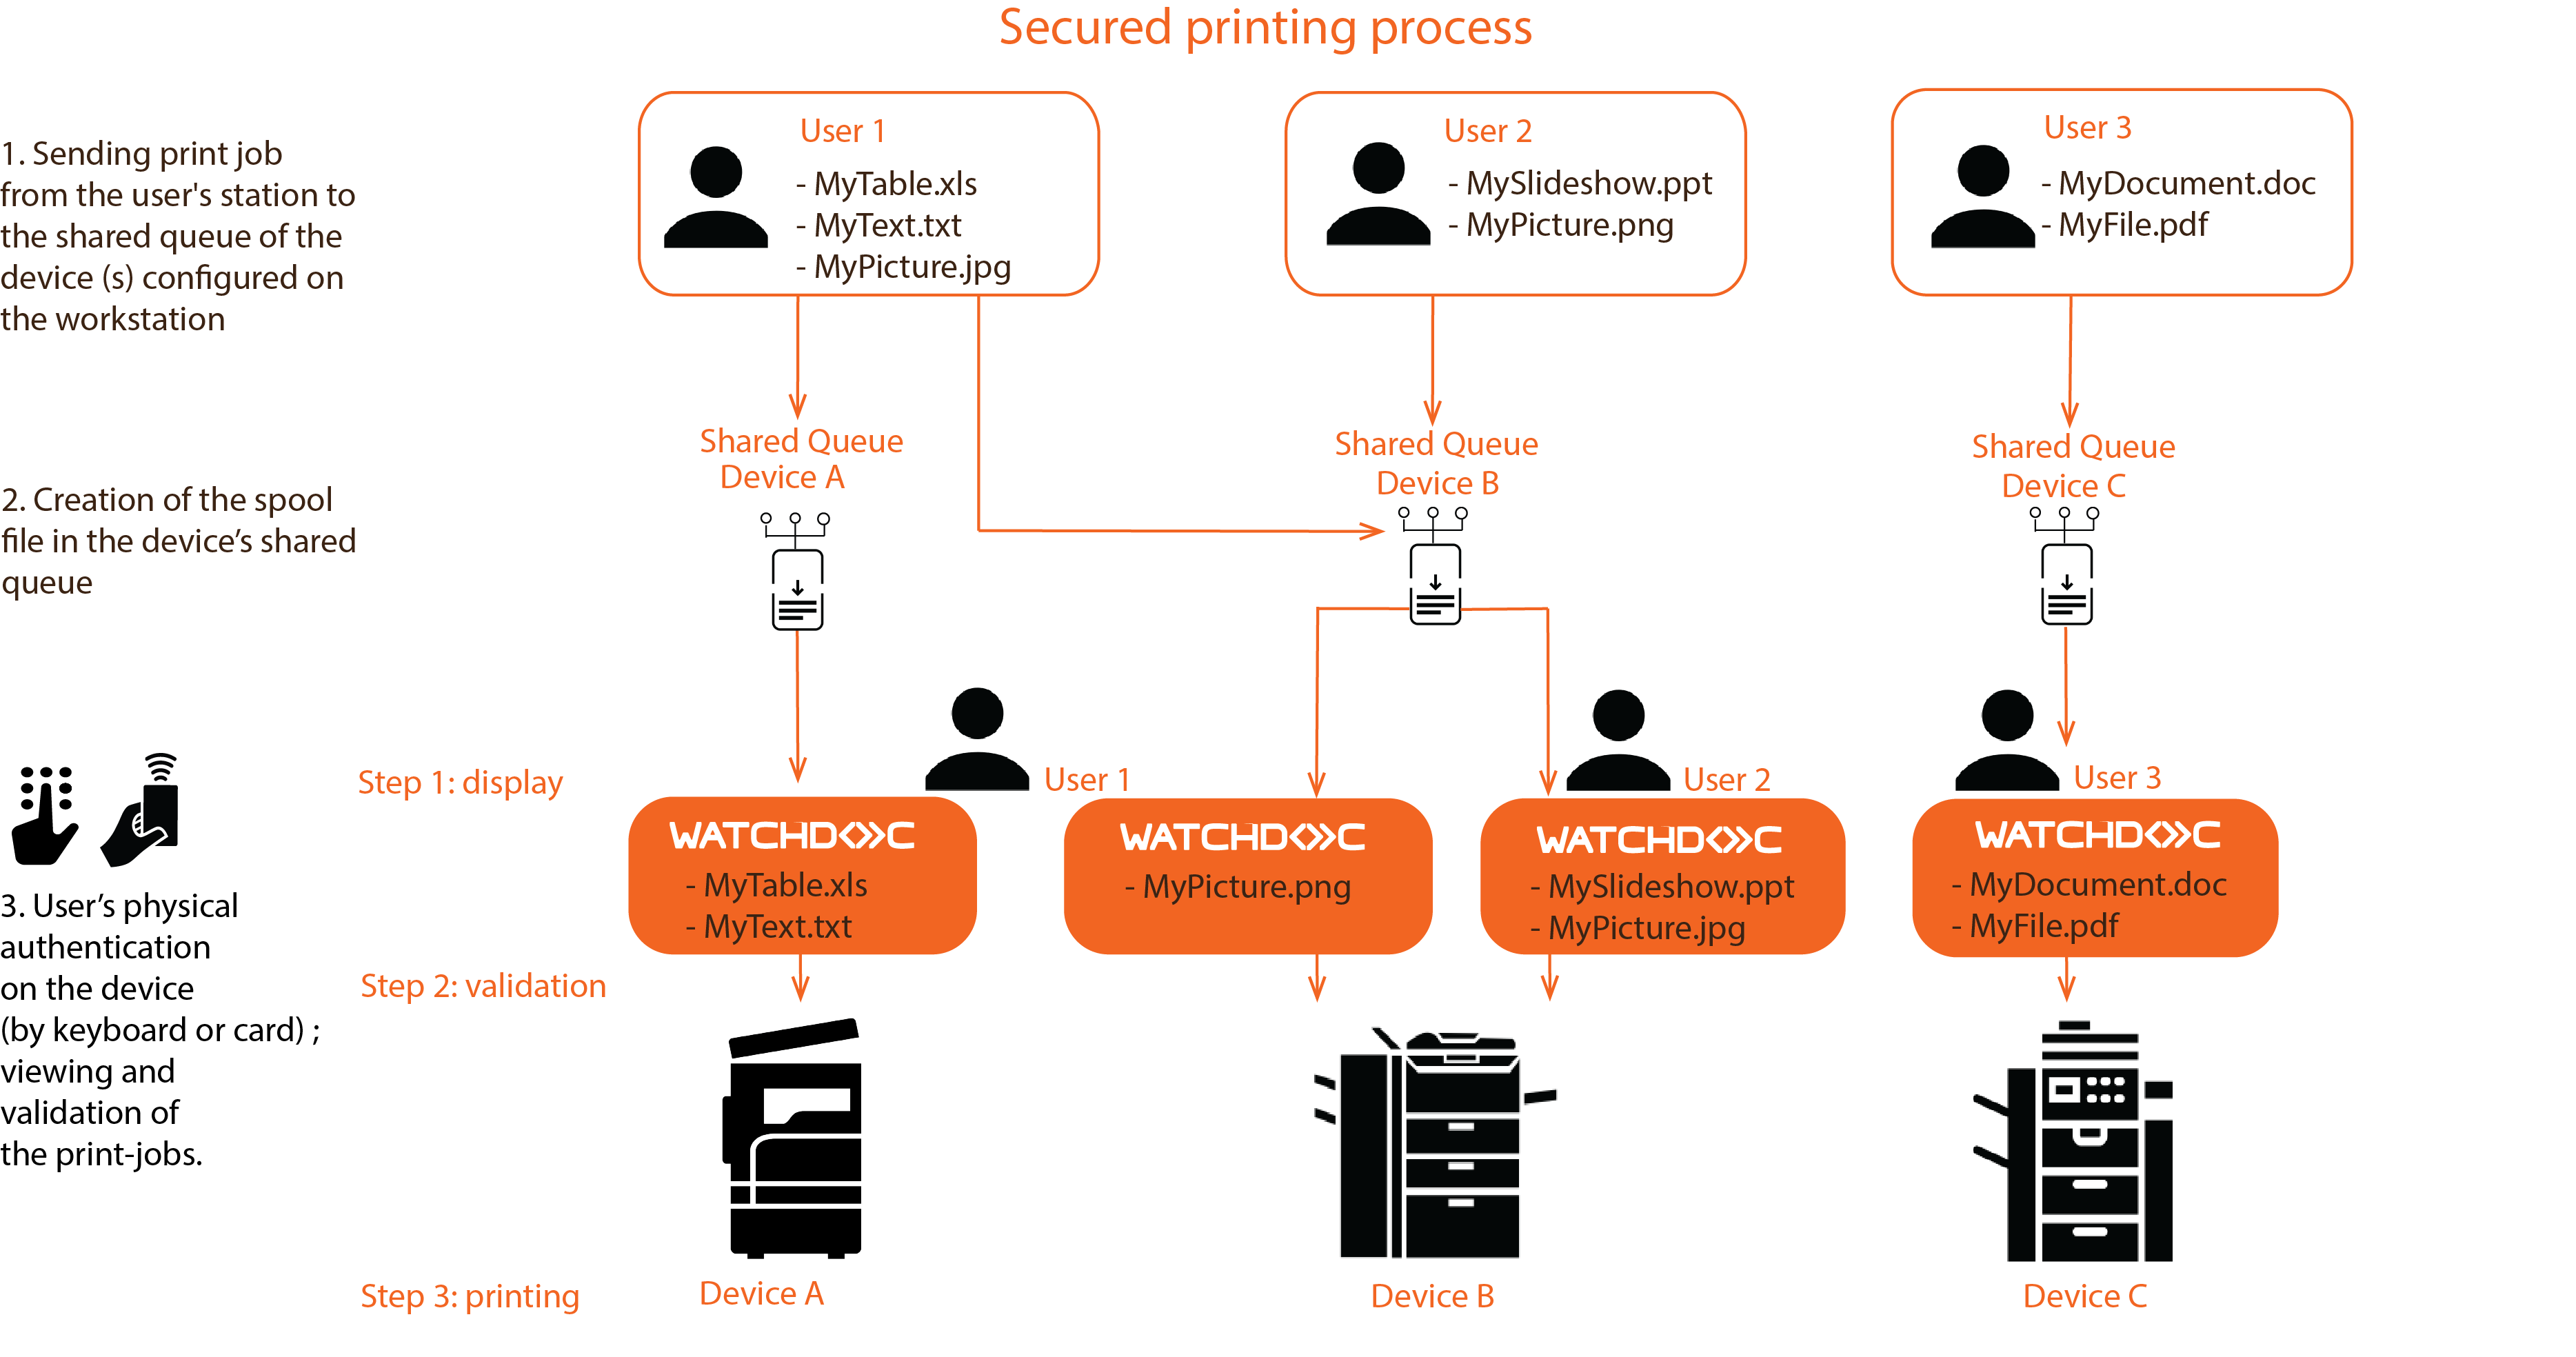
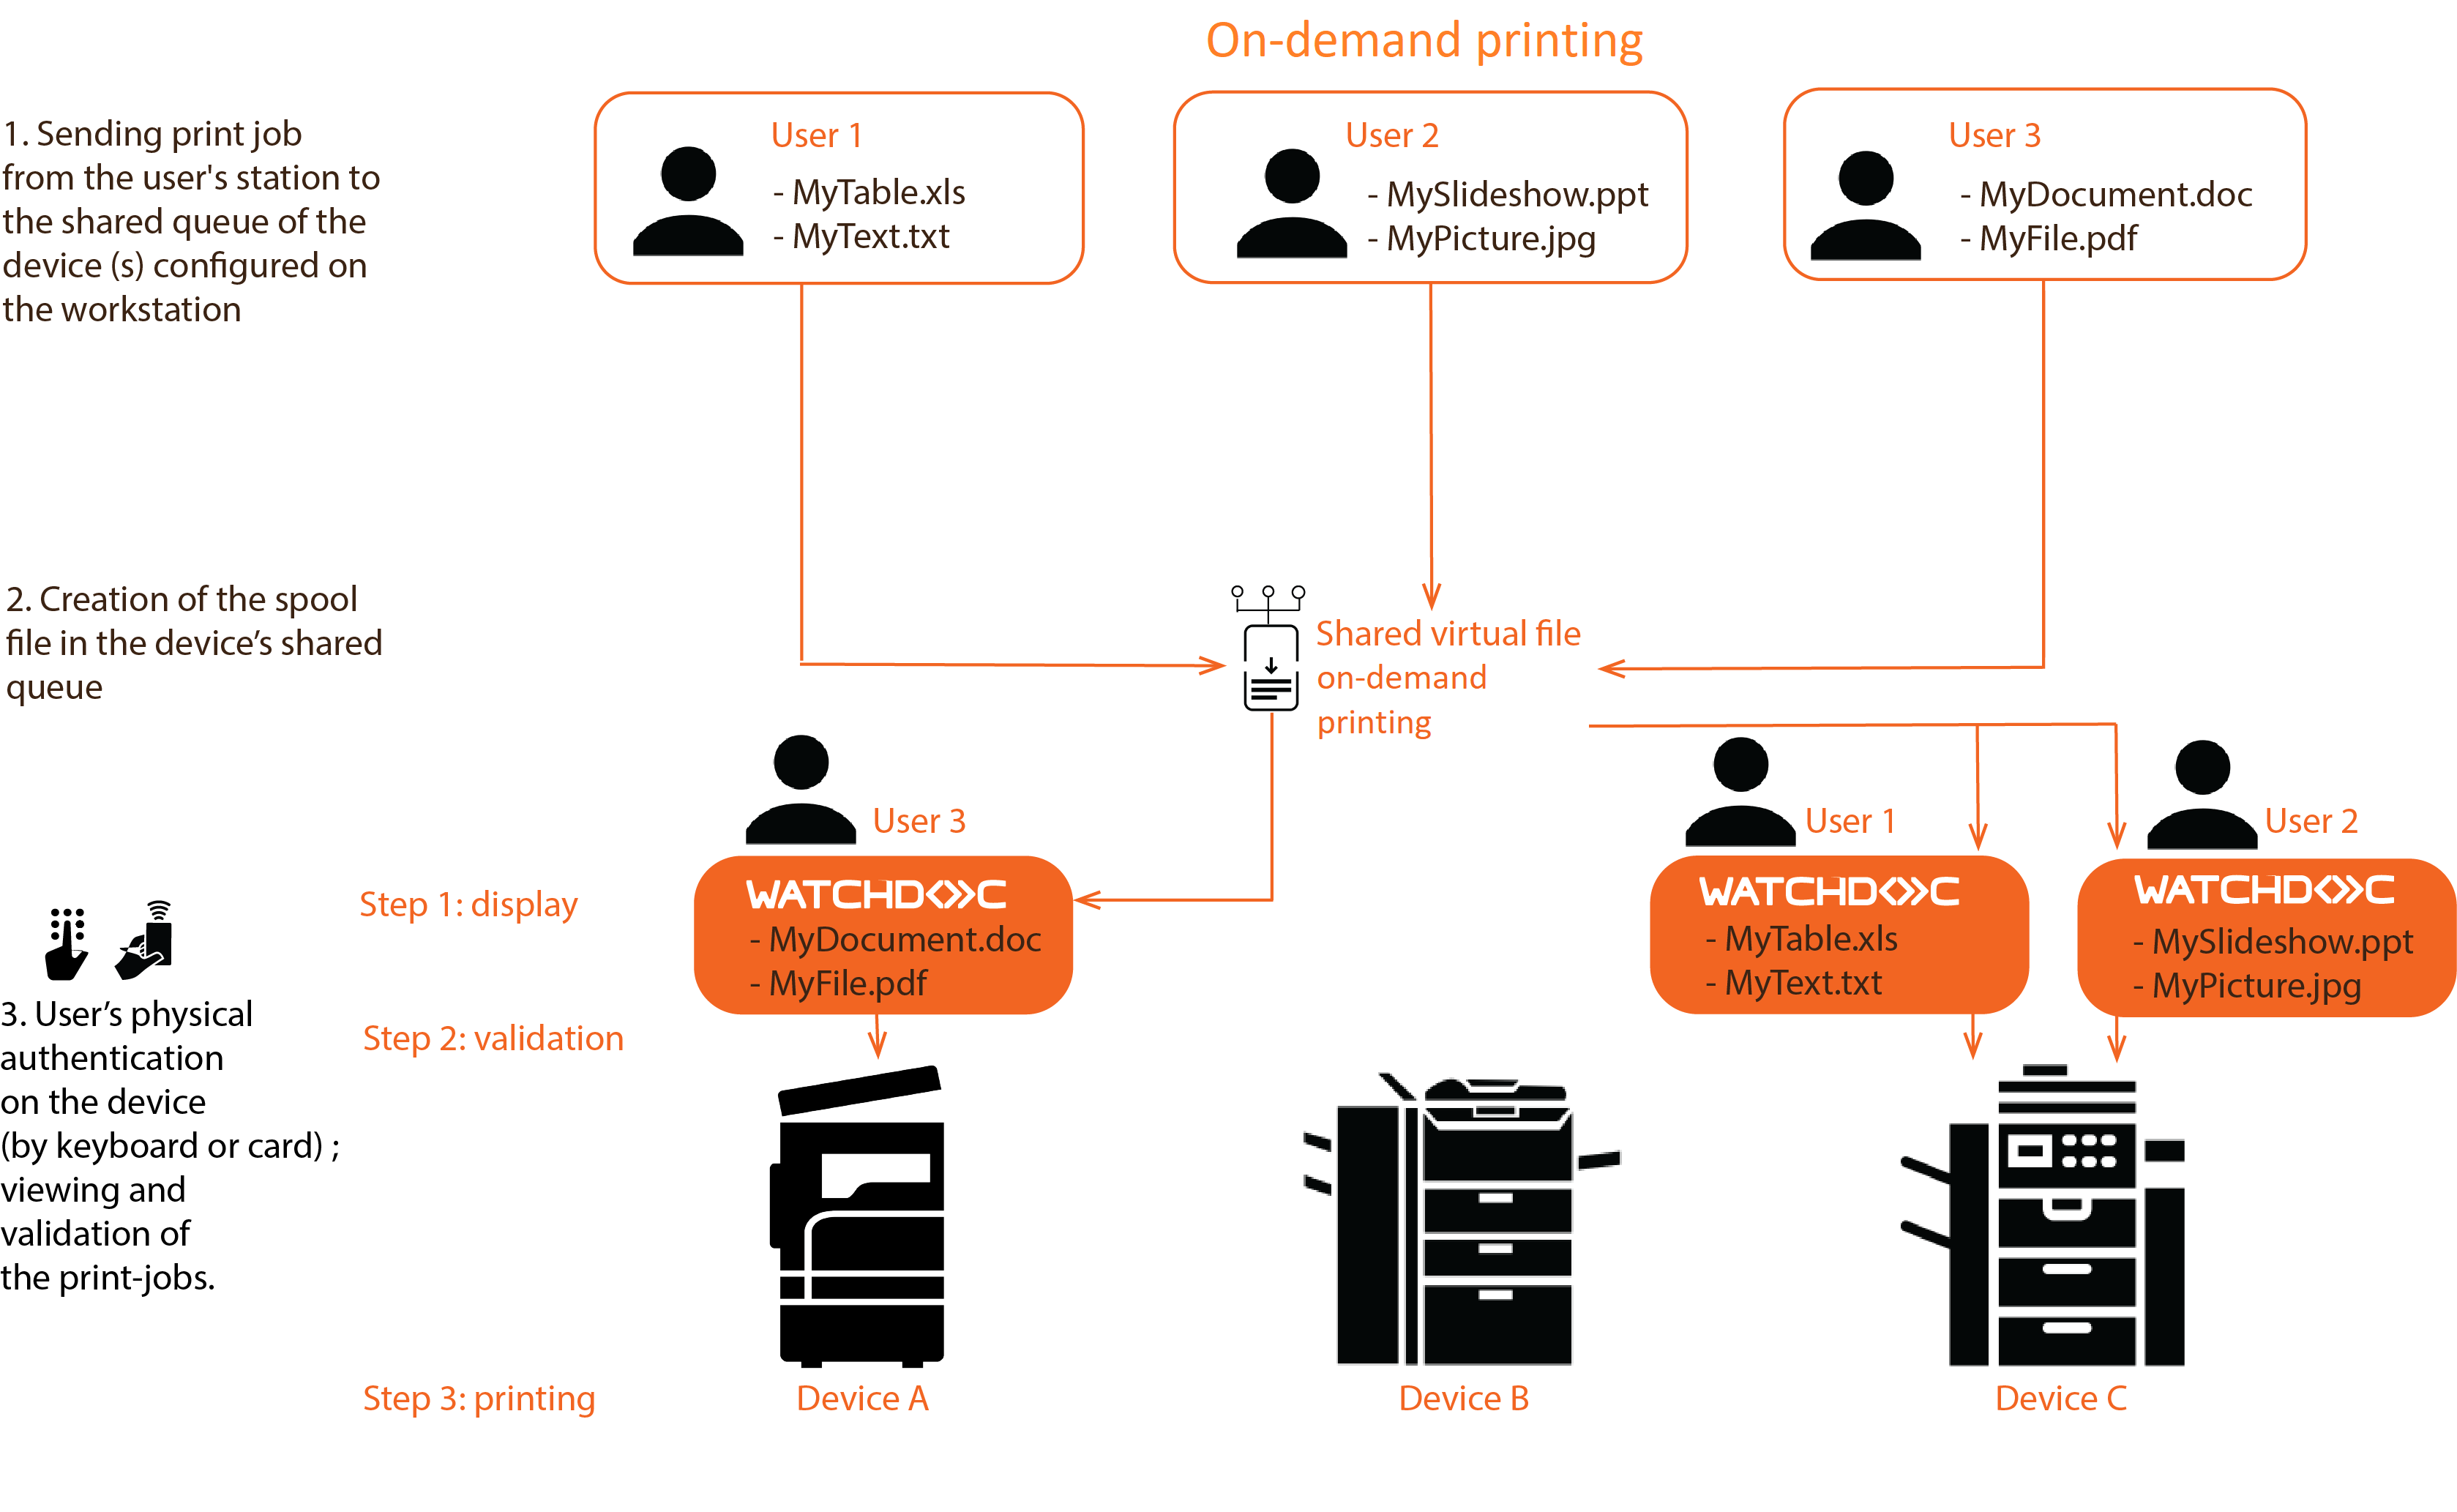
On-demand printing
This mode allows jobs to be redirected from a logical queue to a physical queue with compatible spool formats.
Using this function, it is possible to define one logical queue (or several, one for monochrome printing and one for colour printing; one for the default tray and one for the letterhead tray, for example). Installed on the user's computer, this logical queue allows the user to release print jobs on the device of their choice (among the physical queues to which the logical queue can redirect jobs).
If you activate the on-demand printing function, you will need one (or more) additional queues in your Watchdoc licence (FIR licences):
Print job validation
After authenticating on the device screen, the user is taken to the standard home screen, which displays all the applications, including the Watchdoc job release application: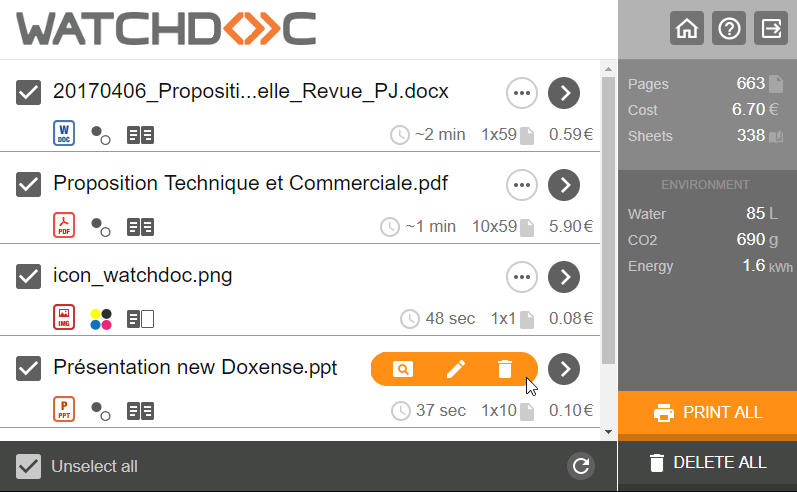
Print jobs list without the delete function
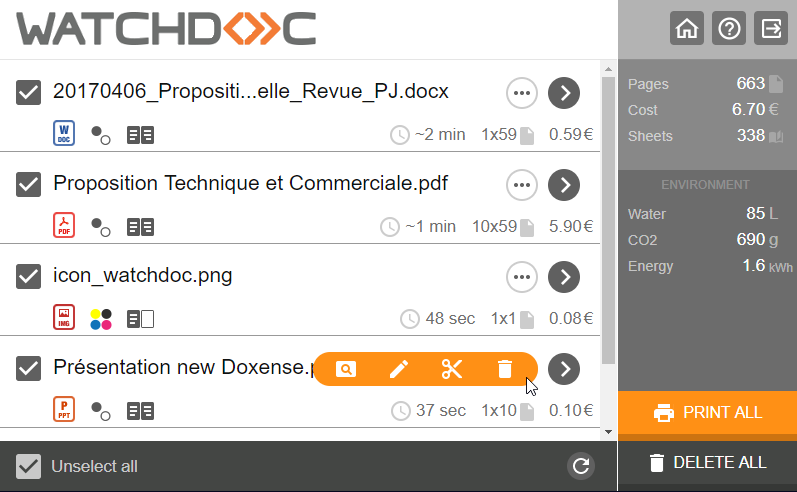
Print jobs list with the delete function
From the list, the user selects the jobs they wish to print or delete*.
By default, all jobs are selected. Users can release all their jobs in 2 clicks: to launch the application, then for the Print All button.
In the last column, you can choose to display the cost, price or number of sheets for each document.
Detailed consultation of print jobs
It is possible to obtain more information about a job by clicking on the icon at the beginning of the line (document type) and then using the zoom tool :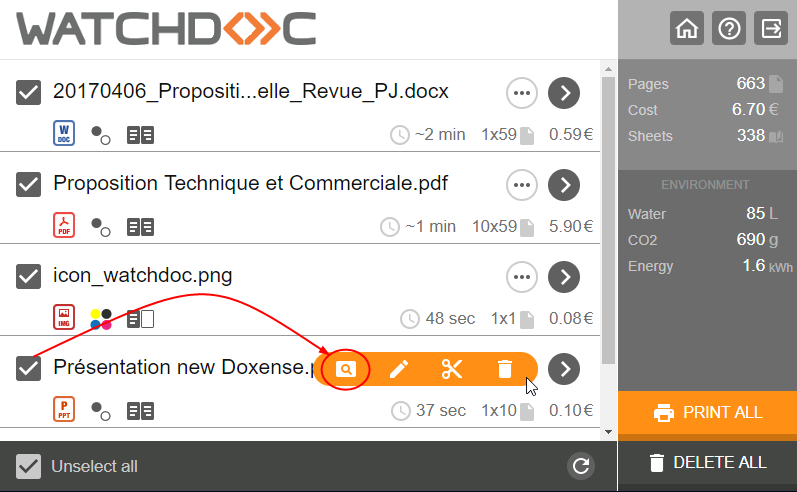
Print-job detailled view
Delete superfluous pages*
This interface allows the user to zoom in on document pages and, if necessary, delete pages from the document so that they are not printed: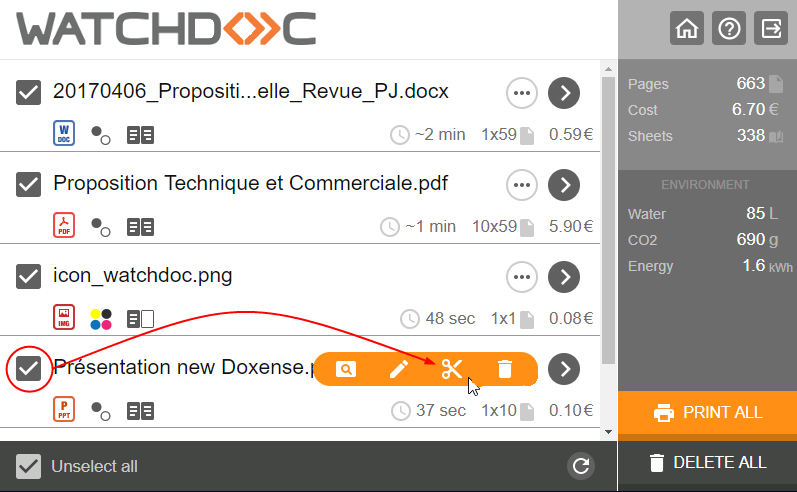
To delete, users click on the pages they do not wish to print.The deleted pages are crossed out in red: they can then click on Print to print only the pages they want: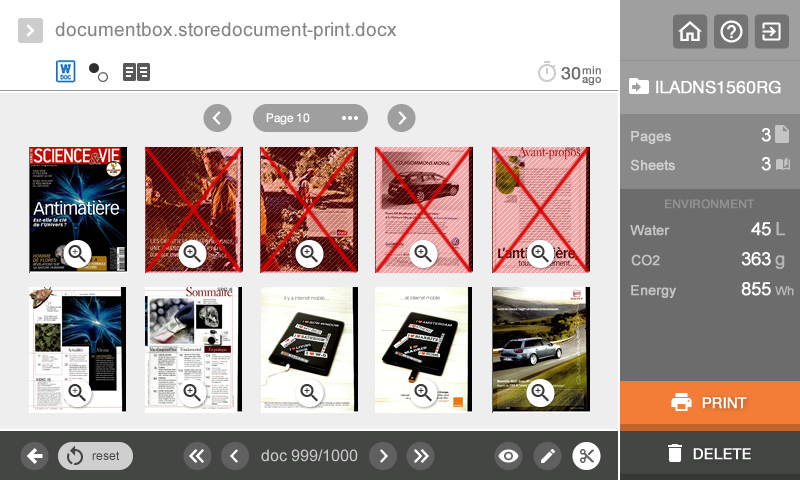
(* if the delete function is supported by the WES)