Brother WES - Configure the WES profile
Create the WES profile
On a clean Watchdoc installation, a first WES profile is automatically created with default parameters at the end of the wizard procedure, but you can, at any time, edit existing profiles to modify them or create a new profile.
-
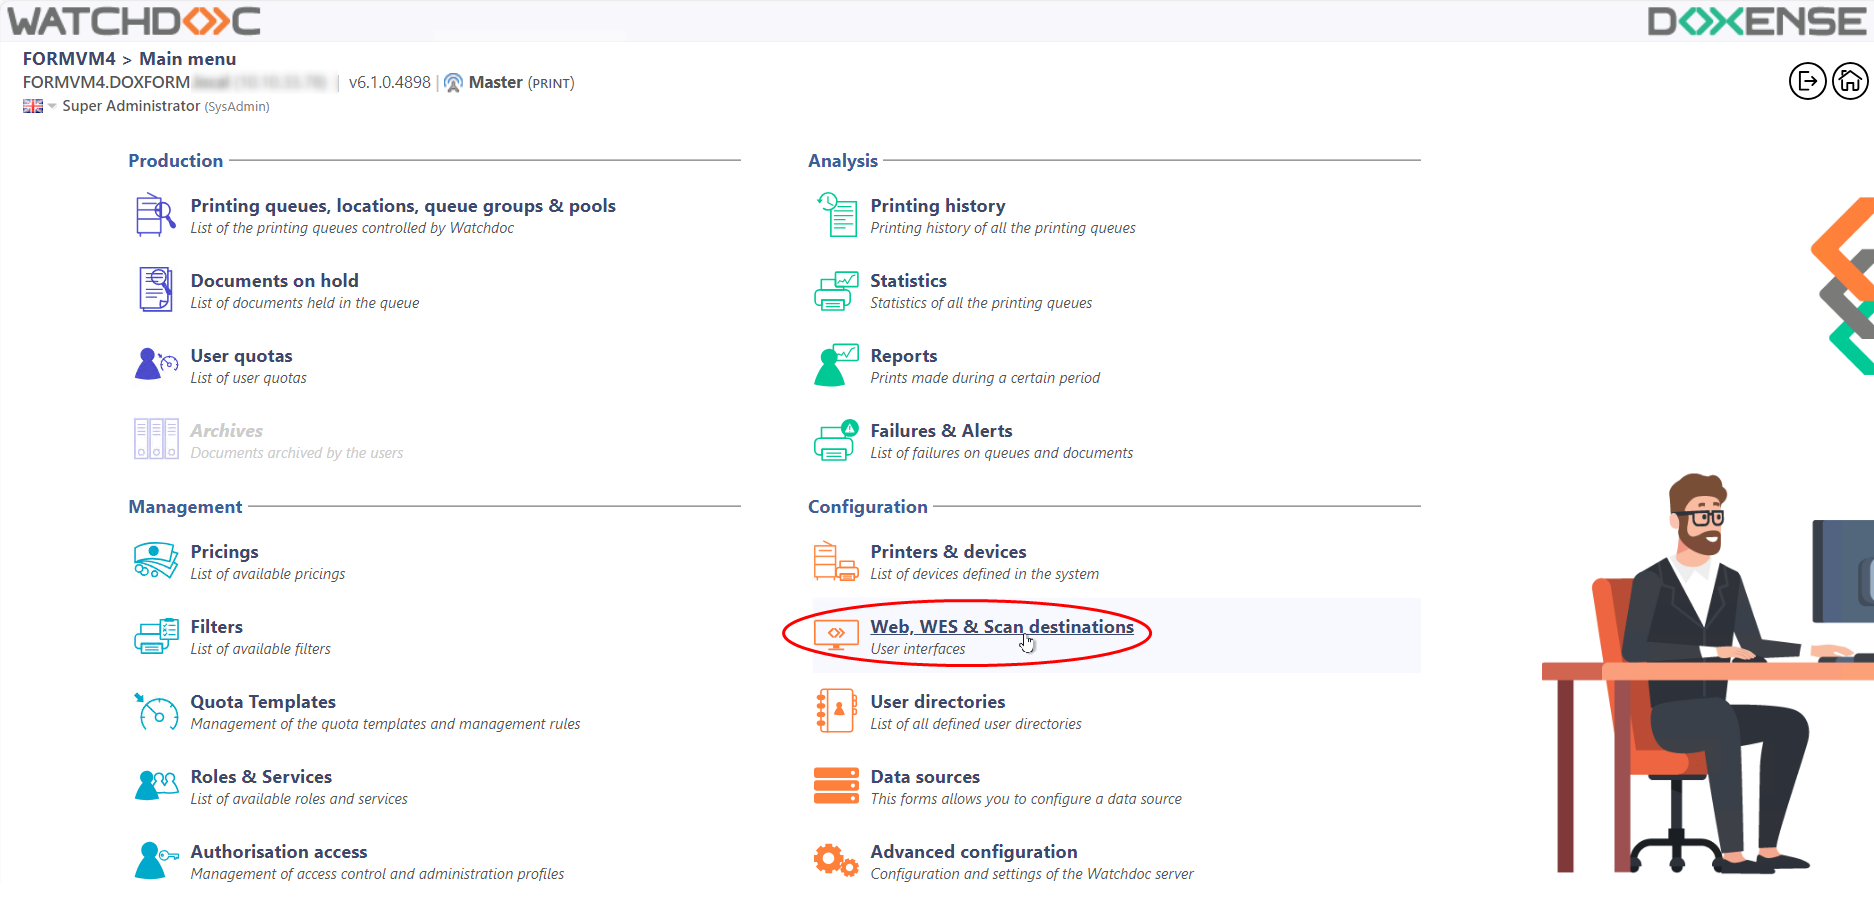
From the Main menu in the administration interface;
-
in the Configuration section, click on Web, WES & Scan destinations:
-
in the Web, WES & Scan Destinations - Client Interface Management interface, click on Create a new WES profile;
-
in the list, select the profile you want to create:
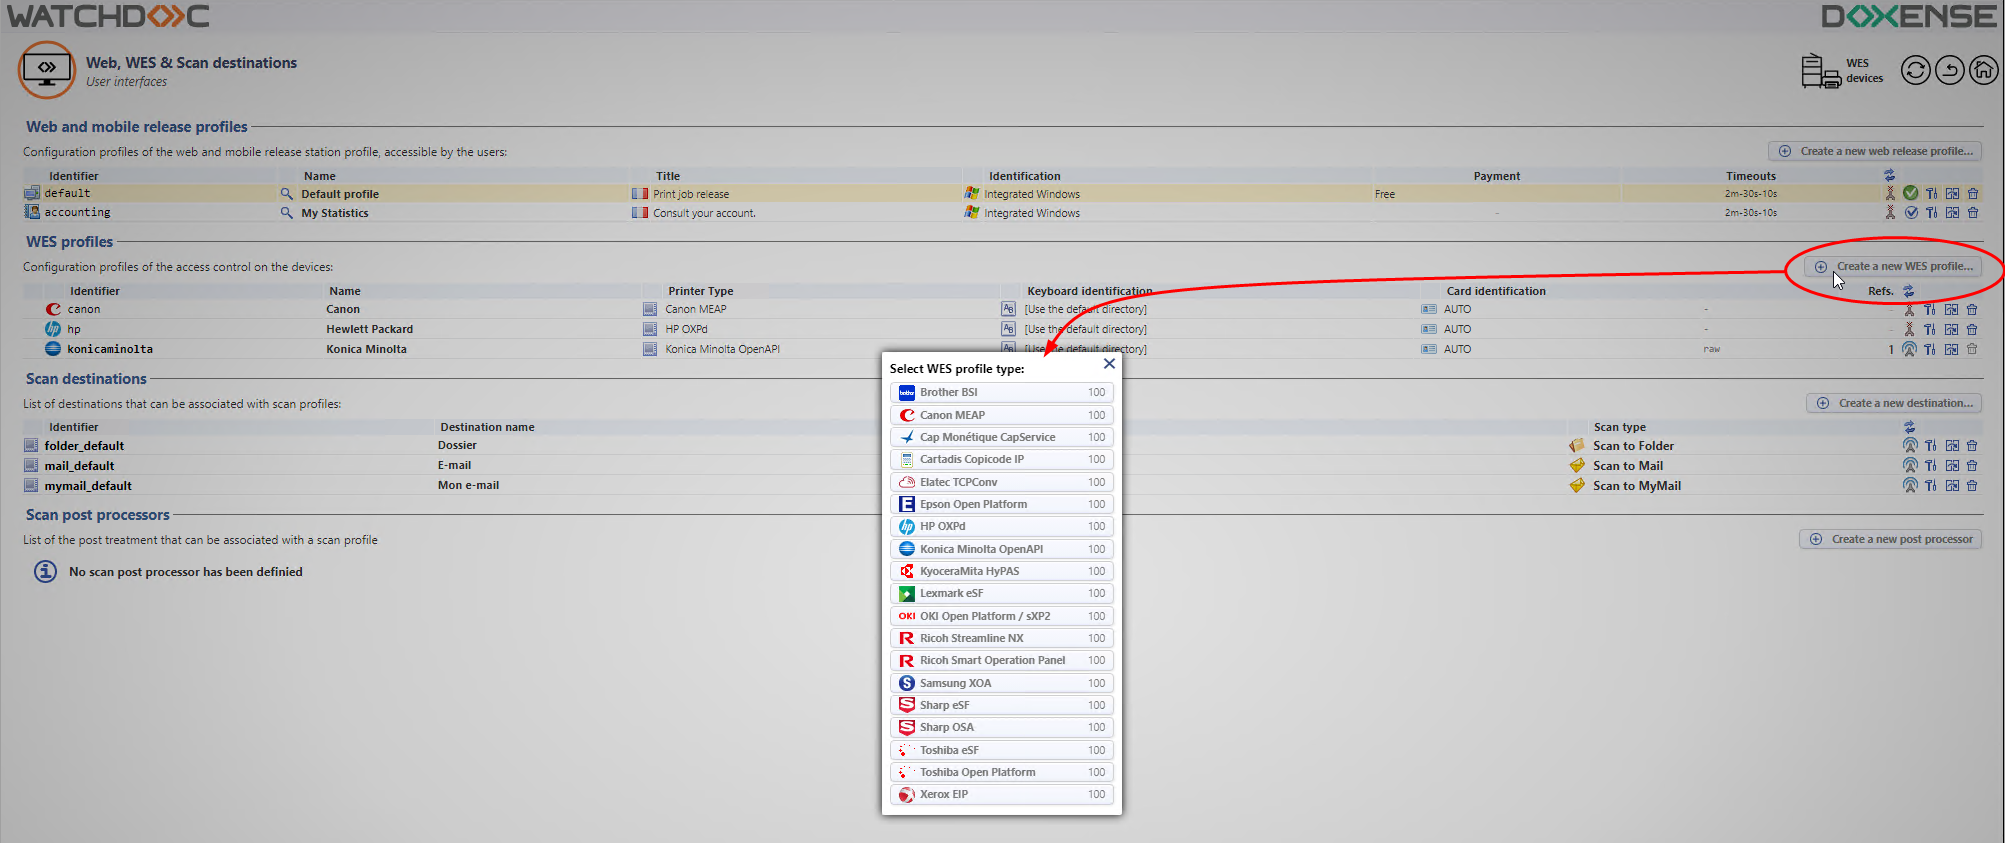
è you will access the Create a WES profile form, which contains a number of sections in which you can configure your WES.
A navigation bar helps you quickly access the desired section:
Configure the WES profile
Configure the Properties section
Use this section to state the main WES properties:
-
Identifier: Enter the single identifier for the WES profile. It can comprise letters, numbers and the '_' character with a maximum of 64 characters. This identifier is only displayed in the administration interfaces.
-
Name: enter the WES profile name. This explicit name is only displayed in the administration interfaces.
-
Global: in the case of a master/slave configuration, tick this box to replicate this profile on the slave servers.
-
Language: Select the WES display language configured from the list. If you select Automatic detection, the WES adopts the language it finds by default in the device configuration.

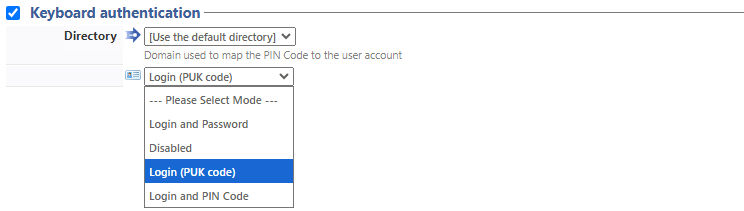
Configure the Keyboard authentication section
You can activate Keyboard and/or Card authentications. For each option, you have to select the directory that Watchdoc will use for authentication requests.
Enable: tick the box (at the section level) to enable user authentication from a physical keyboard or the touch screen one, then set out how this authentication works:
-
Directory: from the list, select the directory to query during keyboard authentication. If no directory is set, Watchdoc will query the default directory
-
Authentication mode: Specify how users are to authenticate themselves (entering a PIN code, a PUK code or an account and password).
-
PUK code authentication: codes are generated automatically by Watchdoc (Generation parameters are in the directory form);
-
Login and PIN Code: consisting of 4 or 5 digits, the user PIN code (1234, for example) is registered as an LDAP attribute or in a CSV file. It is associated to the user login (available with the Watchdoc 5.1 version).
-
Login and password: users will use their LDAP credentials. We do not recommend using this mode.
-
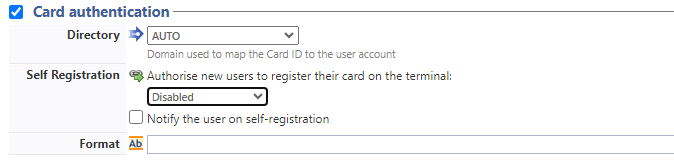
Configure the Card authentication section
Enable: tick the box (at the section level) to enable user authentication from a card, then set out how this authentication works:
-
Directory: From the list, select the directory to query during badge authentication. If no directory is set, Watchdoc will query the default directory.
-
Self Registration: : If you enable enrollment1 from the WES, state how the user assigns their card to their account, using their PUK code or their account and password.
Disabled: the self-registration is not allowed: if the user is unknown, an error message is displayed;
-
with PUK code: the embedded solution will ask the user for its PUK code. If the PUK code is correct, Watchdoc stores the card number with the user's login in its database;
-
Login and PIN code: the embedded solution will ask the user for its login and PIN code. If the login and PIN code are correct, Watchdoc stores the card number with the user's login in its database;
-
Login and password: the embedded solution will ask the user for his login and his password. If the data keyed in are correct, Watchdoc stores the card number with the user's login in its database.
-
Notify the user on self-registration: check this box to send a notification to the user when his badge has been enrolled.
-
-
Format: State, where necessary, how the character string for the badge number string is to be transformed. E.g. raw;cut(0,8);swap.
Configure the Pull print section
In this section, you can change options about the Watchdoc release application: sort order of the document, tariff information and optional pages.
You can bypass this application by enabling the automatic release mode. When the user is authenticated on the device, all its documents are released.
-
Sort Order: Set the documents order on the device screen:
-
Reverse chronological: More recent documents will top the list;
-
Chronological: Older documents will top the list.
-
Release all documents at login: When the user logs on by swiping his card or typing his PIN code, Watchdoc releases all user documents on the device where he logs on.
In this case, the user cannot access the list of pending jobs to choose which ones to print.

-
Configure the Device section
This section is used to define the connection mode between the server and the print devices.
-
Server address: This parameter is used to specify whether the print devices connect via the IP address, DNS alias or DNS name (determined when the service is started) of the Watchdoc server. If the server has several IP addresses or if you want to specify the address manually, select ‘Address shown’ and fill in the field.
N.B.: if the server has several IP addresses, Watchdoc uses the first one it finds. If the device is on a different VLAN, the WES may not be able to contact Watchdoc. In this case:
-
create a WES profile per IP address
-
choose Custom Address and specify an IP for each profile
-
when installing the WES on the print queue, select the WES that corresponds to the device's VLAN.
-
-
Maximum name size: specify the maximum size of the server name in characters.

Validate the profile
1. Click the button  to validate the WES profile configuration.
→ Once validated, the WES profile can be applied to a print queue.