Canon WES - Install the WES on a queue
Installation prerequisites
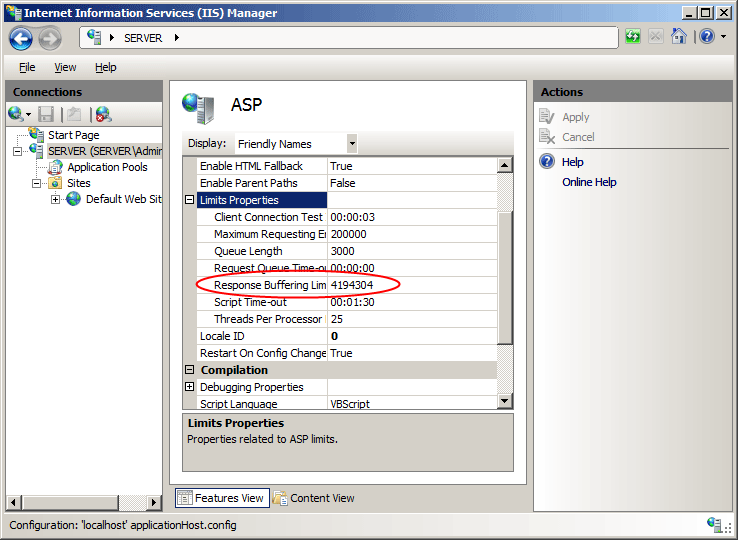
To enable the download of Canon installation files, the IIS web server’s response buffer limit must be set high enough:
-
Log in to Internet Information Services (IIS) Manager as an administrator;
-
in the list of sites, select your Watchdoc site and right-click;
-
go to the Behavior menu > Limits Properties;
-
increase the size of the Response Bufferring Limit:
Access the interface
-
From the Main Menu of the Watchdoc administration interface, in the Production section, click Print Queues, Queue Groups & Pools:
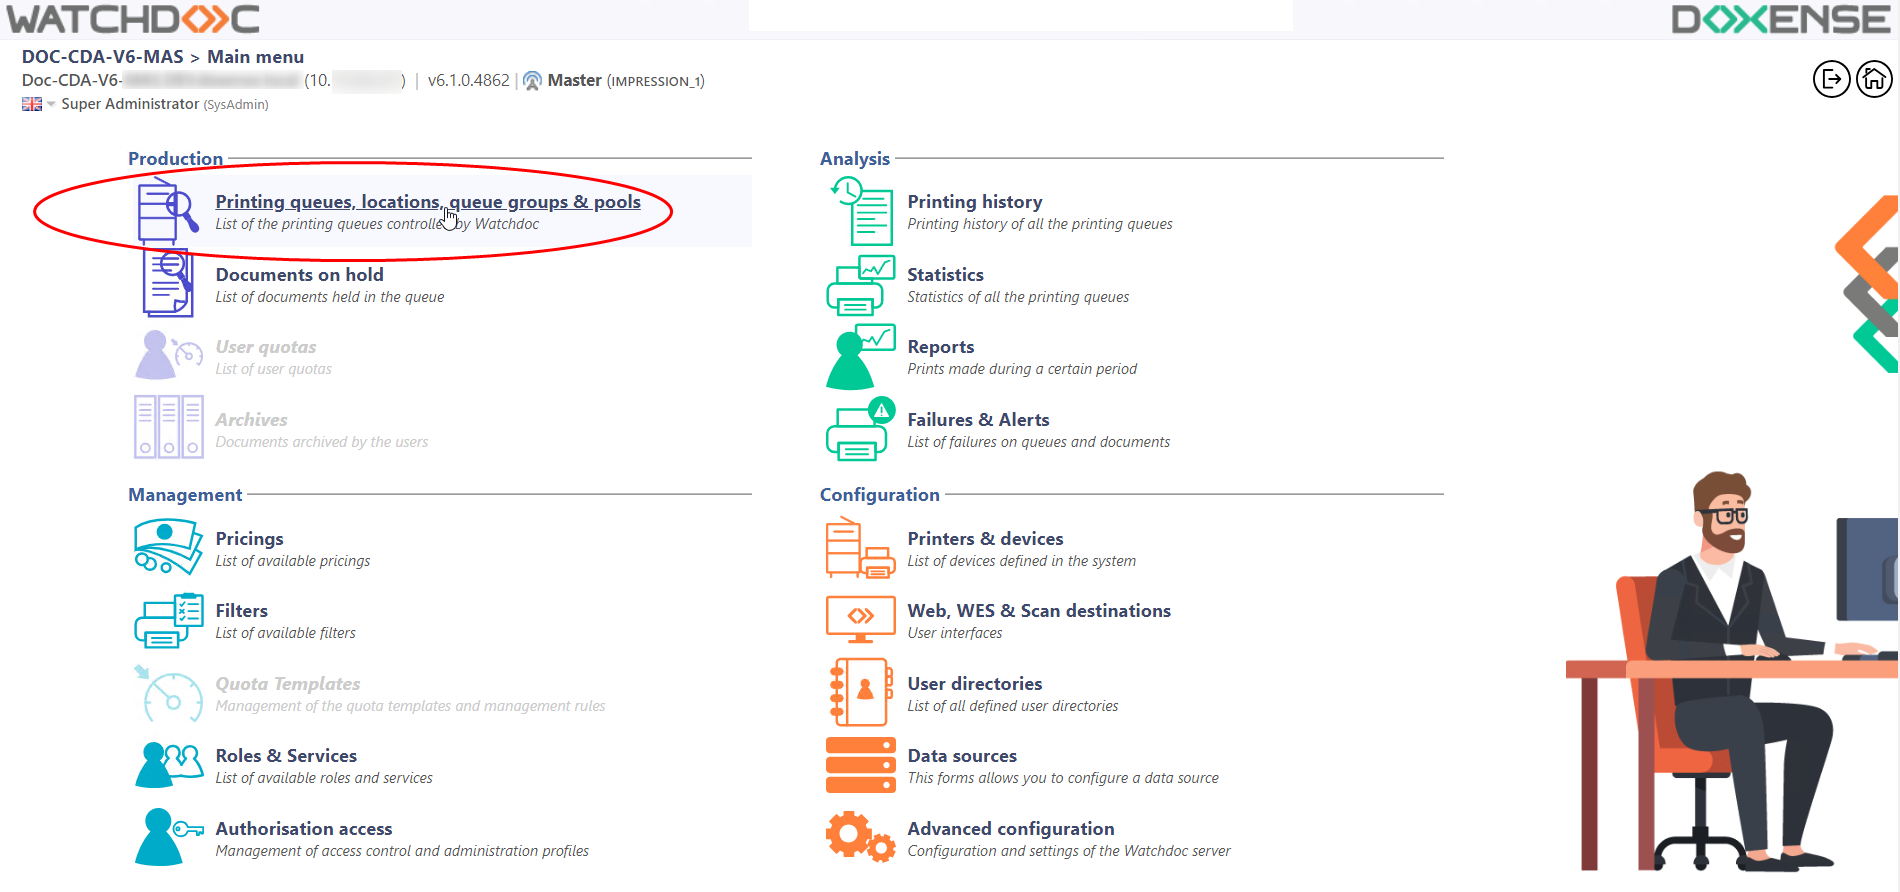
è This takes you to the list of Print Queues controlled by Watchdoc.
-
Click on the name of the queue on which you want to install the WES.
Presentation of the WES section
Once the WES profile has been enabled on the queue, the Canon MEAP section appears in the Queue Properties interface. This section contains several buttons:
-
WES Devices: provides access to a page displaying all WES devices configured on the server;
-
Status of the application: gives access to the Monitoring section (below in the interface);
-
Install: allows Watchdoc to install WES on the device (may take 30 seconds), as well as the Elatec badge module;
-
Access Device WEB Interface: provides access to the device administration website;
-
Enable logs / Disable logs: buttons to enable/disable the saving of WES-related logs;
-
Download logs: button to download the log file (if enabled) for diagnostic analysis;
-
Access the device's web interface: provides access to the device administration website;
-
Edit the settins: gives access to the WES configuration interface on the print queue;
-
WES configuration page: gives access to the WES configuration interface in Watchdoc;
Install the WES
Note: Before installing a WES, check whether a WES is already installed. If so, you must uninstall the previous WES before starting a new installation.
-
In the queue management interface, click on the Properties tab.
-
In the queue properties, the Canon MEAP section is displayed.
-
Click on the Install button:

-
you will be taken to the Manual installation required interface, where the installation is divided into 5 steps:
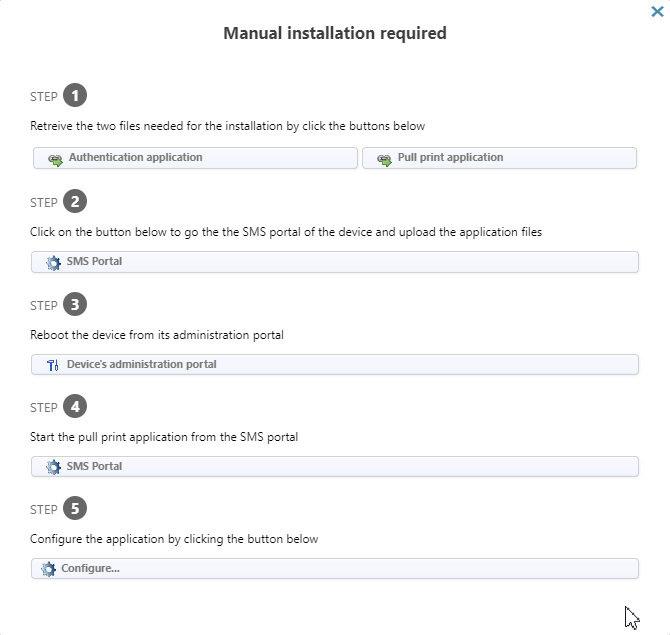
Step 1
-
click on the Authentication application button to download the canonAuthApp.jar file;
-
then click on the Pull print application button to download the canonPpApp.jar file.

Step 2
-
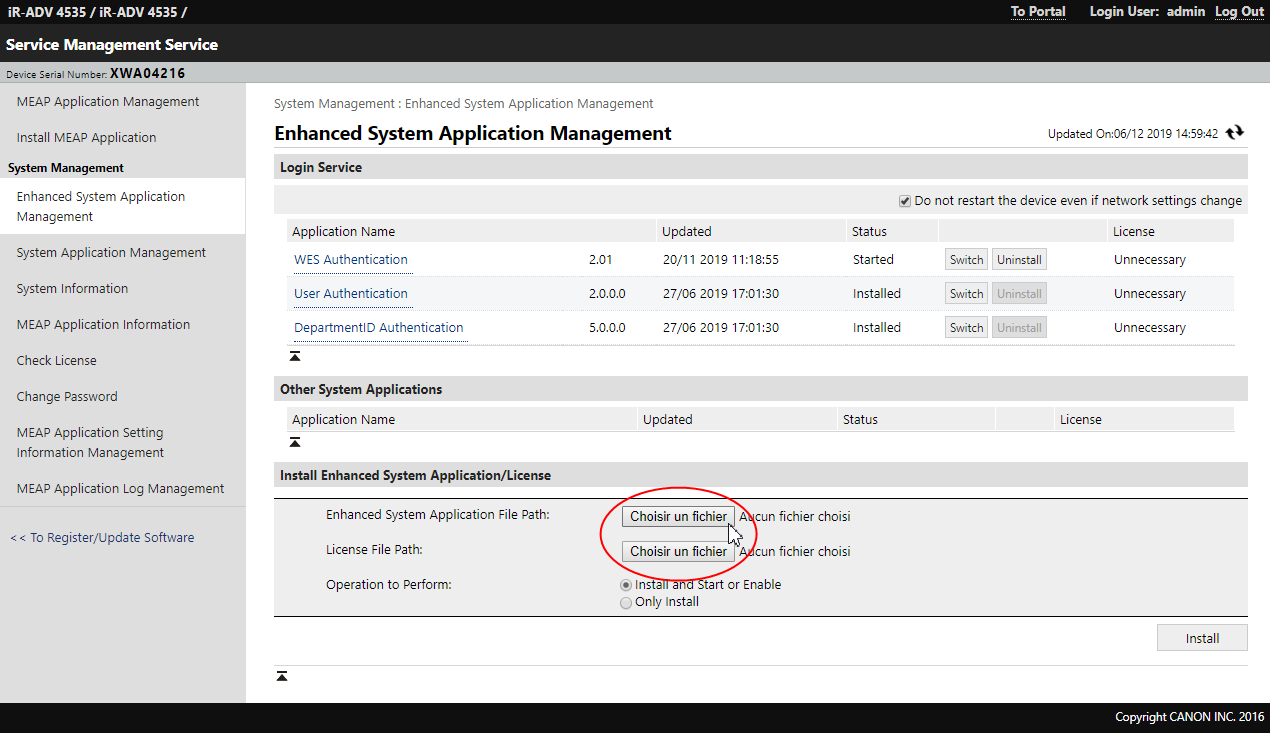
click on the SMS Portal button to access the printing device administration interface (Service Management Service);

-
authenticate yourself as an administrator with the login and password provided by Canon®:
-
in the Service Management Service interface, System Management menu, click on the Enhanced System Application Management entry;
-
in the Install Enhanced System Application/License section,
-
for the Enhanced System Application File Path setting, click on the choose a file button;
-
select the canonAuthApp.jar file previously uploaded to your workspace;
-
for the License File Path setting, click on the Choose a file button;
-
select the canonAuthAppv1.0.lic file that you have previously downloaded:
-
-
once the two files downloaded, click on the Install button and accept the terms of the installation.
The WES Authentication application appears in the list at the top of the Connexion Service page.
-
Click on the Change button corresponding to the installed application to activate it:

èThe application status changes to Start after restart.
-
In the SMS portal, click on the Install a MEAP application menu item.
-
In the Install a MEAP application/license section ;
-
for the Application file path parameter, click on the Choose a file button;
-
select the WES Pull Print_1.0.jar file previously uploaded to your workspace;
-
for the Licence file path parameter, click on the Choose a file button;
-
select the WES_PullPrint_v1.0.lic file that you have previously downloaded:
-
-
click Install, accept the terms of the installation and wait for it to complete.
-
-
Back in the Watchdoc interface Manual installation required, click on the Start the device from its administration portal button;

-
in the SMS portail, click Settings/Registration, then Perform Restart:
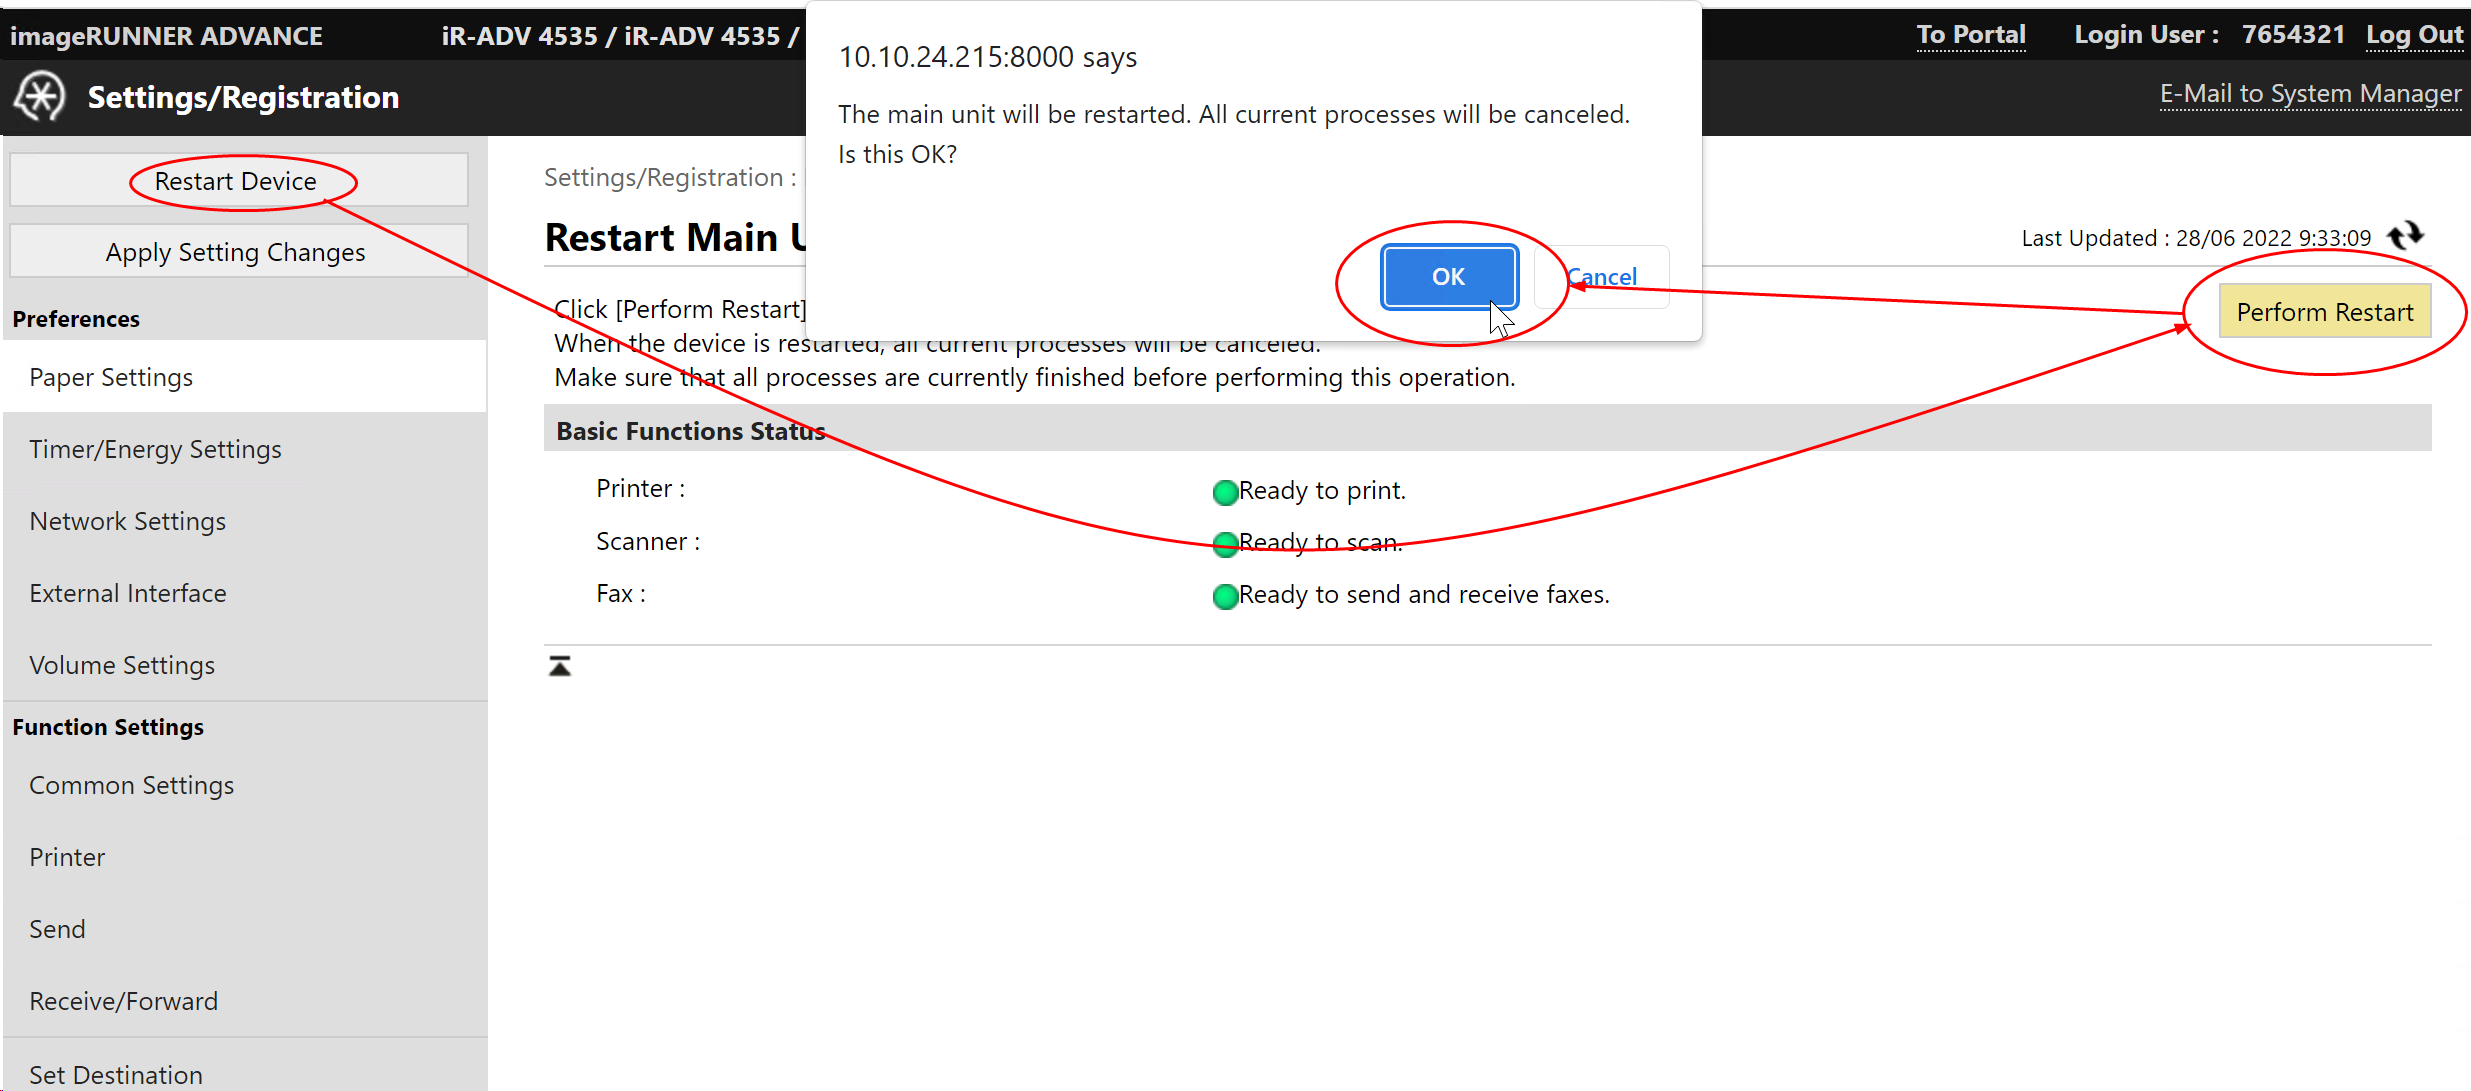
-
Confirm twice that you want to restart the device (a message will inform you that jobs in progress will be lost).
-
Wait for the device to restart.
-
back to the Manual installation required, in the Step 4, click on the SMS portal button;

-
in the Management portal, in Application Name, for WES Pull Print, click on Start;

-
Wait for the device to restart.
Step 3
Step 4
Step 5
-
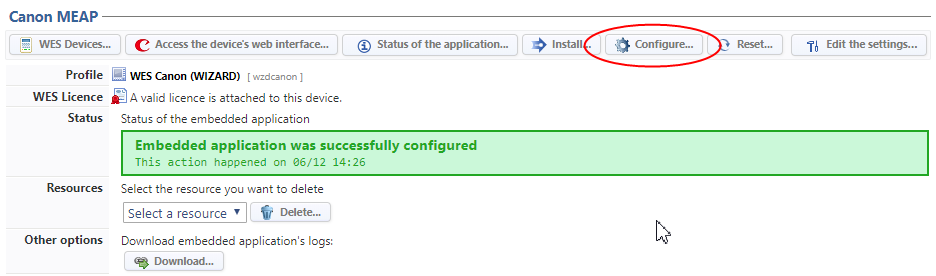
In the Manual installation required interface, Step 5, click on the Configure button:

è This will push the address of the server to the device so that it may be able to communicate with the server and to function correctly.
-
If the WES is correctly installed, a message displays in the Status section of the WES profile section of in the queue properties.
-
Click on the Configure button to complete the installation:
-
When the operation is complete, new Update buttons is displayed.
-
Run a print job to check that the WES is working properly.