Hewlett Packard - Prerequisites and prior configuration
Configure ports
The network ports to open are the following:
| Source | Port | Protocol | Target |
| Service Watchdoc |
TCP 57627 TCP 7627 |
HTTP HTTPS |
Printing devices |
Device configuration
Configuration of the Hewlett-Packard WES must be preceded by configuration on the device from its web administration interface.
Admin password
By default, no security parameters are defined on devices. To enable security settings:
-
access the device administration website using a browser ;
-
cick on the Security tab;
-
In the General Security interface, enter a password for the admin user (or reset the password if it already exists):

Future Smart Level
To operate, WES v3 requires at least FutureSmart level 4.
To check the FutureSmart level field in the administration interface:
-
open the device administration website using a browser;
-
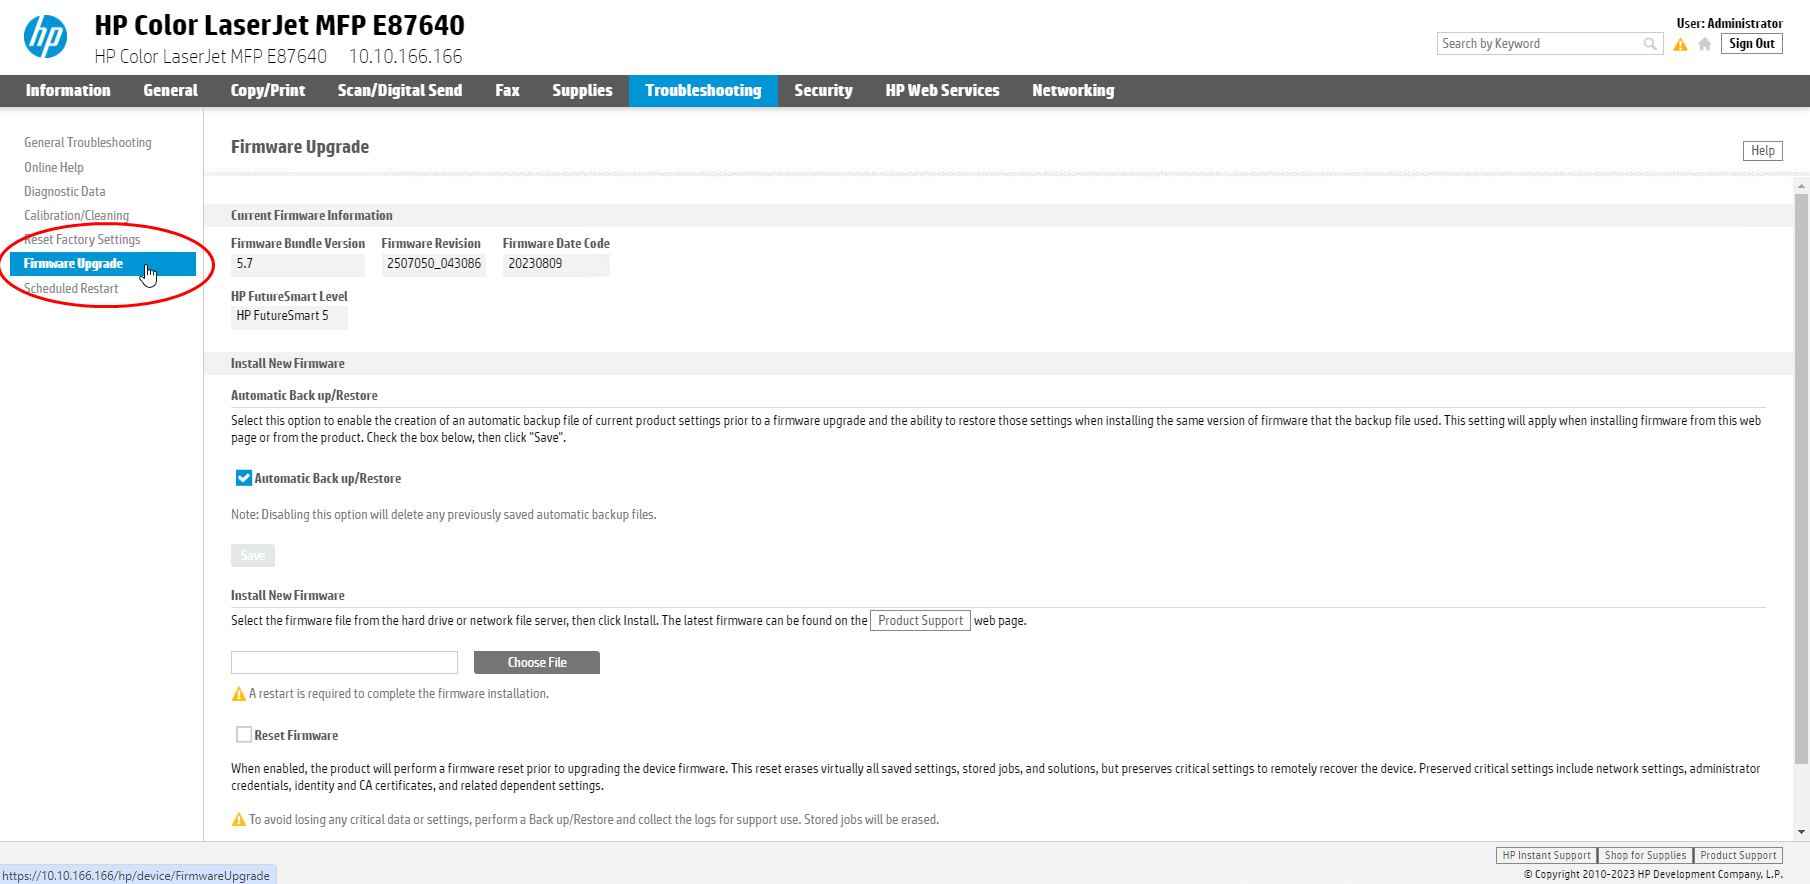
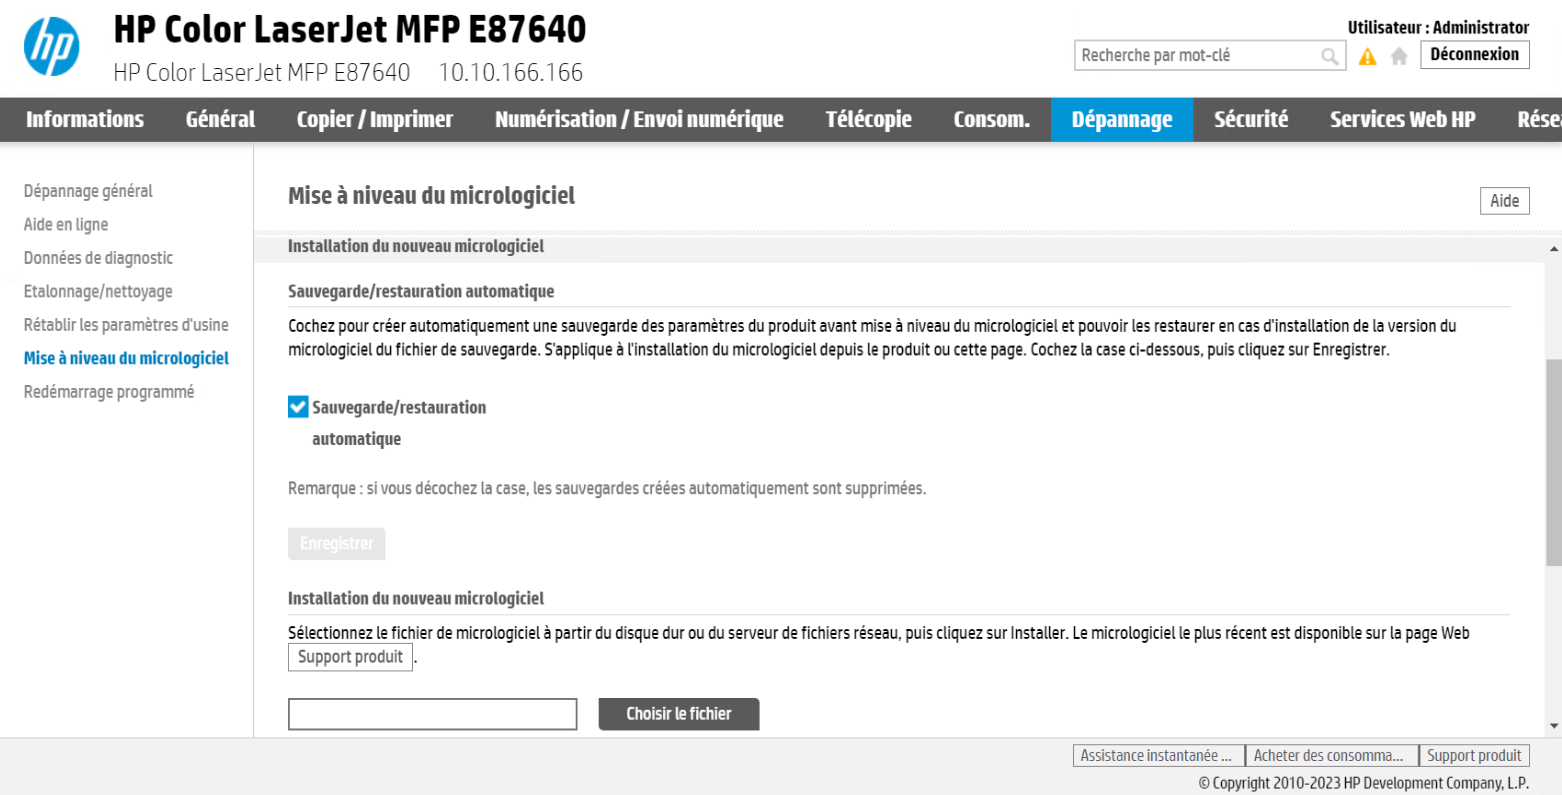
from the administration interface, go to the General or Troubleshooting tab;
-
In the left-hand menu, click on Firmware Update;
-
In the Current Firmware Information section, check the HP FutureSmart level;
-
if the level is not at least 4, go to the section Installing new firmware;
-
go to the Product Support web page and select a higher firmware version;
-
check the firmware date: the firmware must be at least March 2014 old;
-
download the firmware to your workspace;
-
return to your device's administration interface and click on Choose file:
-
browse your working space to download the new firmware version;
-
once the firmware has been installed, restart your printing device to complete the installation;
-
the device will restart and the update will begin.
Scan to mail - Scan and send by e-mail
This function allows the user to scan a document and send it to an email address.
If you want to use this function on your device:
-
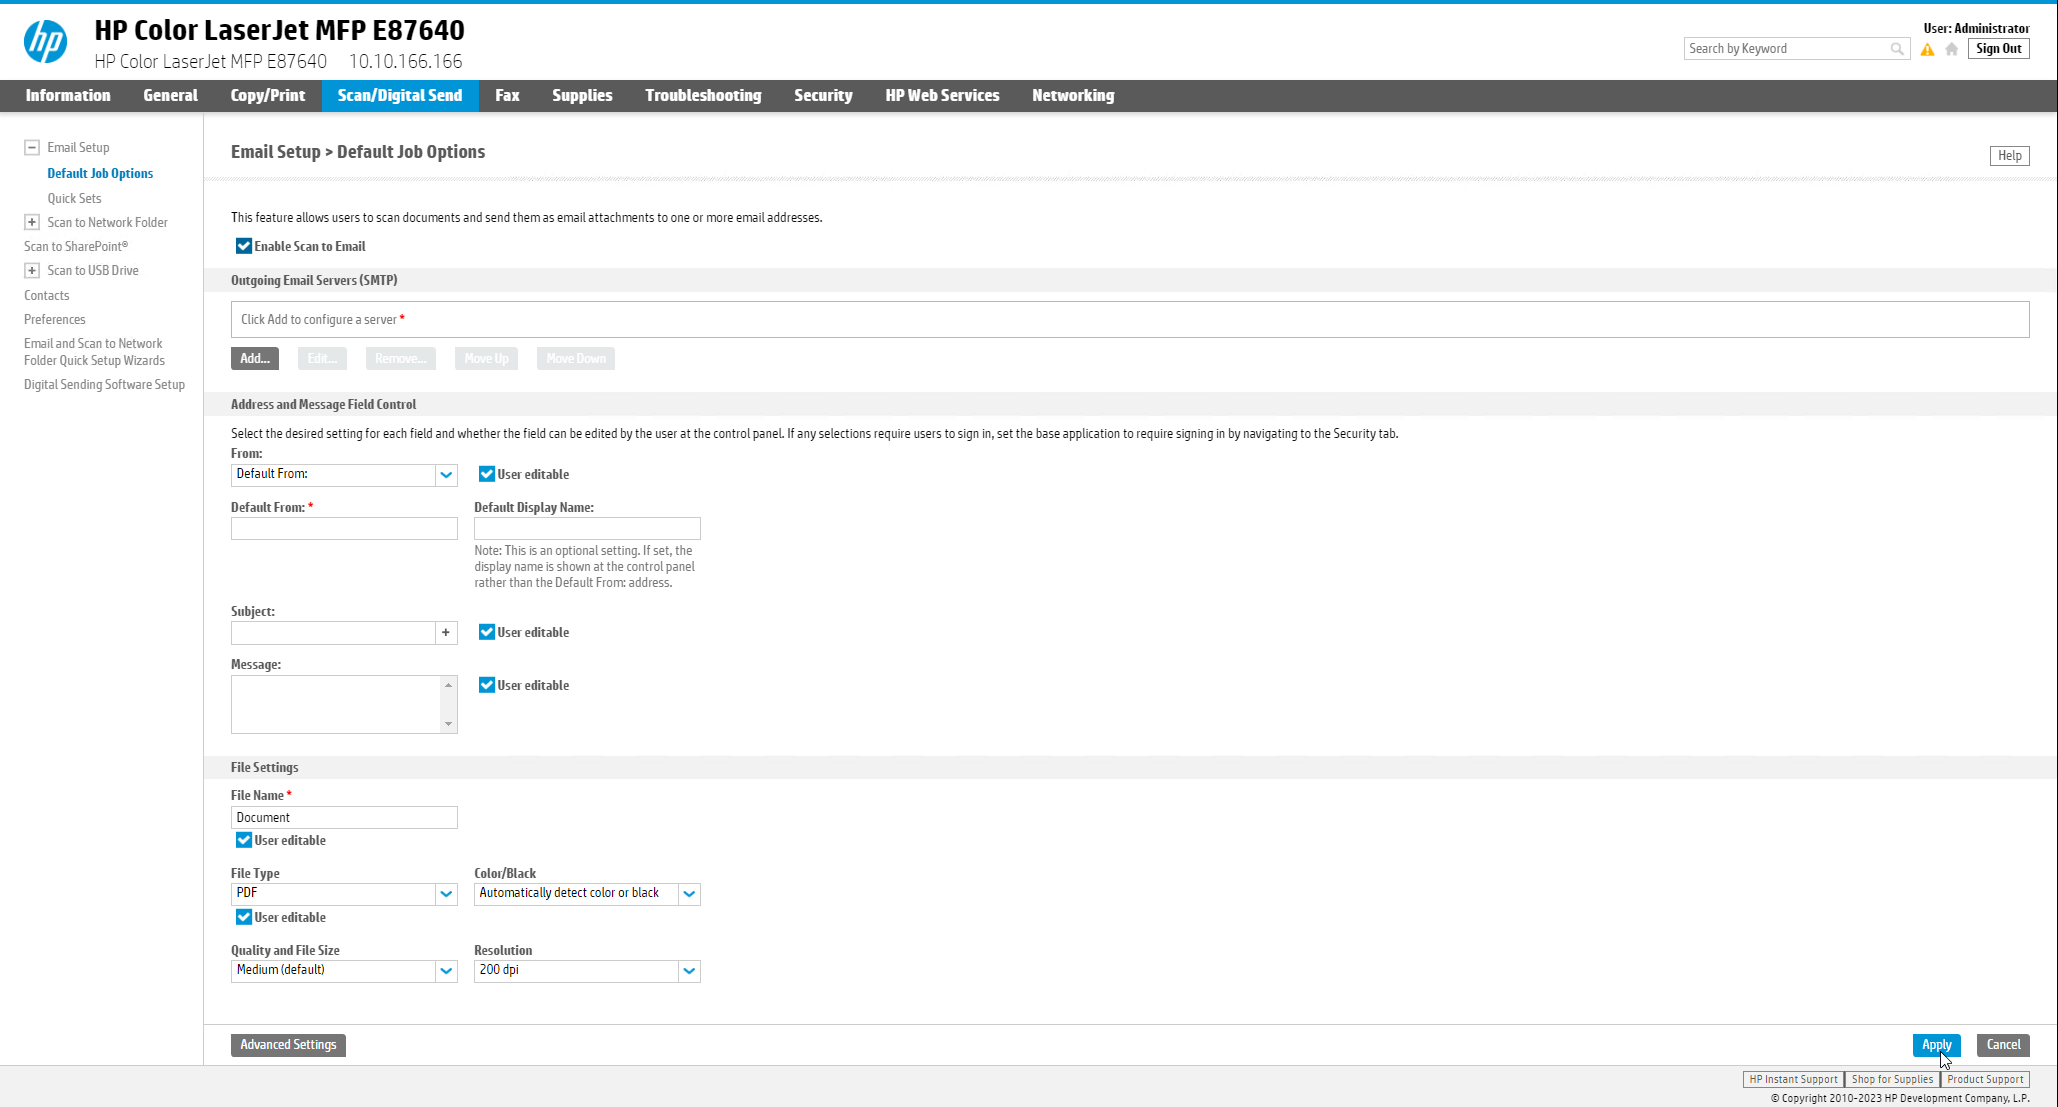
In the device administration web interface, on the Scan > Digital Send tab, select the Enable Scan to email check box Activate Scan to send by e-mail;
-
then click Default Job Options ;
-
on the Default Task Options interface, select the Enable Scan to network folder check box;
-
complete the settings
-
SMTP server: enter the address of the SMTP server used;
-
From: select User address (login required) and uncheck the User editable box ;
-
-
then click Apply to accept the settings:
Scan To Folder - Scan to a personal folder
This function allows the user to scan a document and send it to a personal network folder.
You will need to set up a service account with write access to users' network sub-folders.
If you want to use this function on the device :
-
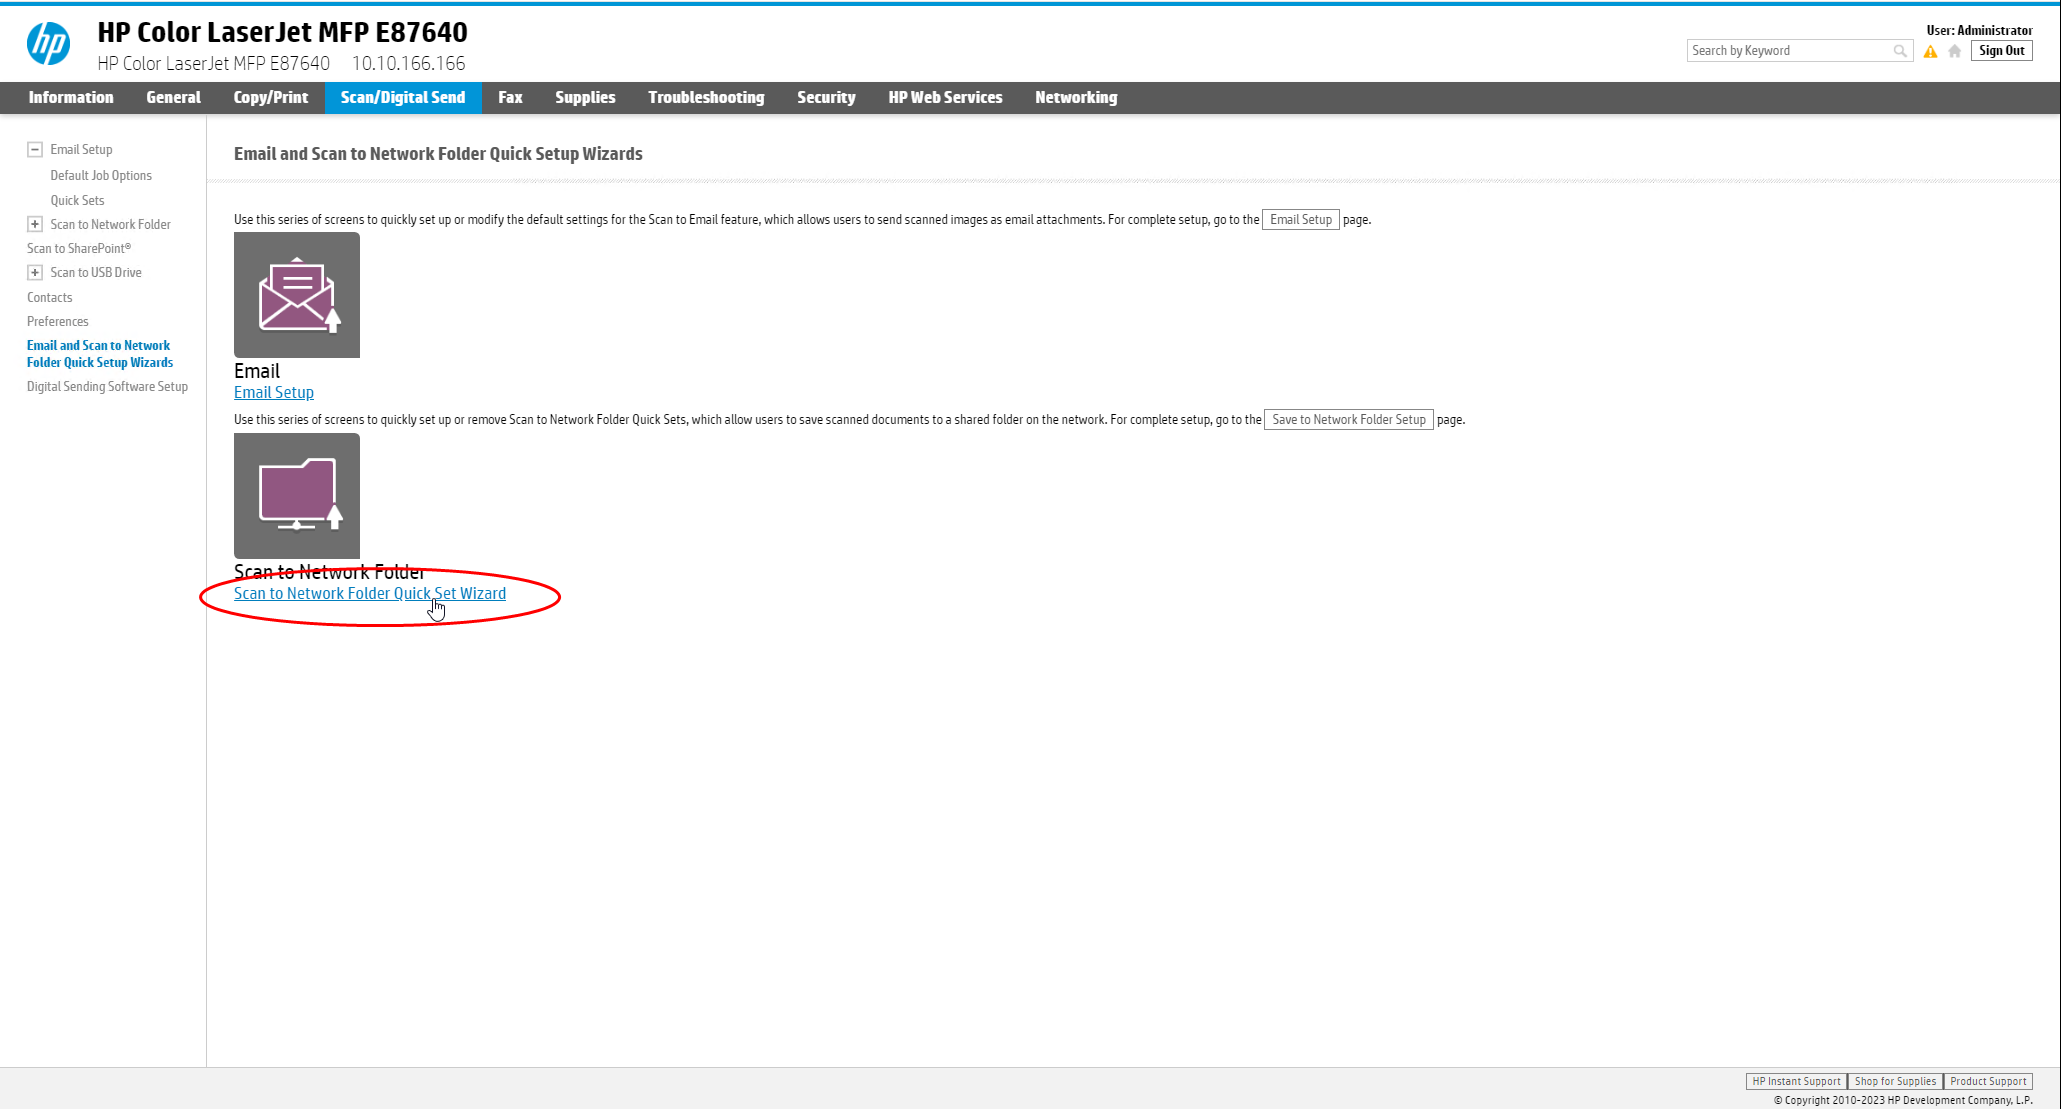
in the device administration web interface, on the Scan > Digital Send tab, click the Scan to network folder menu entry;
-
In the Default Job Options interface, select the Enable Scan to Network Folder check box;
-
Complete the Folder settings (path, authentication settings, Windows Domain) according to how you have configured the network folders dedicated to this function.
-
then click Apply to accept the settings.