Konica Minolta WES - Troubleshoot the WES
General troubleshooting rules
In order to enable the Doxense Support team to establish a fast and reliable default diagnosis, please communicate as much information as possible during the declaration of the inciden
-
What? What procedure can be used to reproduce the incident?
-
When? What date and time did the incident occur?
-
Where? On which printer did the incident occur?
-
Who? On which user account did the incident occur?
-
Watchdoc.log: thank you for providing the Watchdoc.log file;a
-
config.xml file: thank you for providing the Watchdoc.log file;
-
server/device communication logs: please activate the trace files on each file.
Once this information has been gathered, you can send a resolution request from the Connect portal, the incident management tool dedicated to partners.
To obtain the best possible record of the data required for diagnosis, use the Watchdoc DiagTool® supplied with the Watchdoc installation program (cf. Creating a log report with DiagTool ).
Scan, fax and photocopying are not in Watchdoc
If the scan, fax and photocopy jobs are not counted by Watchdoc, verify that the address (host name or IP) of the Watchdoc server configured in the device is correct:
-
Iin the configuration interface of the queue, in the WES section, click on the button Application status (displayed when the WES is properly installed);
-
Click the Download button to download the log files and WES configuration;
-
In the downloaded .zip file, open the Config.json file using a text editor and check the information corresponding to the address of the server (Address) and ports;
-
If the configuration of the address and / or ports is not correct, click on the Configure button on the queue configuration interface.
-
Verify that the procedure has resolved the problem.
Activating WES Traces
To diagnose a problem with WES Konica Minolta applications, you need to activate the log files specific to WES communications :
-
in the Watchdoc web administration interface, from the Main Menu, Production section, click Printing queues, queues groups & pools;
-
In the list of queues, click on the name of the queue with the WES for which you want to activate the trace files;
-
in the queue management interface, click on Properties;
-
in the WES section, click on the Edit the settings button:
-
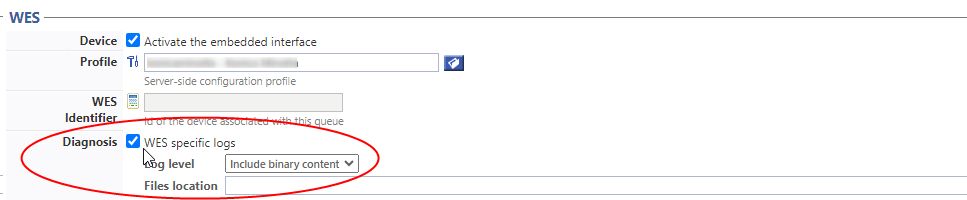
in the WES>Diagnostics section, tick the Enable traces box;
-
in the Trace level list, select:
-
Auto: retains standard traces;
-
Include binary content: retains detailed traces.
-
-
In the Path field, enter the path of the folder in which the trace files should be saved. If you leave the field blank, the trace files will be saved by default in the Watchdoc_install_dir/Logs/Wes_Traces/QueueId installation folder:
Access to the device control panel
Context
When installing the Konica Minolta WES, it may be usefull to access remotely the control panel, especially when the device is far away and when actions must be performed on it. This remote controle avoids physical movement to the device.
In short
To activate this remote control, it's necessary to:
-
activate the Server Remote Panel in the device configuration interface;
-
use the https://[IP-DEVICE]:50443/panel/top.html URL to access the control panel.
Detailled procedure
To access the control panel:
-
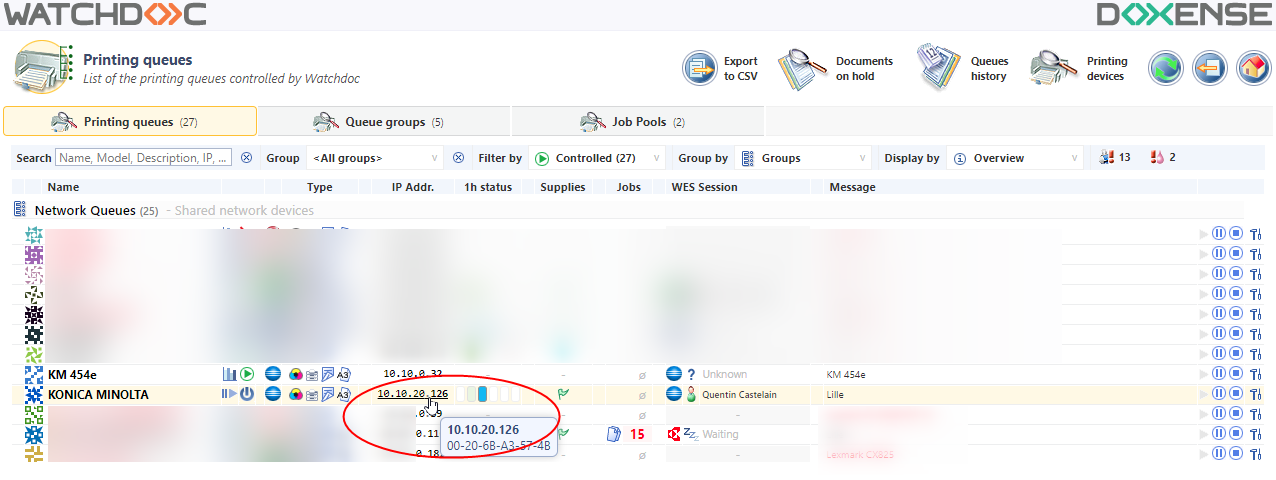
in Watchdoc, from the Main Menu, Production section, click on Printing queues, queue groups &pools;
-
in the printing queues list, locate the Konica Minolta queue concerned and click on the IP address allowing to access the administration interface :
-
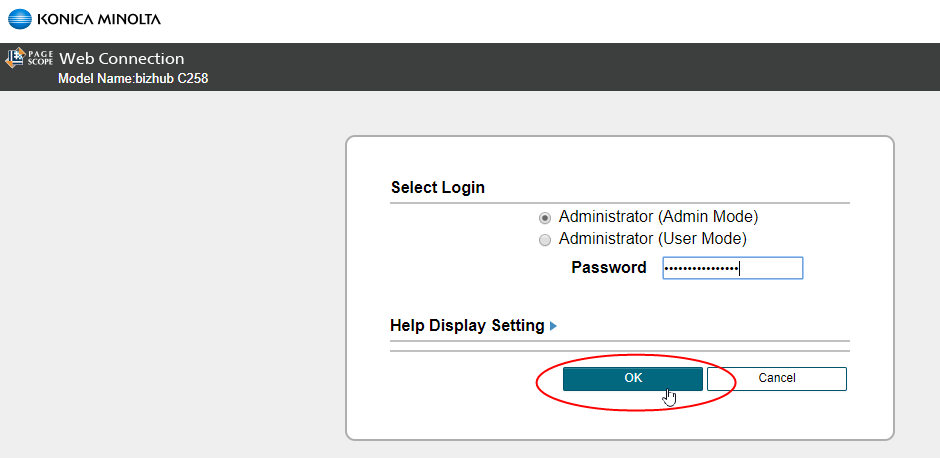
in the Konica Minolta Web Connection interface, log as an administrator;
-
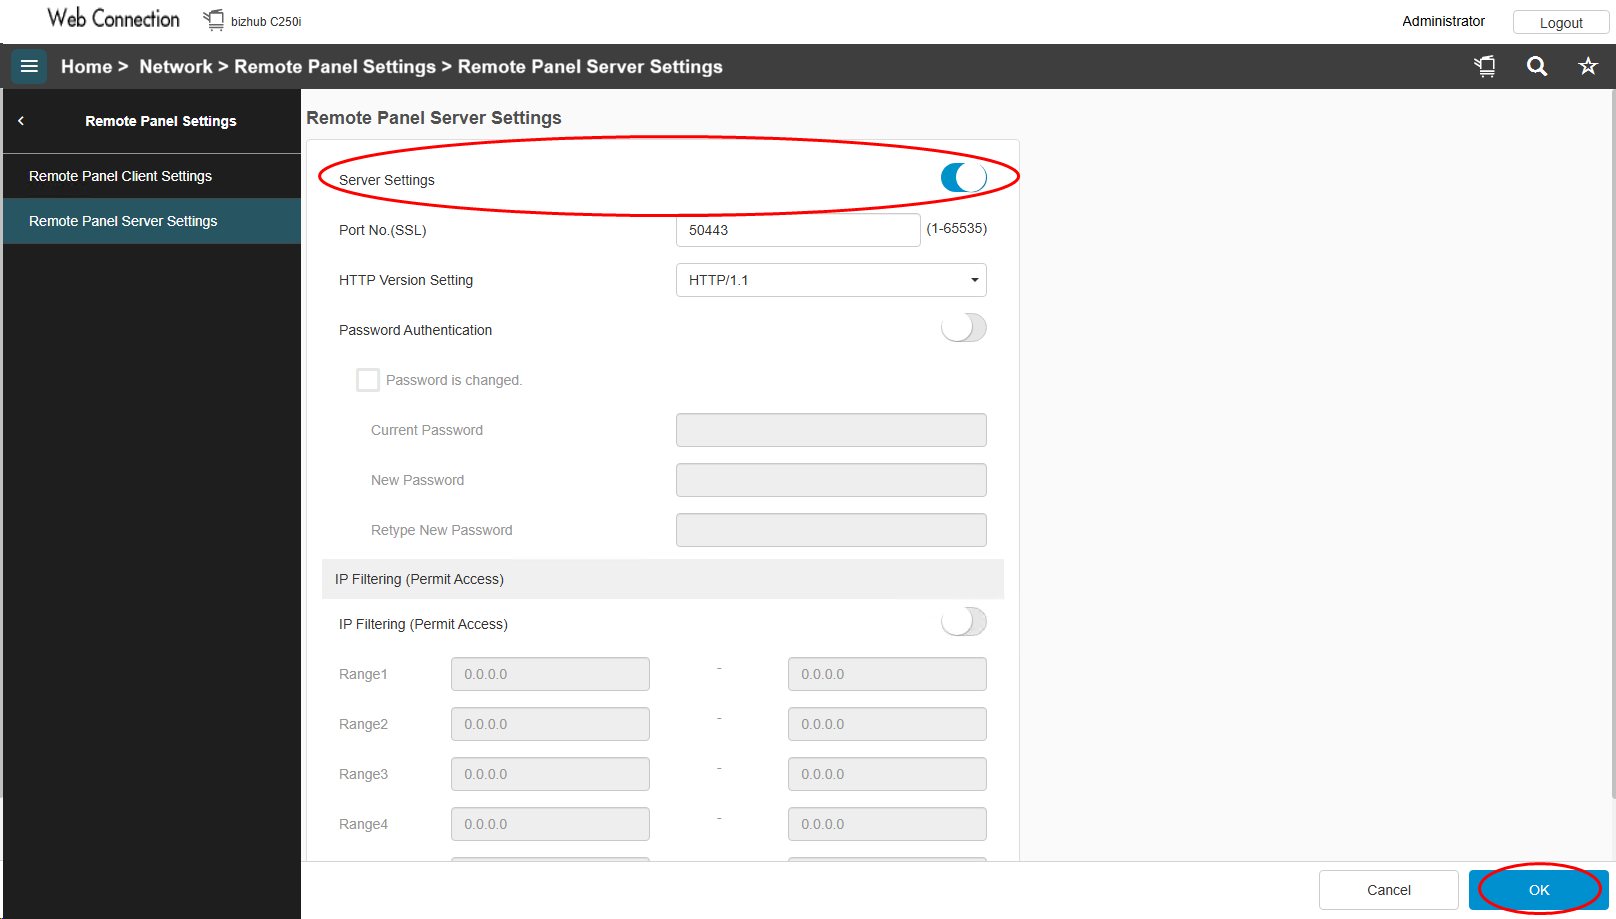
in the Web Connection device site menu, click on Network > Remote Panel Settings > Remote Panel Server Settings;
-
in the Remote Panel Server Settings configuration interface, for the Server Setting parameter, select ON in the list;
-
then click on OK to validate this setting:
-
once this setting validated, use the https://[IP-DEVICE]:50443/panel/top.html URL to access the device control panel:
èWhen the test is OK, go back to the device configuration web interface and reactivate the Password Authentication = ON setting, then click on OK to validate.
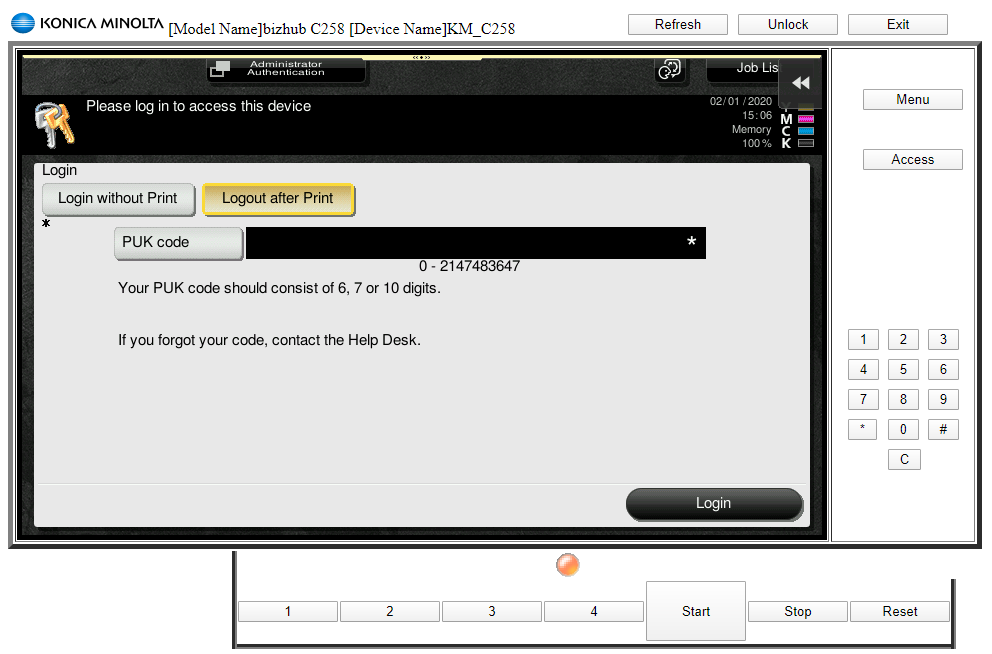
Error message when authenticating with PUK code
Context
When a user authenticates using his PUK code on the device's display, an error message may appear informing him that his PUK code is invalid, even though the code has been entered correctly, especially if the code begins with a zero (0).
Cause
The error is due to a problem transforming the PUK code when entered on the peripheral's keyboard, for 2 main reasons:
-
The devices' physical keyboards only allow 9 digits to be entered, whereas the default algorithm has 10 digits;
-
the devices' physical keyboards systematically delete the first character of the PUK code if it is a 0.
Resolution
To solve this problem, select the "Virtual keyboard" option when configuring the WES profile, in the Keyboard authentication section: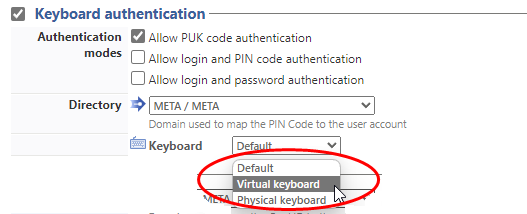
To ensure that profile changes are taken into account, proceed as follows:
-
stop the file (or group of files) on which WES is installed;
-
modify the WES profile and confirm;
-
restart the queue (or queue group);
-
reinstall the WES on the queue (or queue group).
Connection to the server error
Context
When activating the WEB browser onto a Konica Minolta device, it occurs that an error message is displayed to alert that the connection to the server is not possible (ErrorCode:MAE001): Failed to connect to server - Please enter the license code and validate the function - Error Code:MAE001.
|
|
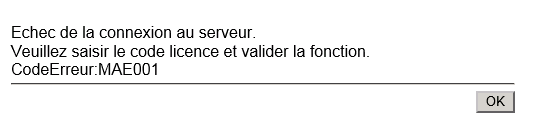
When you click on OK, you access the web interface to Generate License Code.
Cause
This problem occurs when the device does not have any licence code.
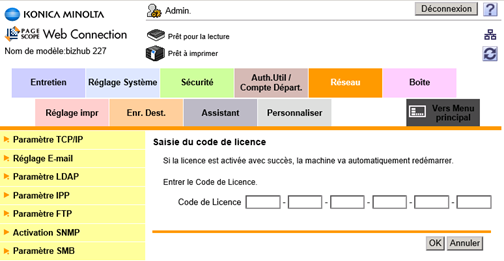
Resolution
-
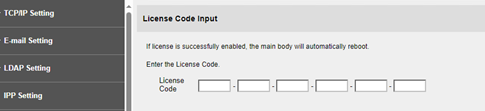
Go to the web site Konica Minolta Generate Licence code (https://lms.konicaminolta.com/activate);
-
Enter the device serial number, then click on Next to obtain the licence code;
-
Enter the licence code in the device web administration interface (Page Scope Web Connection) and click on OK to validate;
-
Check that the connection between the device and the server is operational.
Managing the anonymous users access rights
May 2020
Context
It may be necessary to manage the anonymous users access rights on a Konica Minolta (4e/8 & sup. range) printing device operating with a WES V3. For example, to allow the Anonymous user to scan from the device.
In brief
-
allow the Anonymous connection on the WES v3 profile ;
-
manage the users rights on the queue or the queues group concerned.
Detailed procedure
Configure the WES v3 profile
-
in Watchdoc, from the Main Menu, section Configuration, click on Web & WES templates;
-
in the WES profiles, edit the Konica Minolta WES v.3 profile applied on the printing queues on which you want to allow the Anonymous access;
-
in the Configuree a WES profile Konica Minolta, thick the Anonymous connection (if the box is not clickable, check the WES version in the Properties section: anonymous connection is available with the v.3 version);
-
give a Title to the button that will permit, from the WES, to give the access to the anonymous user;
-
in the dropdown list Redirection, select the feature toward which the anonymous user must be directed (logically, there is a correspondence between the Button title and the selected feature);
-
validate the WES v.3 profile;
Configure the Anonymous user's rights
-
in Watchdoc, from the Main menu, Production section, click on Printing queues groups & pools;
-
click on:
-
either the Printing queues tab to apply the right on a specific queue;
-
or the Queues group to apply the right on a printing file group;
-
-
in the Printing queue configuration interface (or Queues group configuration), click on the Policy tab, then Usage authorisation tab (in v. 5.3) or Rights (in previous versions);
-
in the Device usage rights interface, edit either the Queue (if rights apply on the queue) or the Group (if rights apply on the group);
-
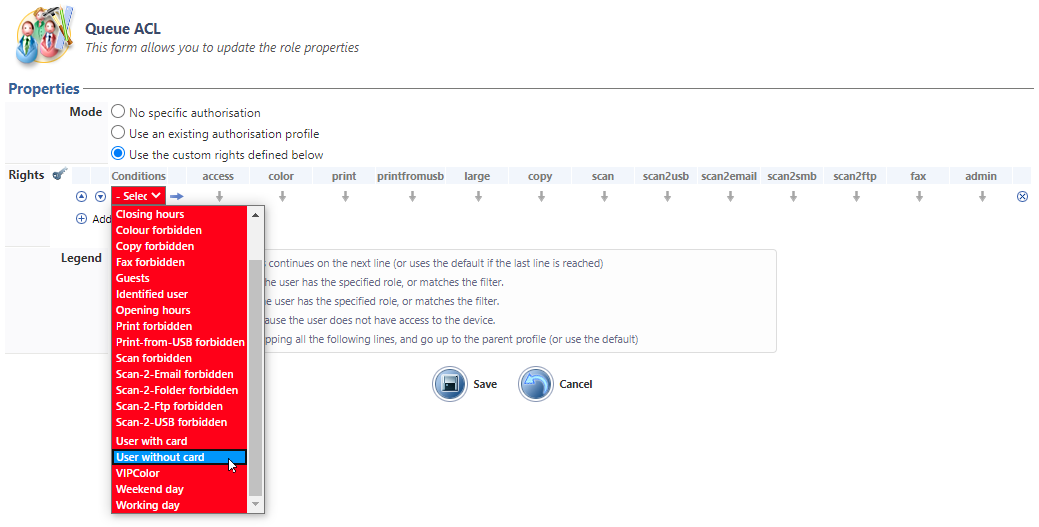
select the mode "Use the custom rights defined below";
-
in the Conditions list, select the "User without card" value;
-
for each right displayed in the columns, specify, with the arrows if it is allowed, refused, or if it inherits the parent profile (cf. the legend):
in the ACLs (of a queue or of a queue's group) interface:
-
validate the right configuration by clicking on the
 button.
I-series configuration - Error code 23 : CMS failed
Context
When installing the Konica Minolta WES, an error message is displayed.
Cause
This message occurs on i-series devices that have been incorrectly configured at the factory.
These are printing devices from the i-series range, produced between November 2022 and March 2023.
Some devices in the batch have been corrected: a green sticker has been affixed to the original cardboard.
Resolution
The initial configuration of the device must be modified before installing the WES.
Activate DHCP
-
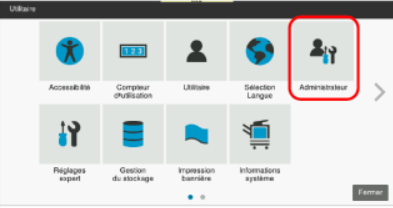
Access the "Administrator" menu of the printing device.
-
Log on as Administrator.
-
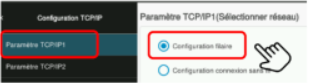
From the Home menu, go to Network > TCP/IP Configuration > Wired Configuration:
-
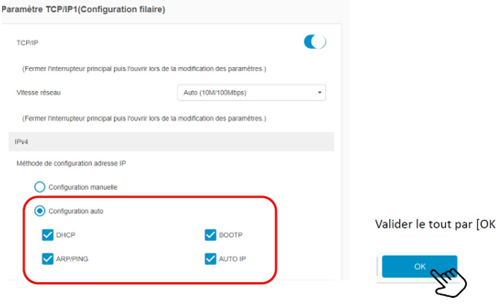
Tick Auto configuration and then the following boxes: :
-
DHCP
-
ARP/PING
-
BOOTP
-
AUTO IP
-
-
Click OK to confirm the configuration.
-
Log out of the Administrator account.
ScanToMail feature error on a MS Windows Office 365 context
Context
When a user activates the ScanToMail function from a Konica WES installed in a Windows Office 365 printing environment, emails may be rejected.
Cause
In this context, rejection is due to the replacement of the sending e-mail: the e-mail configured as the default sender in the MFP is replaced by the e-mail of the user authenticated on the WES and generates a rejection from the Microsoft SMTP service (spoofing).
Resolution
Changing the MFP configuration :
1. From the MFP configuration interface, click Security > Restricted User Access > Change "From" address>
2. Select Admin E-Mail Addr. instead of Administrator E-Mail Address. Login User Address
Unable to install a WES - An error occurred during the last operation - Could not enable Relay Server authentication : (-1)
Context
When installing a WES KM OpenAPI, a message indicates that an error has occurred and the WES does not appear on the print device.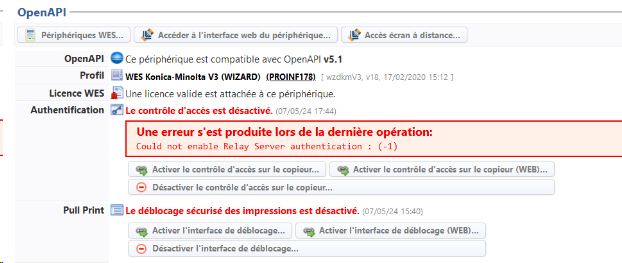
Resolution
To resolve this problem:
-
click the Disable Access Control button on the print device;
-
click the Access the device's web interface button;
-
In the device's OpenAPIManager management interface, uninstall the applications listed;
-
perform a factory reset of the device;
-
reinstall the WES.
Web browser disabled / Web server disabled
Context
When a WES KM is installed, the following message is displayed: Web browser not activated (or Web server not activated).
Cause
The problem is due to the fact that the WebDAV protocol is not enabled on the device, which prevents the transfer of files between the Watchdoc server and the printing device.
Resolution
To solve this problem :
-
from a browser, go to the device configuration interface;
-
log in as administrator;
-
in the menu, click Network > Web Browser Setting > Web Browser Setting ;
-
in the Web Browser Setting interface,
-
activate Web Browser;
-
in the menu, click Network > WebDAV Settings > WebDAV Server Settings;
-
-
in the WebDAV Server Settings interface, activate WebDAV Settings;
-
check that non-SSL Only is selected for the SSL Settings parameter ;
-
in the menu, click Network > WebDAV Settings > WebDAV Server Settingsin the WebDAV Client Settings interface, activate WebDAV Client Setting ;
-
log out of the device administration interface.
NB. Web Browser activation may fail and you may be asked for a licence key: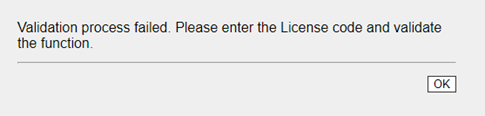
In this case:
-
in the print device's administration interface, find and copy the MFP Serial Number;
-
connect to the Konica licence key generation site;
-
in the MFP Serial Number field, paste the device's serial number;
-
copy the supplied licence key (To enable via MFP) and paste it into the print device's Licence Code Input interface;
-
continue with WebDAV configuration (see step 5).
Enable remote access to the printing device (Remote Panel Server Configuration)
To perform certain actions and checks, it may be useful to access the printing device remotely. For a Bizhub model, the procedure is as follows.
-
Log in to the Web Connection interface as an administrator.
-
In the Home menu on the left, click Network > Remote Panel Configuration > Remote Panel Server Configuration.
-
In the Remote Panel Server Configuration interface, enable the Server Setting option.
-
Click OK to confirm: