Ricoh WES - Install the WES on the queue automatically
Principle
The WES Ricoh Smart Operation Panel is installed using the WESRicohDeployer.jar executable provided by Doxense® as a JAVA archive file (.jar) in the Watchdoc installation package.
This file can be run from the Watchdoc server or from any workstation that can network with the Watchdoc server and target devices. The server or workstation from which the executable is launched must support the Java® 8 min application.
In order for WESRicohDeployer to function correctly, it is necessary to use one of the following versions of the JRE (Java Runtime Environment) (Ricoh restriction):
-
Amazon Corretto v8, v11, v17 or v19;
-
Liberica v19.
If the installation of WES using the executable fails, you can resort to manual installation, described in the next chapter.
Run the executable
-
Access the Watchdoc server as administrator.
-
Go to the folder C:\Program Files\Doxense\Watchdoc\Redist\
-
Double-click on this WESRicohDeployer.jar file;

N.B. :As the Java 8 application on which WESRicohDeployer is based is relatively heavy, you can also install it not on the Watchdoc server, but on a workstation communicating with the server and the devices, from which WESRicohDeployer.jar will be launched:
-
Check that the workstation is communicating on the network with the Watchdoc server and with the Ricoh® devices;
-
copy/paste the WESRicohDeployer.jar file on the workstation;
-
double-click on WESRicohDeployer.jar to launch the executable.
The WES Ricoh deployer interface that is displayed consists of 3 parts:
-
the Server Info section contains fields relating to the Watchdoc server;
-
the Actions section contains buttons to launch installation and uninstallation actions;
-
the Report section includes a field in which you can specify the folder in which reports relating to WES installation and uninstallation operations will be saved;
The bottom section (blank at start-up) displays information about the actions launched and a progress cursor: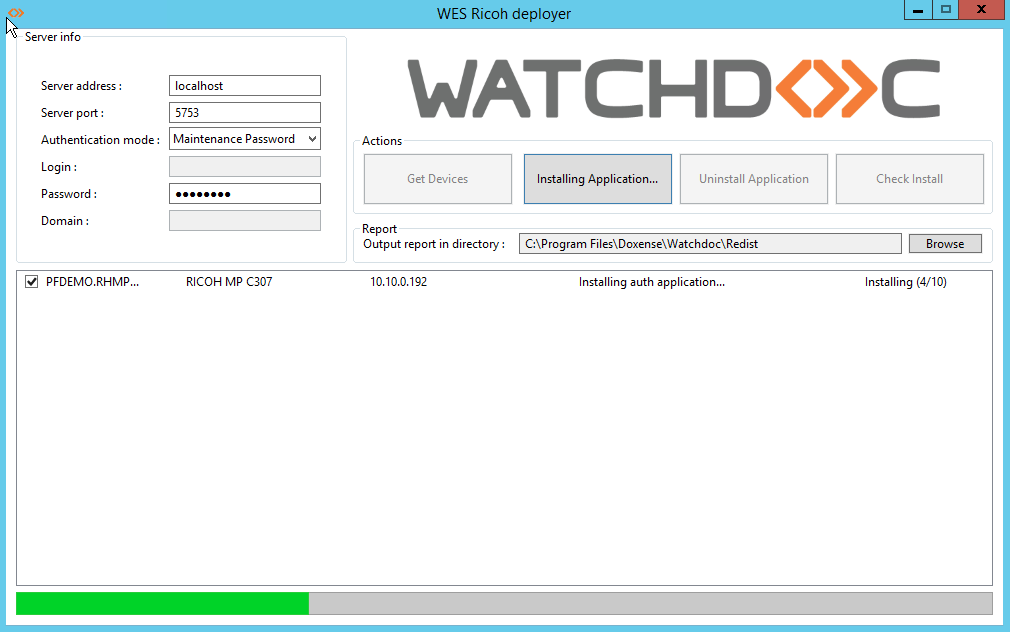
Configure access to the server
In the Server Info section, complete the following fields to identify and locate the server on which the WES is to be installed:
-
Server address: enter the address (IP address) of the Watchdoc server;
-
Server port: enter the port used to access the Watchdoc server;
-
Authentication mode : from the list, select the authentication mode chosen to access the server.
-
Maintenance Password: select this mode if you want to access the server using a maintenance account and fill in the Password field.
-
Login/Password: select this mode if you wish to access the server using an administration account, then complete the fields relating to this account:
-
Login: enter the administration account login ;
-
Password: enter the password for the administration account;
-
Domain: enter the domain of the administration account.
-
-
Install the WES
Once you have entered the data for the server
-
in the Actions section, click on the Get Devices button ;
èin the lower section, all the Ricoh® devices installed on the server are displayed;
-
click on the Install Application button to start the WES installation on the detected devices;
-
a cursor indicates the progress of the operation;
èAt the end of the operation, a message will appear indicating that the installation has been successful on the device(s): You can check that the WES is working on the device(s) by clicking on the Check install button.
Check the installation
To check that the WES has been installed on one of the devices:
-
in the Actions section, click the Get Devices button ;
-
in the list of devices, tick the box for the device or devices whose installation you wish to check;
-
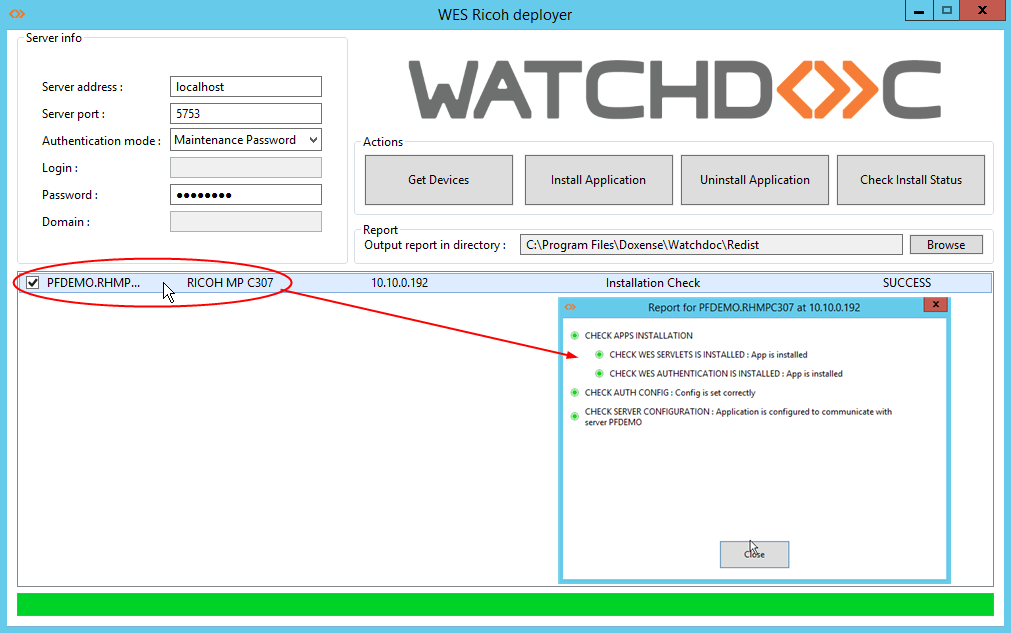
click on the Check install status button;
-
a message indicates that the check has been completed;
-
click on the line corresponding to the device to access the details:
Finalise the installation in Watchdoc
From the Main Menu of the administration interface,
-
in the Operations section, click Print Queues :
-
In the list of queues, click on the queue on which you wish to install the Ricoh WES;
-
in the queue interface, click on the Properties tab;
-
In the WES Ricoh SOP section, several buttons are displayed:
-
Access the device's web interface: shortcut to the device's internal administration website;
-
WES devices: provides access to the list of devices equipped with a WES in Watchdoc;
-
Config servlet: provides access to the WES configuration interface in Watchdoc;
-
Application status: accesses the Monitoring section (below in the interface);
-
Configure: allows Watchdoc to install the WES on the device (may take 30 seconds);
-
Enable/Disable logs: enables WES-specific logs for analysis;
-
Download logs: allows you to download WES-specific logs (if enabled) for diagnostic purposes;
-
Refresh: refreshes the page;
-
Edit configuration: allows you to access the WES configuration on the queue.
-
-
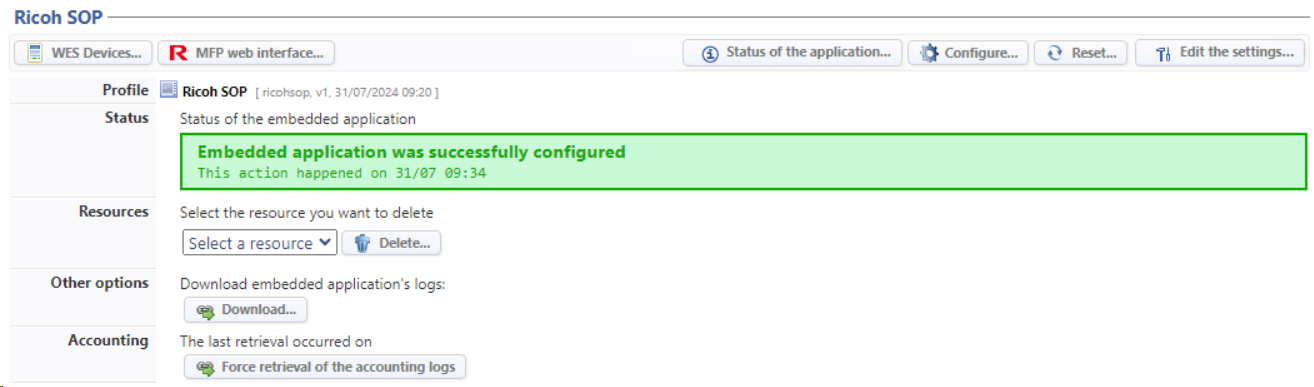
click on the Configure button to install the application;
-
At the end of the installation, the status of the application is displayed:
-
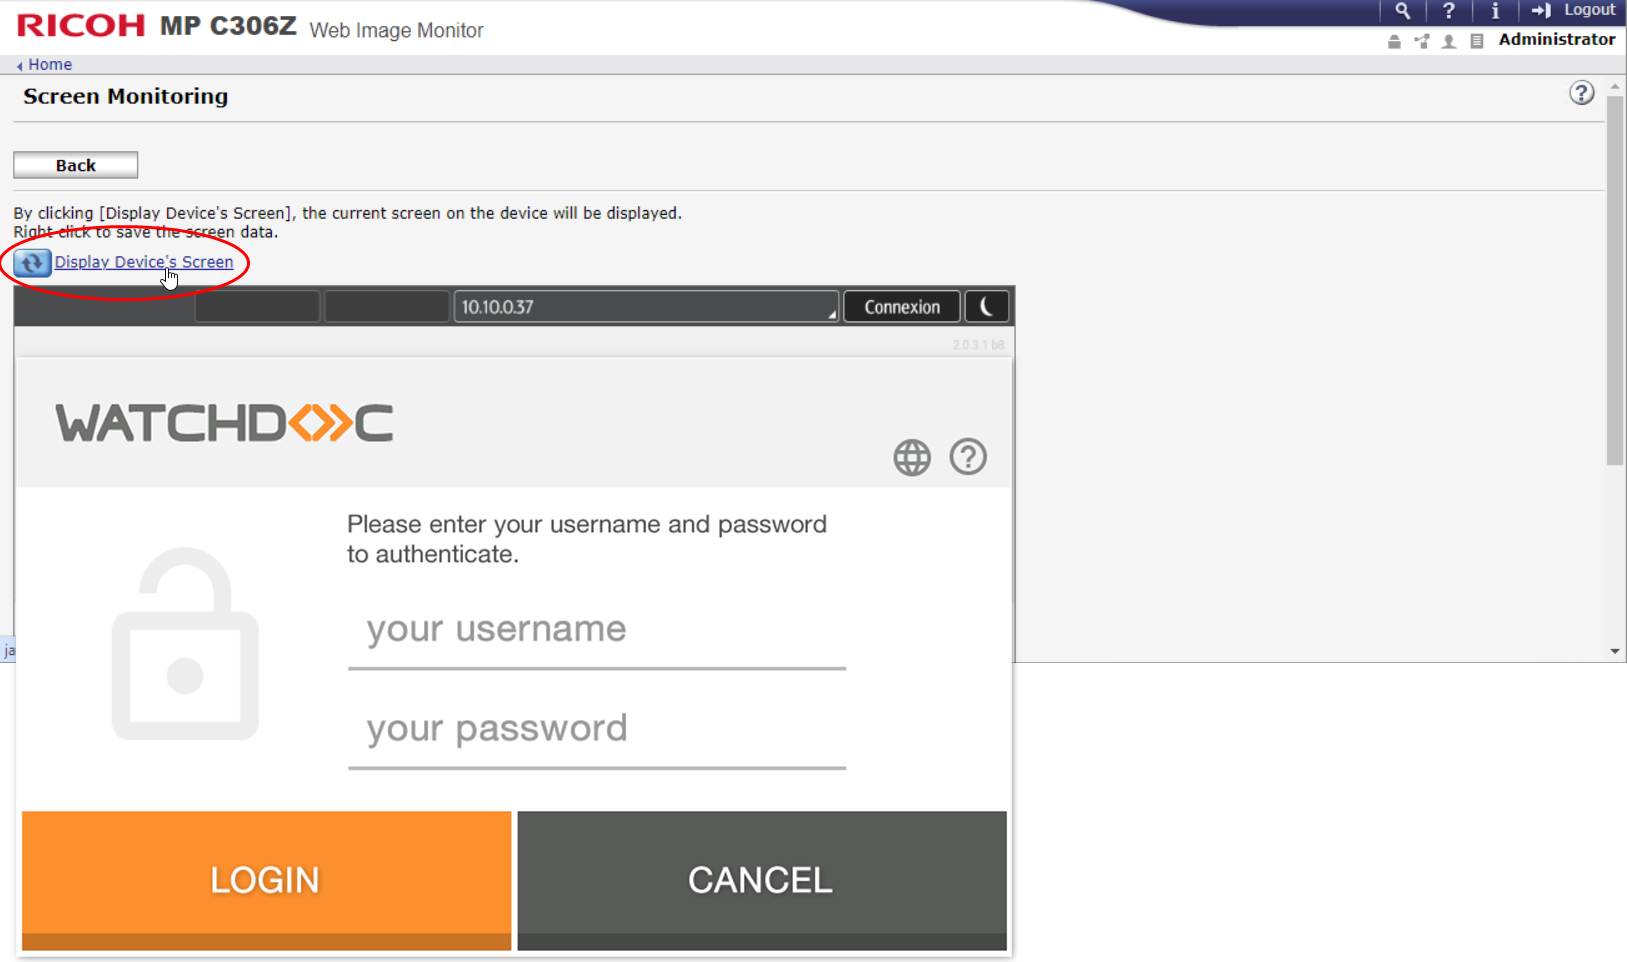
From the device administration interface, you can use the screen simulator to check that the Watchdoc application is correctly installed: