WES Ricoh - Install the WES manually
Principle
If WES installation using the WESRicohDeployer.jar executable fails, you can install WES manually using the procedure described below. Manual installation involves the following steps:
-
activate SSL/TSL communication :
-
install WES from the Ricoh interface;
-
configure administrator authentication.
Access the device administration interface
WES is installed manually from Web Image Monitor, the Ricoh device administration website. You can access it in two different ways:
-
by entering the website address directly into a browser;
-
or via the Watchdoc administration website.
To access Web Image Monitor via Watchdoc:
-
in the Watchdoc administration interface from the Main Menu, Production section, click on Printing Queues, locations, queue groups & pools link;
-
in the list of printing queues, click on the Ricoh queue on which you wish to install WES:
-
in the queue configuration interface, under the Status tab, in the Monitoring section, click on the device IP address:
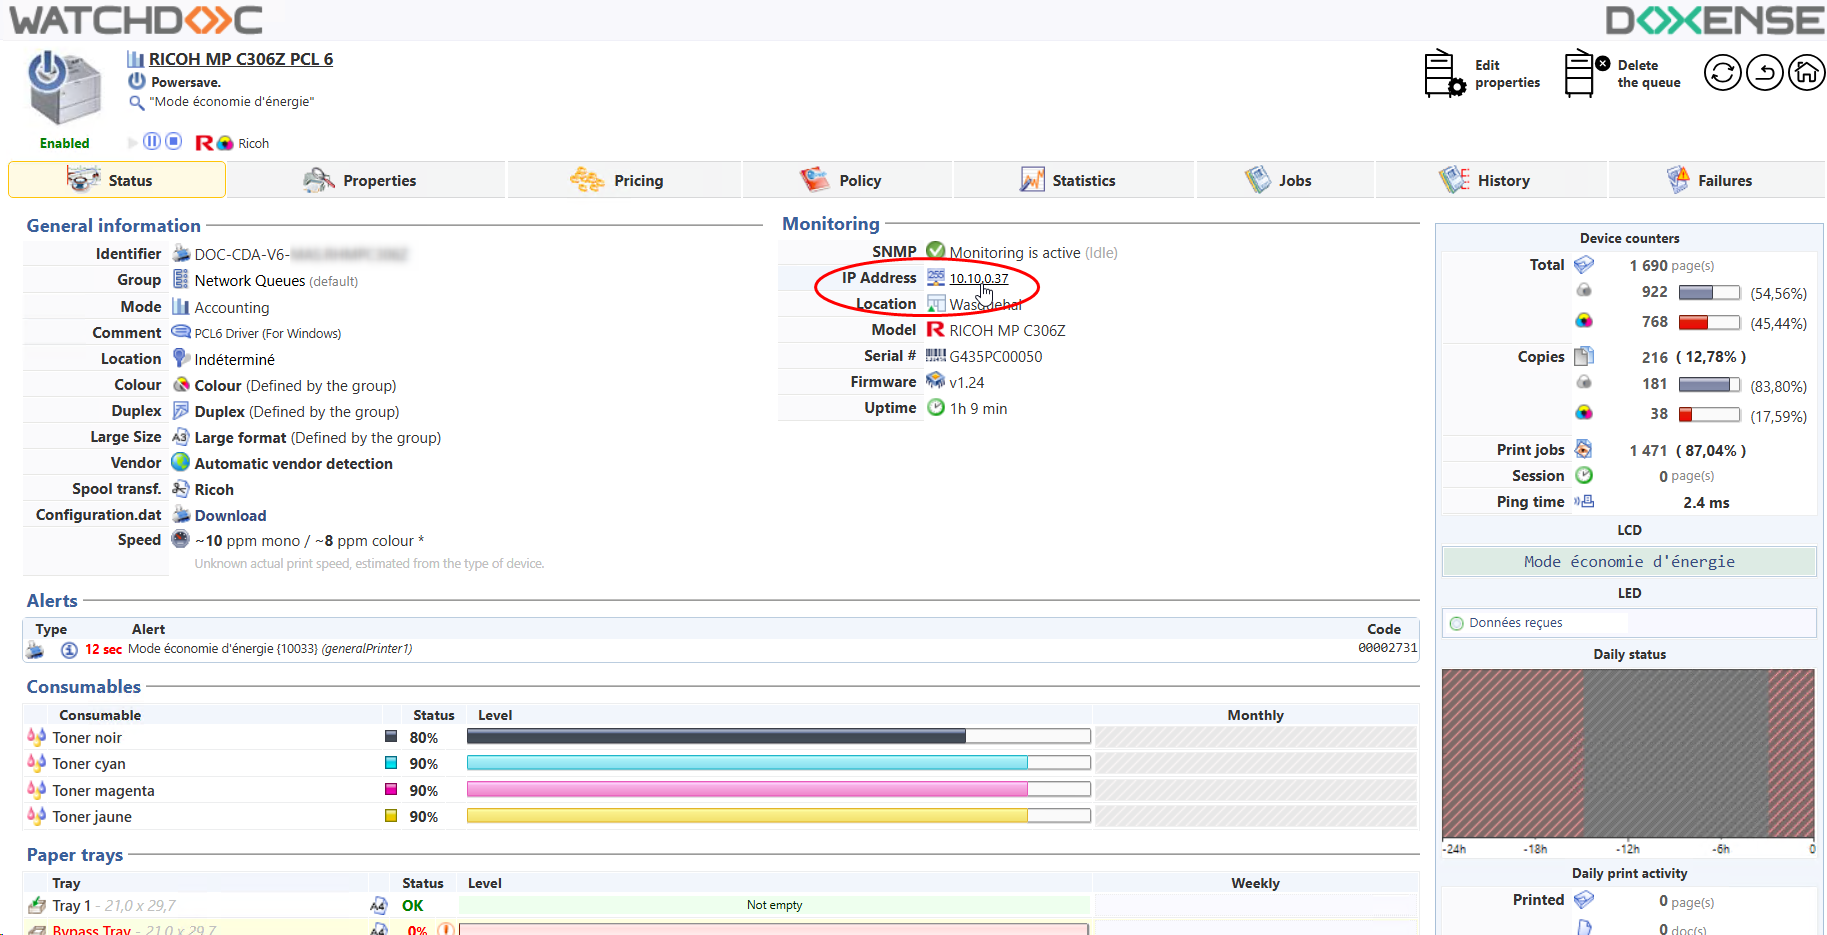
-
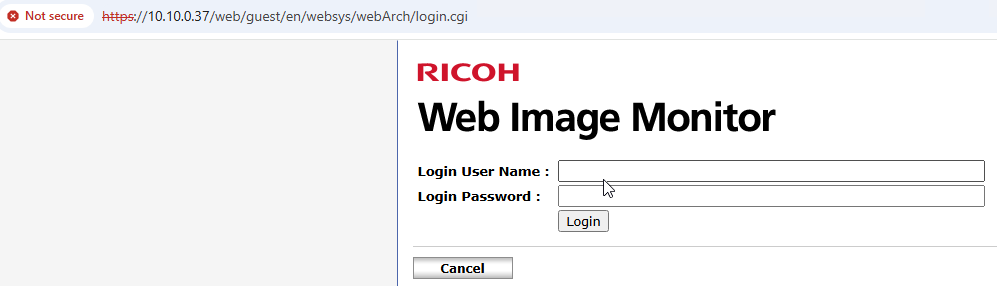
you access Web Image Monitor, the Ricoh device administration website.
-
Authenticate yourself as administrator:
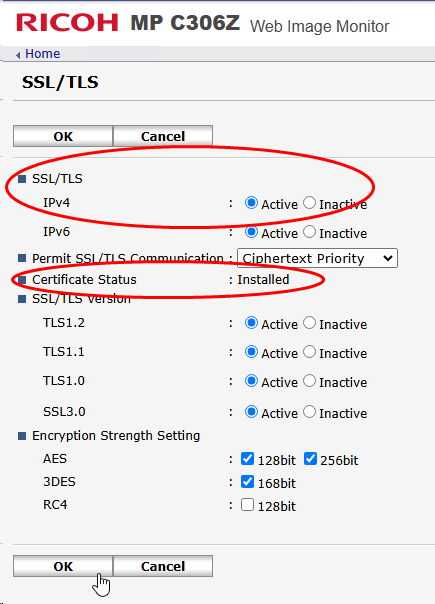
Enable SSL / TLS communication
To enable exchanges between the device and the WES, you first need to activate SSL/TLS communication:
-
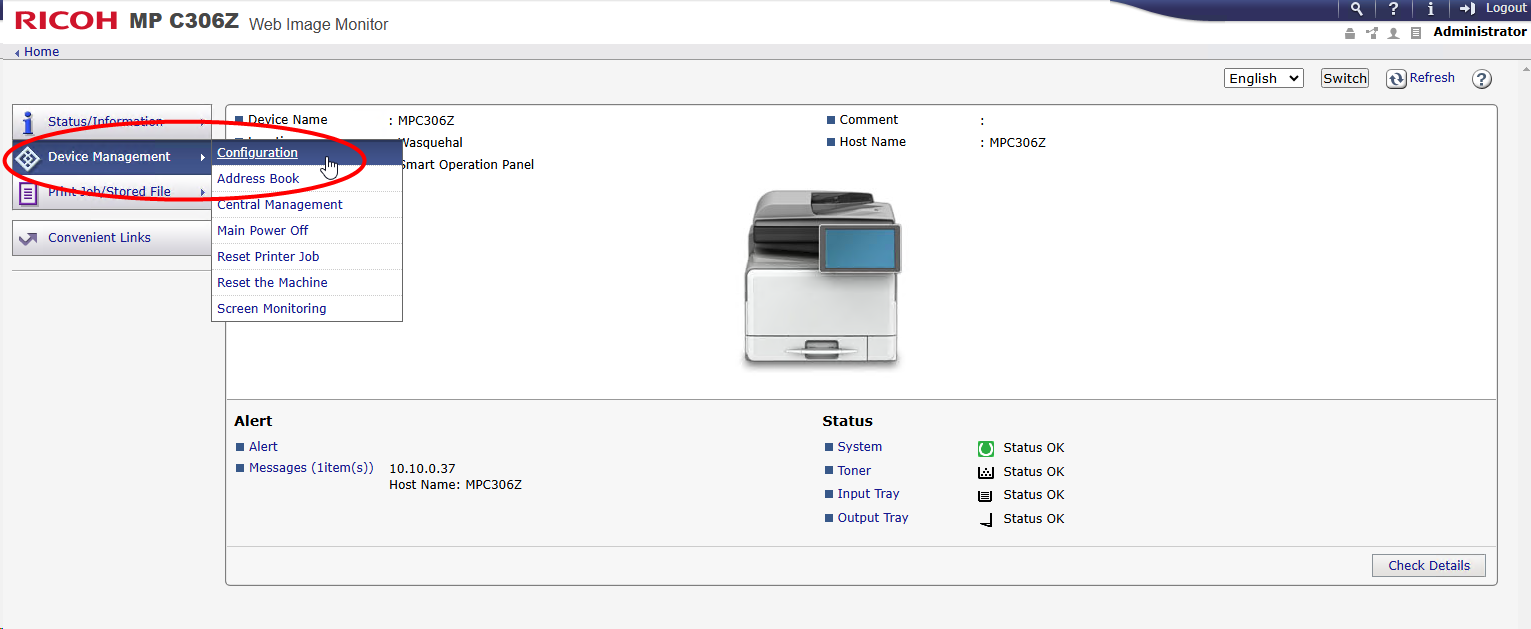
from the administration interface, go to Device Management > Configuration:
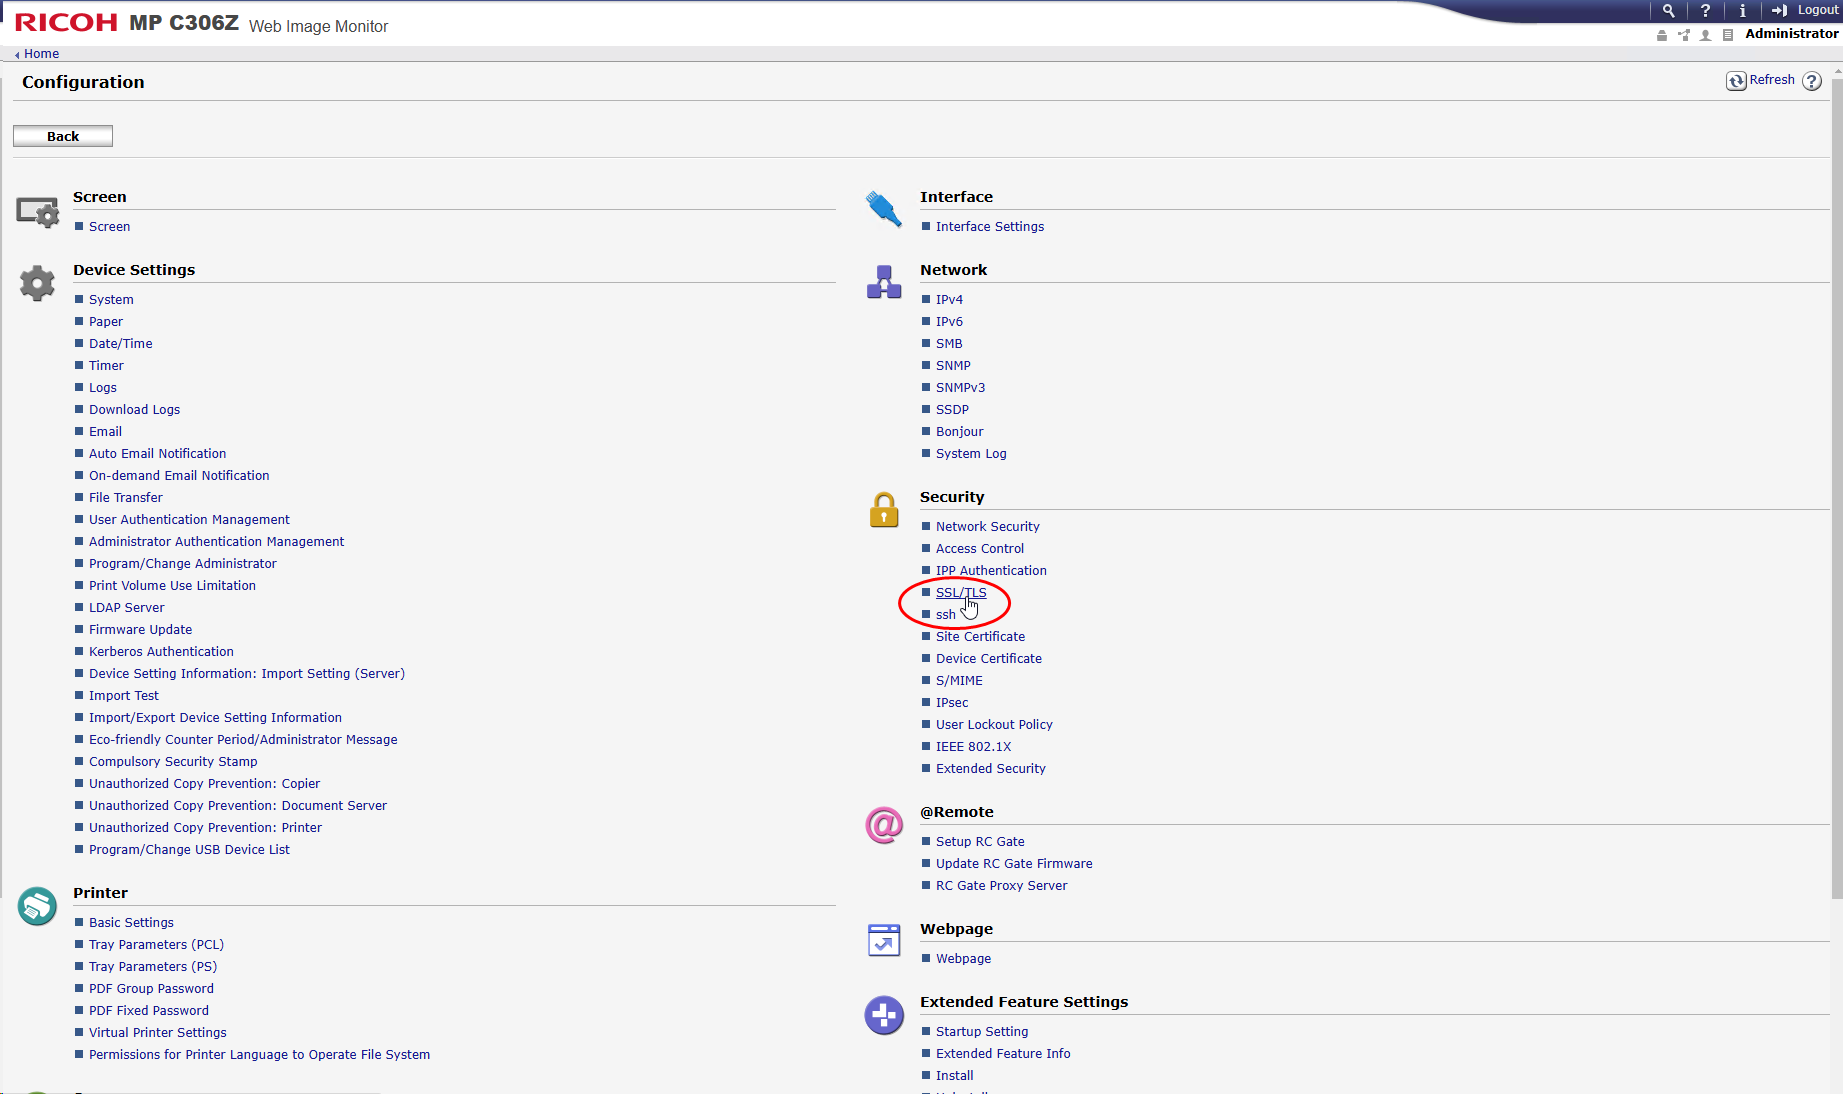
-
in the Security section, click on SSL/TLS:
-
in the SSL/TLS interface, check :
-
IPv4 parameter is enabled ;
-
the SSL certificate is installed.
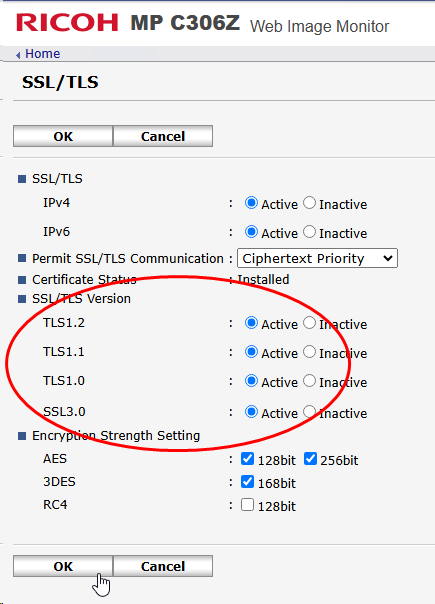
-
for generation 2.5 devices, check that all radio buttons in this section are enabled:
-
-
click on OK to validate the settings.
Install the WES from the Ricoh® device interface
Access the interface
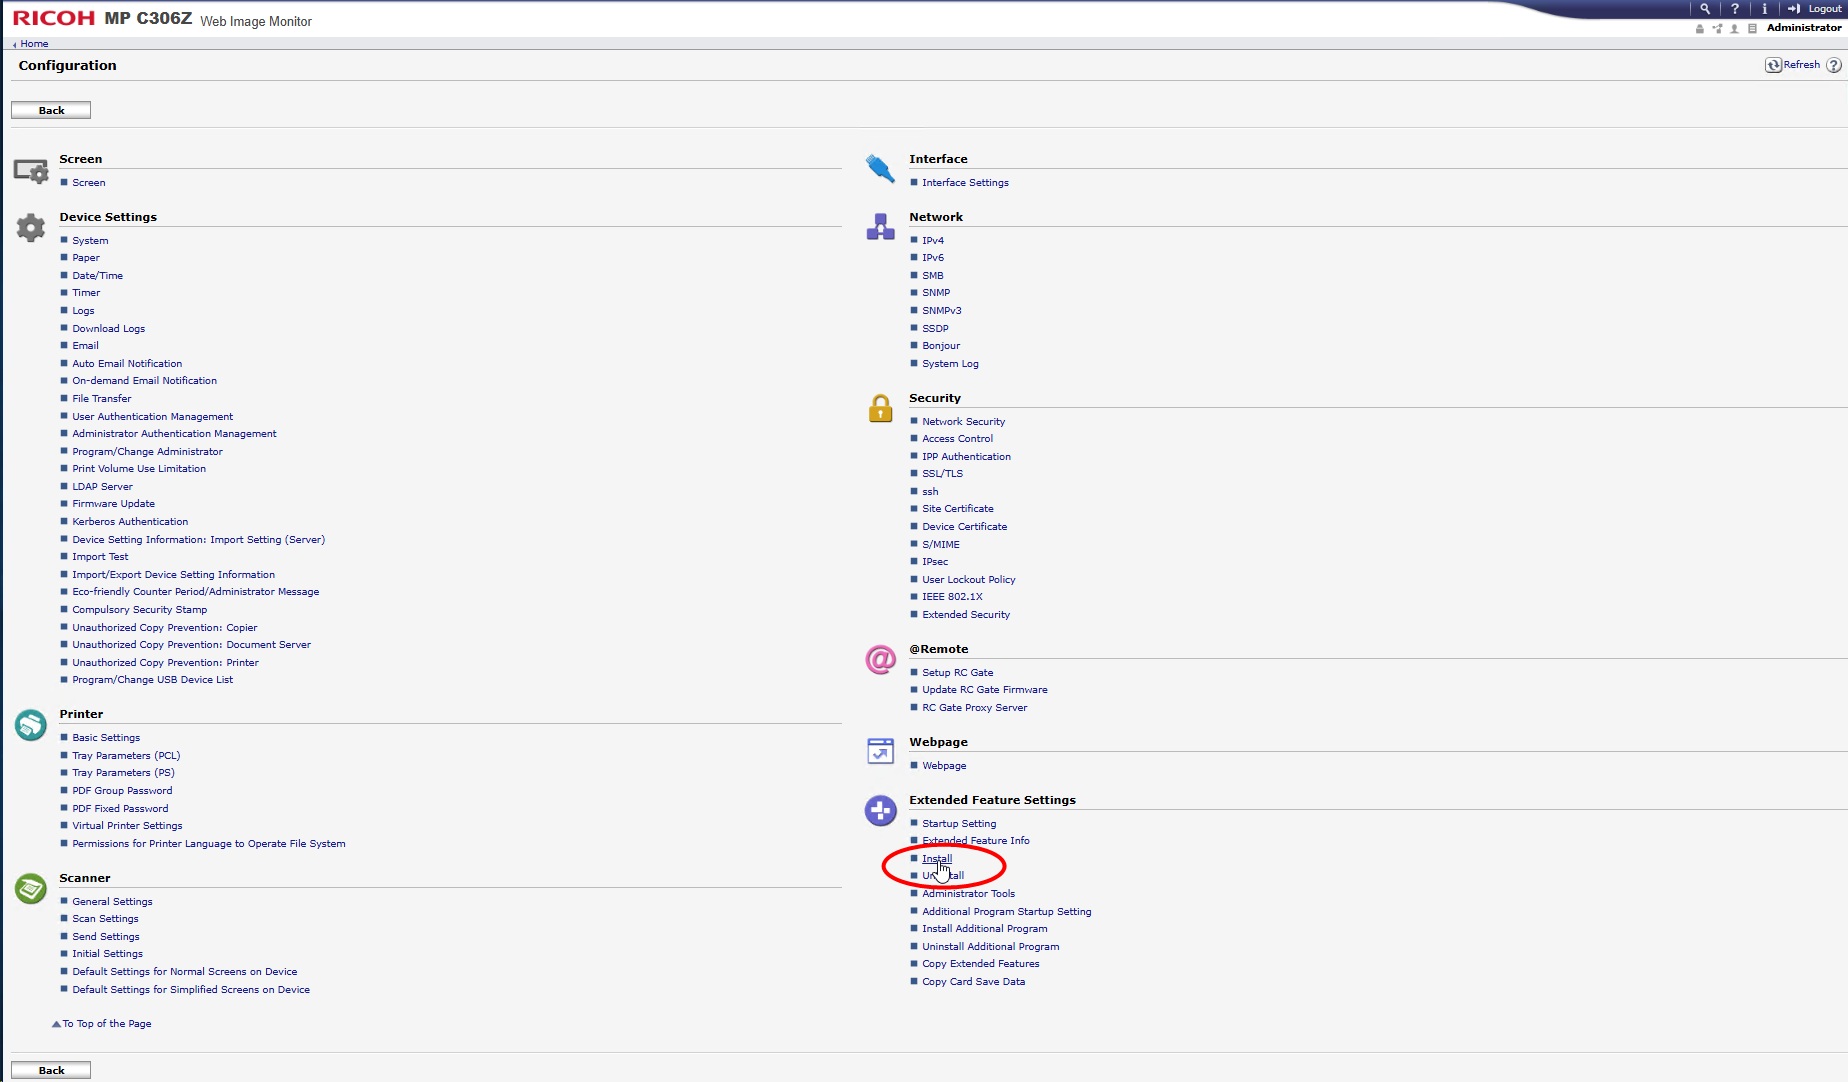
-
from the Configuration interface, in the Settings - Advanced functions section, click on Install:
-
in the Installer interface, click on the Local file radio button, then click on Browse ;
-
in the selection window, browse your working environment to select the Ricoh WES installation file inProgramsDoxenseWatchdocRedist by default):
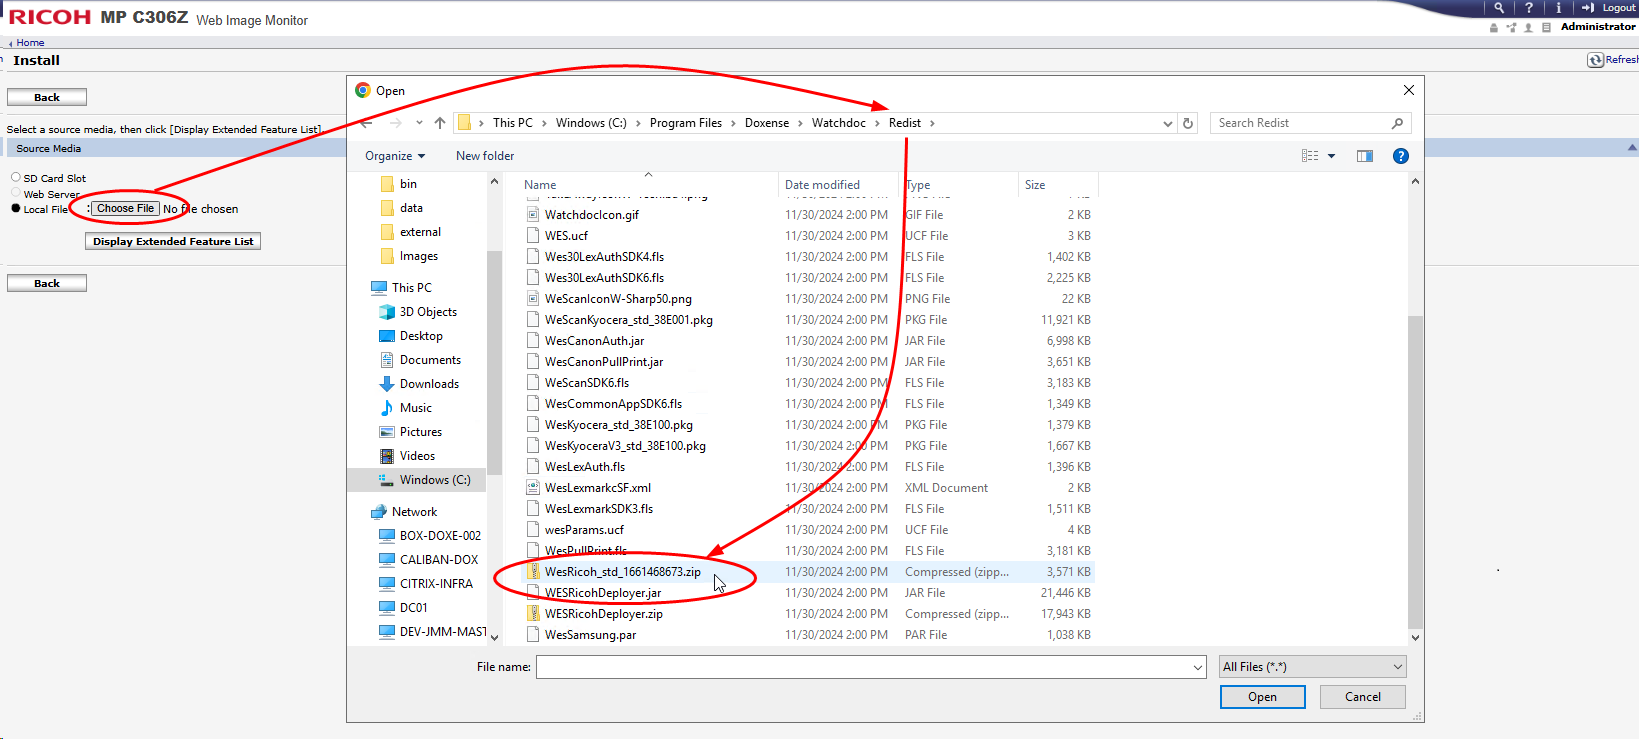
- once the file has been selected, click on the Show advanced functions list button (N.B.: the display may take several seconds)
è new configuration sections appear in the interface.
Install authentication
-
In the Installer interface, in the Type-J Configuration section, check the ON radio button to enable Auto-Start ;
-
in the Advanced features list section, check the Watchdoc Authentication radio button,
-
then click Install;
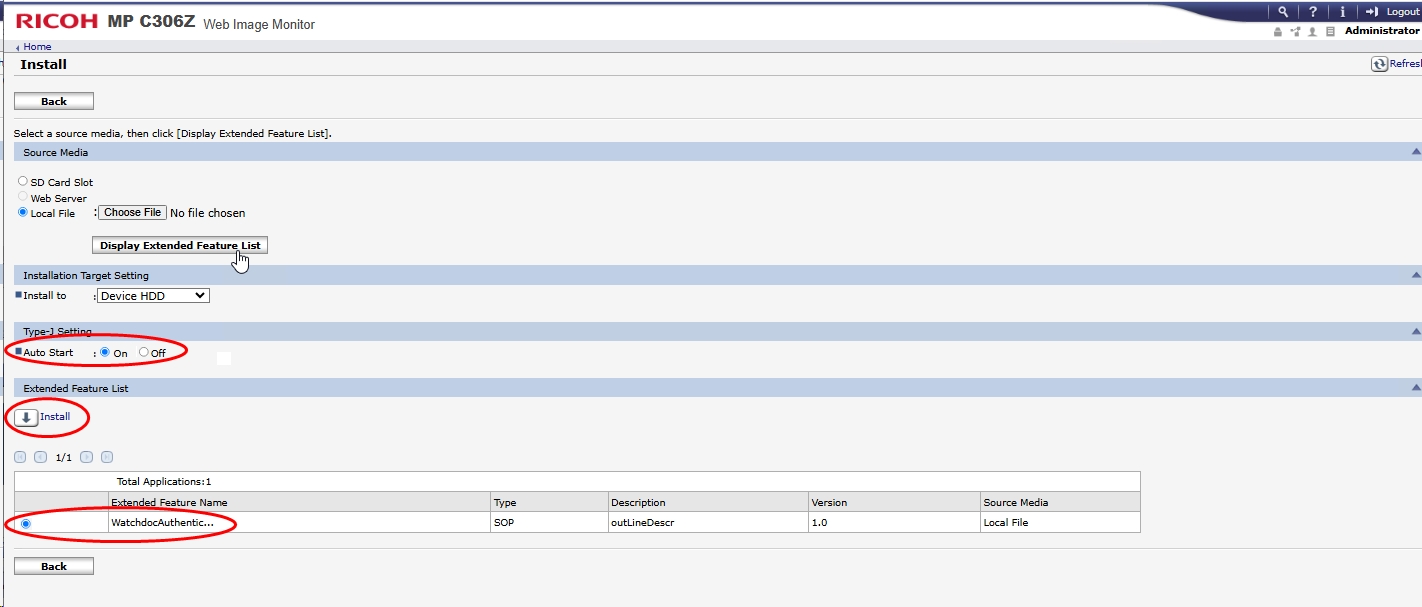
-
In the Confirm window, click on OK:
èa confirmation message informs you that the WatchdocAuthentication advanced function is being installed and the Install interface reappears.
Install the servlet
-
In the Install interface, click again on the Local file radio button, then click on Browse ;
-
in the selection window, browse your working environment to select the compressed folder ServletsRicoh_std_[...] (in ...\Programs\Doxense\Watchdoc\Redist by default) :
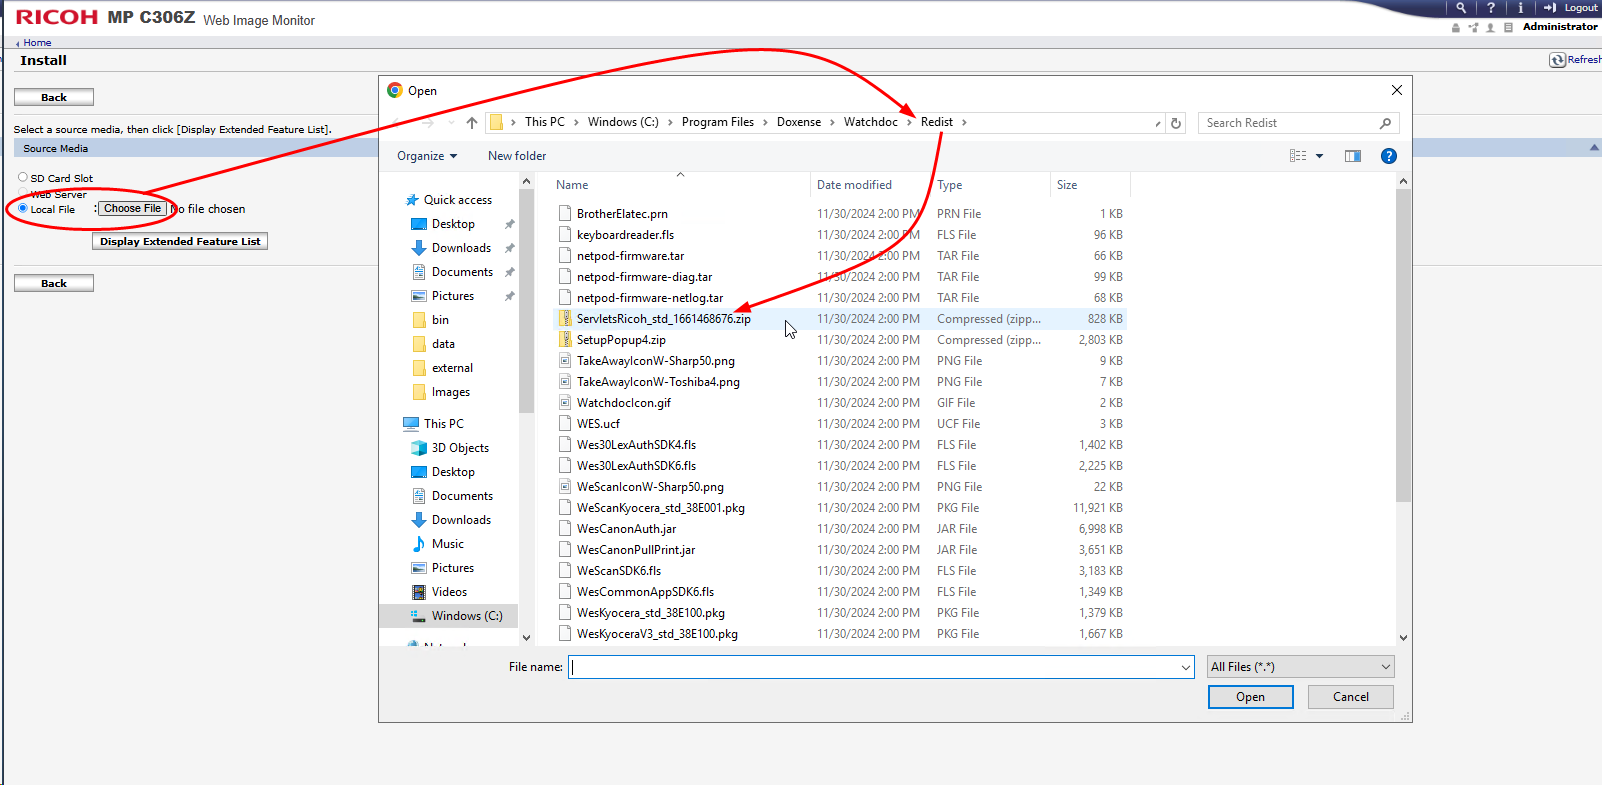
-
once the file has been selected, click on the Displayed Extended Feature List button;
-
in the Extended features list section, check the WatchdocWebAppInstallation radio button, then click on Install;
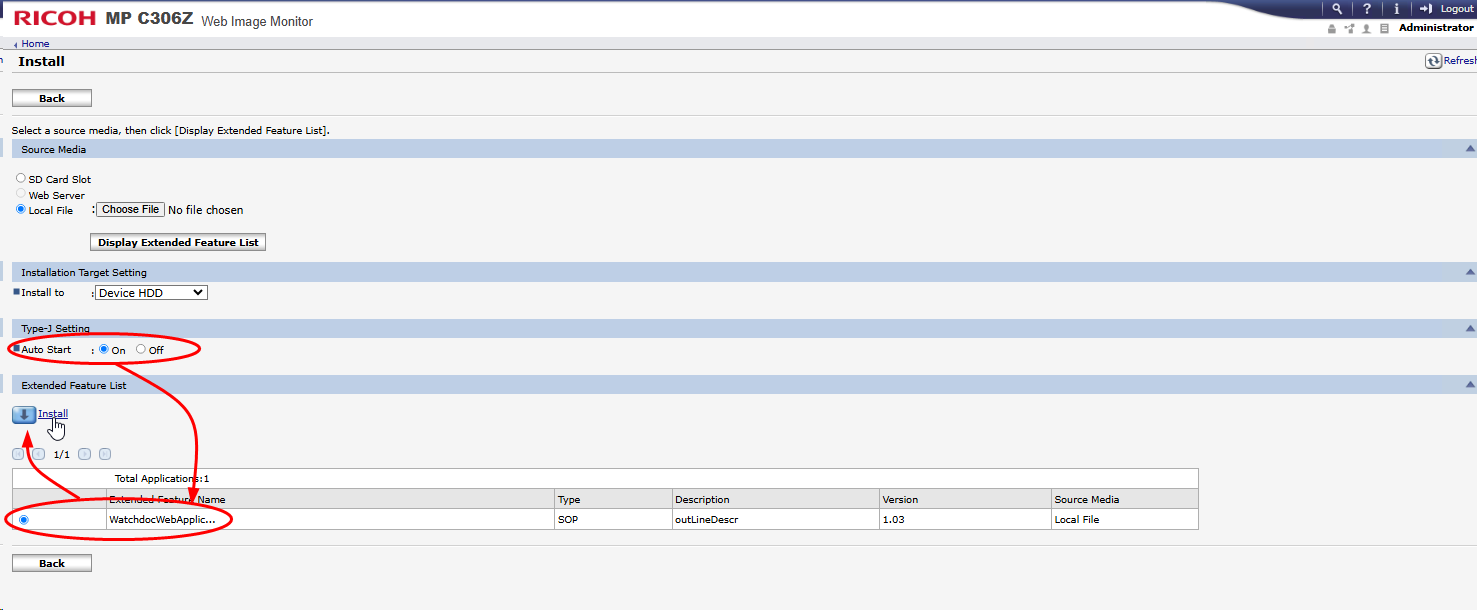
-
In the Confirm window, click on OK :
A confirmation message informs you that the WatchdocWebAppInstallation advanced function is being installed..
-
click OK to confirm installation.
You then return to the Install interface.
-
In the Install interface, click on the Back button to return to the general configuration interface.
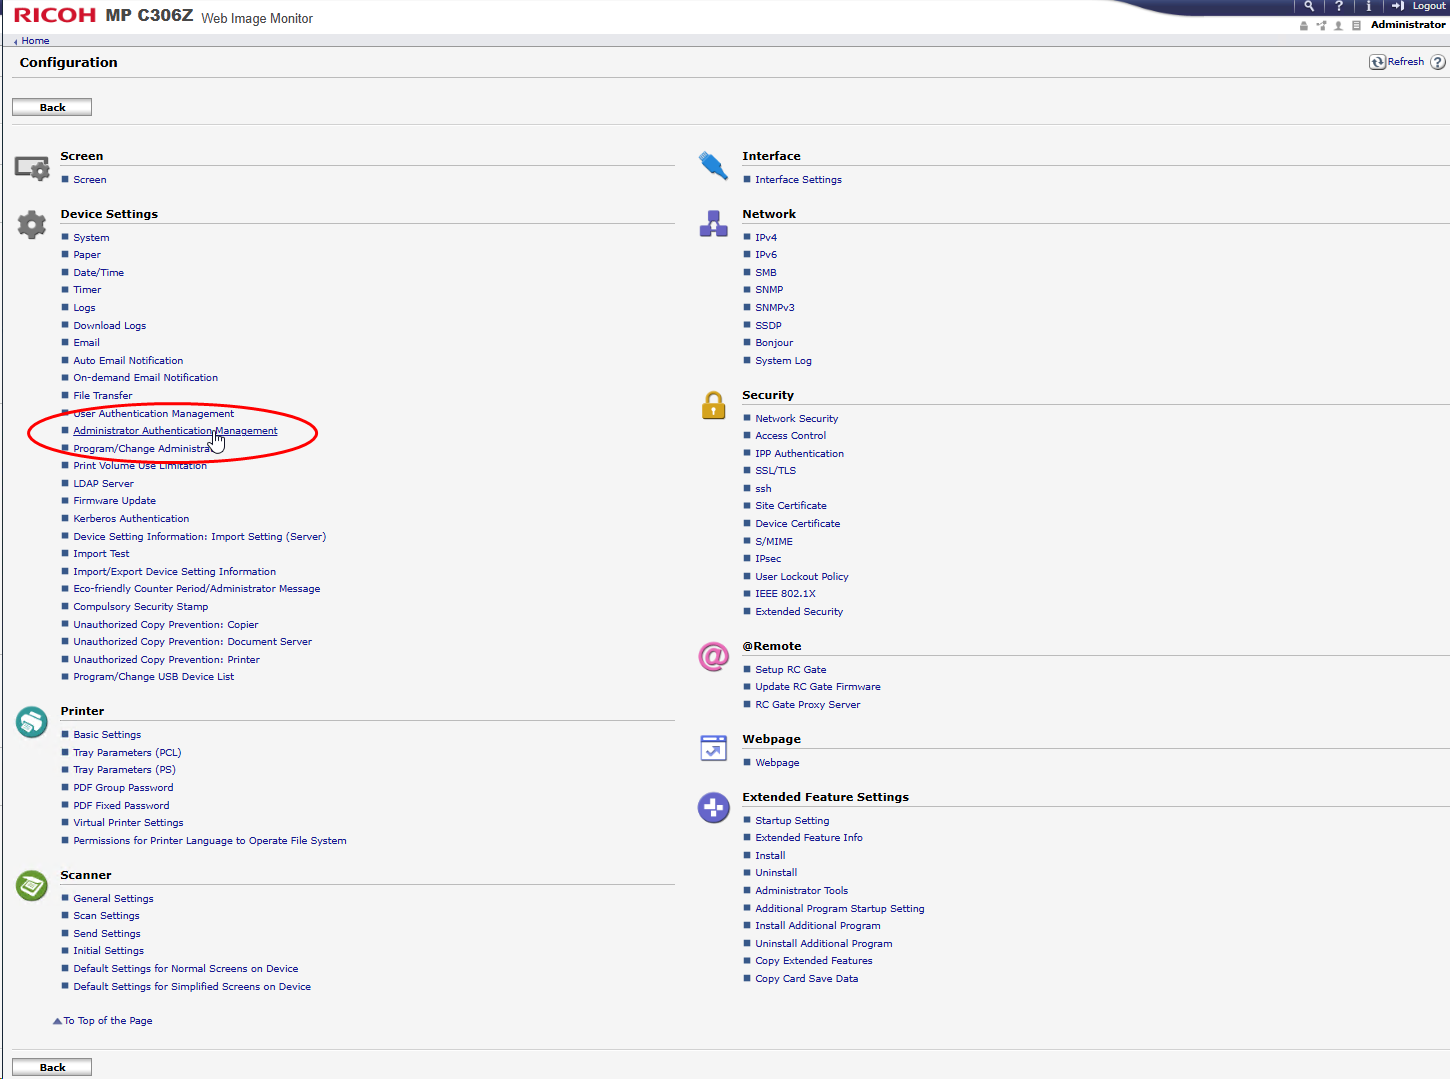
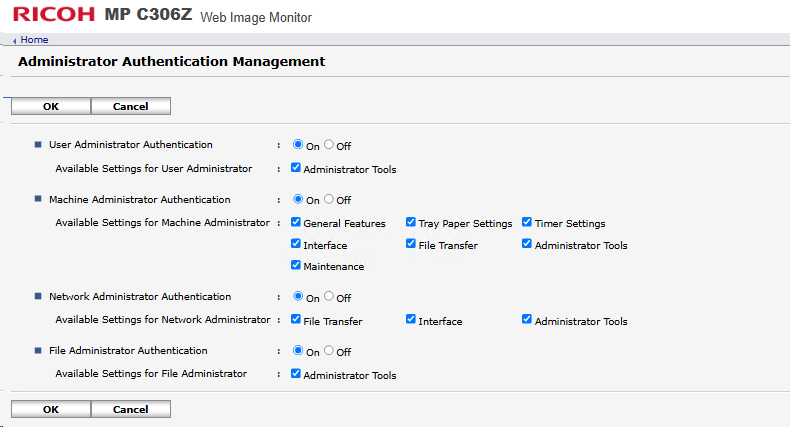
Configure administrator authentication
-
In the Configuration interface, Device Setting Information section, click on Administrator authentication management:
-
In the Administrator authentication management interface, check the ON radio buttons to activate :
-
user administrator authentication ;
-
administrator tools ;
-
machine administrator authentication ;
-
all parameters available to the machine administrator ;
-
network administrator authentication ;
-
all parameters available to network administrator ;
-
file administrator authentication ;
-
all parameters available to file administrator.
-
-
Click on OK to validate the settings;
You return to the general configuration interface.
Configure user authentication
-
From the general configuration interface, click on User authentication management parameter, select Custom Authentication from the list;
N.B.: if the Custom authentication management type does not appear in the list, this means that SP modes are not correctly configured on the device (see Configuring SP modes).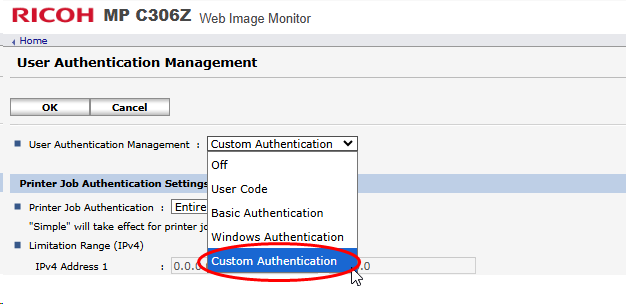
-
click on OK to confirm your choice;
-
in the section Printer Job Authentication Settings displayed, for the Printer Job Authentication setting, select Entire:
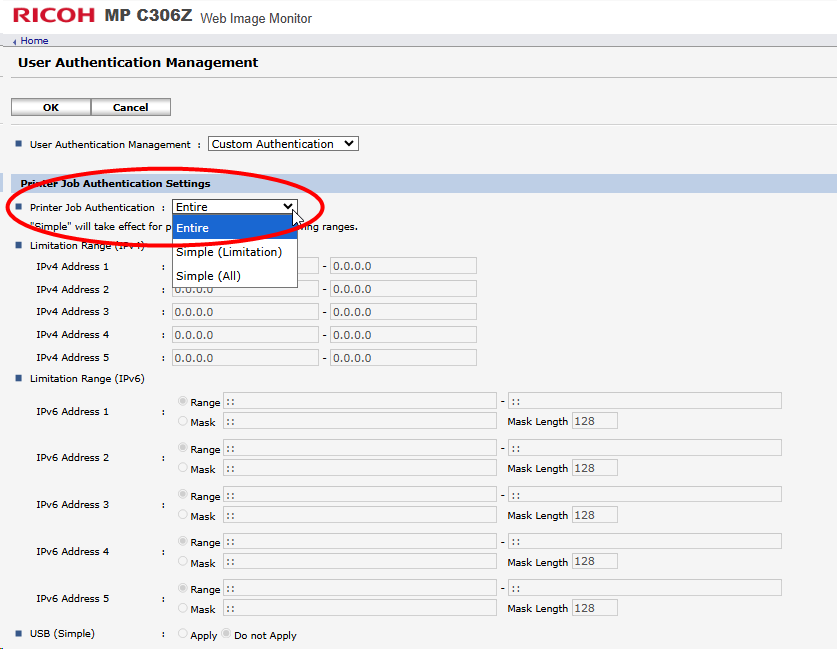
-
Keep the other parameters as default, then click on OK to validate the configuration.
You will then return to the general configuration interface.
Reset device
Once these settings have been completed, the device must be reset:
-
from the Image Monitor Web interface > Configuration, click on the Back button ;
-
in the menu, click on Device Management > Reset Device:
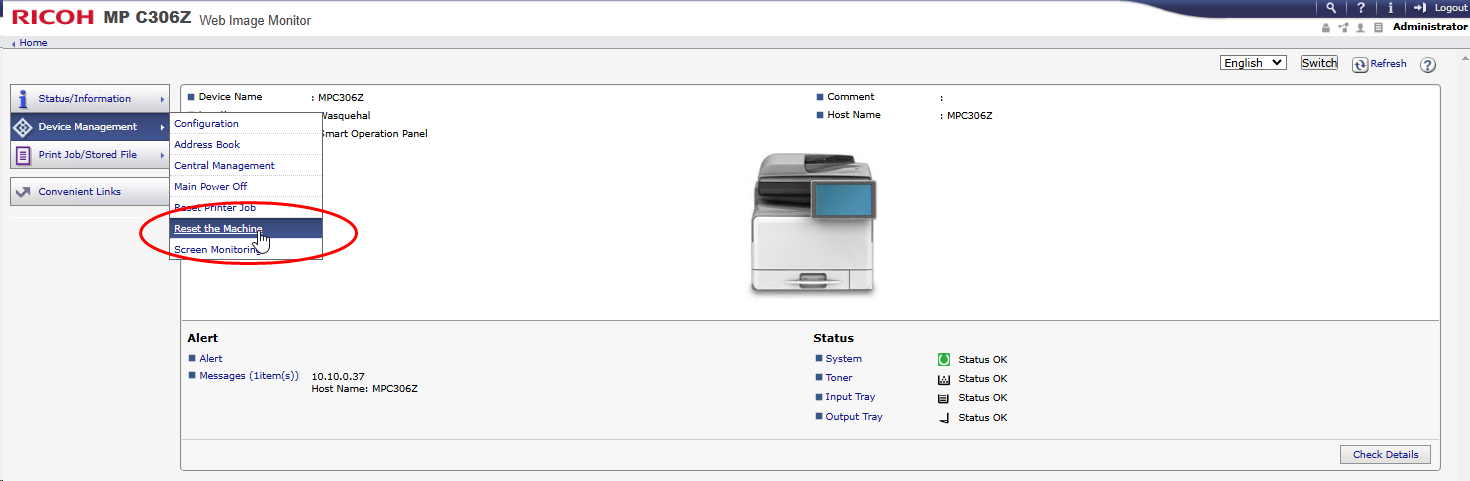
-
in the Reset device interface, click OK to confirm the restart:
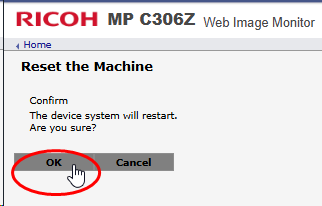
A message informs you that the device is inaccessible during the reboot and invites you to wait.
Check device status
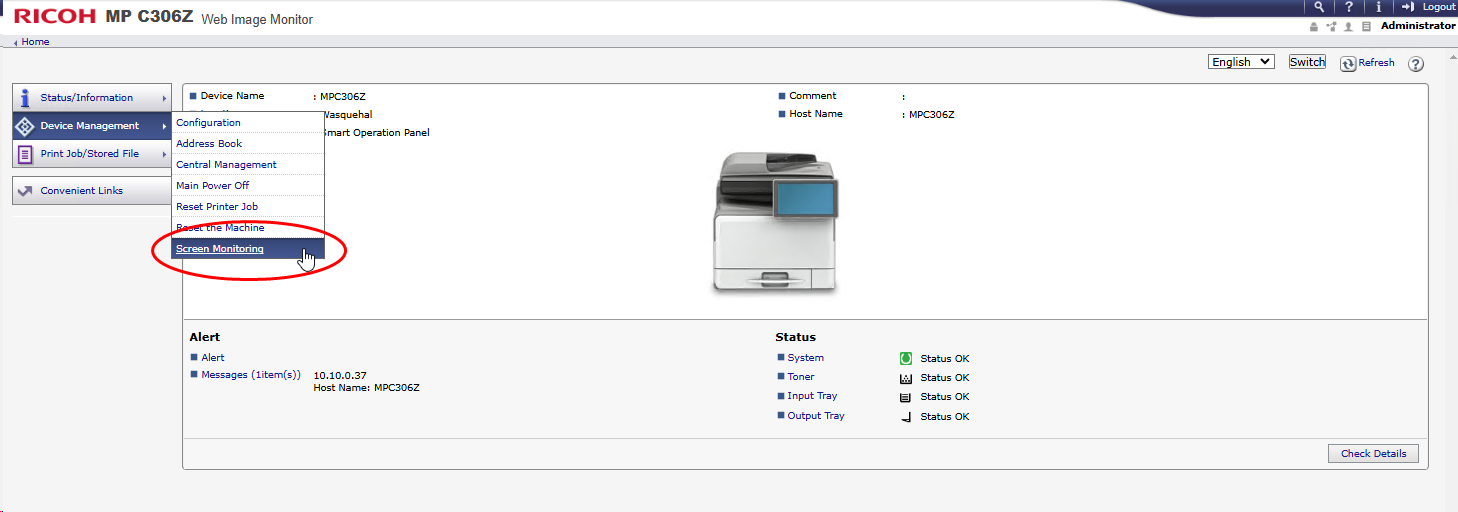
You can check the device's status using the screen simulator. To access the simulator:
-
You can check the device's status using the screen simulator. To access the simulator :
from the Web Image Monitor device administration interface, click on the Device Management>Screen Management menu;
-
in the Screen Management interface, the device screen is displayed. When the device restart is complete, the message displayed is “Settings modification complete”:
-
Click on the Display device's screen link to update it:
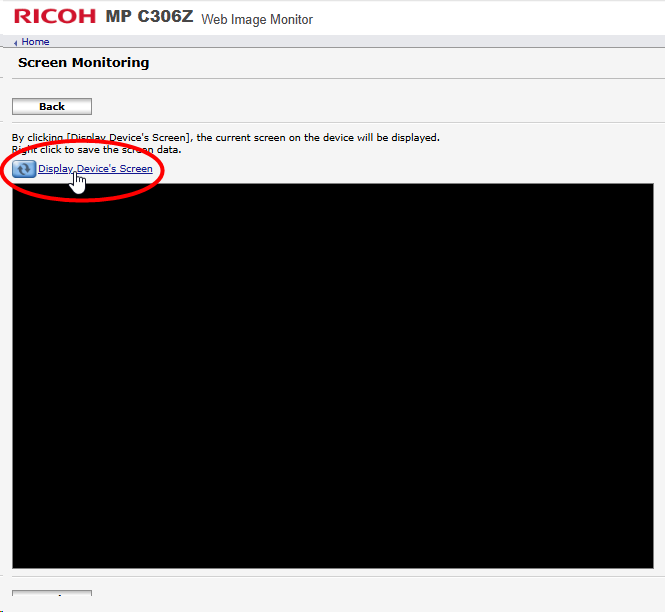
è A message informs you that the installation is continuing and awaiting a valid configuration:
-
Click the View device screen link again to update the device.
-
Return to the Watchdoc configuration interface to install the WES.