Xerox WES - AltaLink and VersaLink models prior configuration
Principle
Before installing the Xerox WES on an AltaLink or VersaLink model, the following settings must be configured on the printing device:
-
administrator password
-
time zone
-
accounting method
-
SNMP communities
-
TLS security
-
badge reader installation (if authentication is badge-based).
Access the configuration interface
These configurations are defined from the device administration web interface. To access them:
-
Enter the device IP in a web browser.
-
authenticate as the device administrator.
Change the Administrator password
To access the print device administration interface, you need to change the default administrator password:
-
once authenticated, in the top right-hand banner, click Admin> My Profile:
-
in the My Profile interface displayed, click on the Change password button ;
-
in the dialogue box, enter the old password and the new one ;
-
then click OK to confirm:
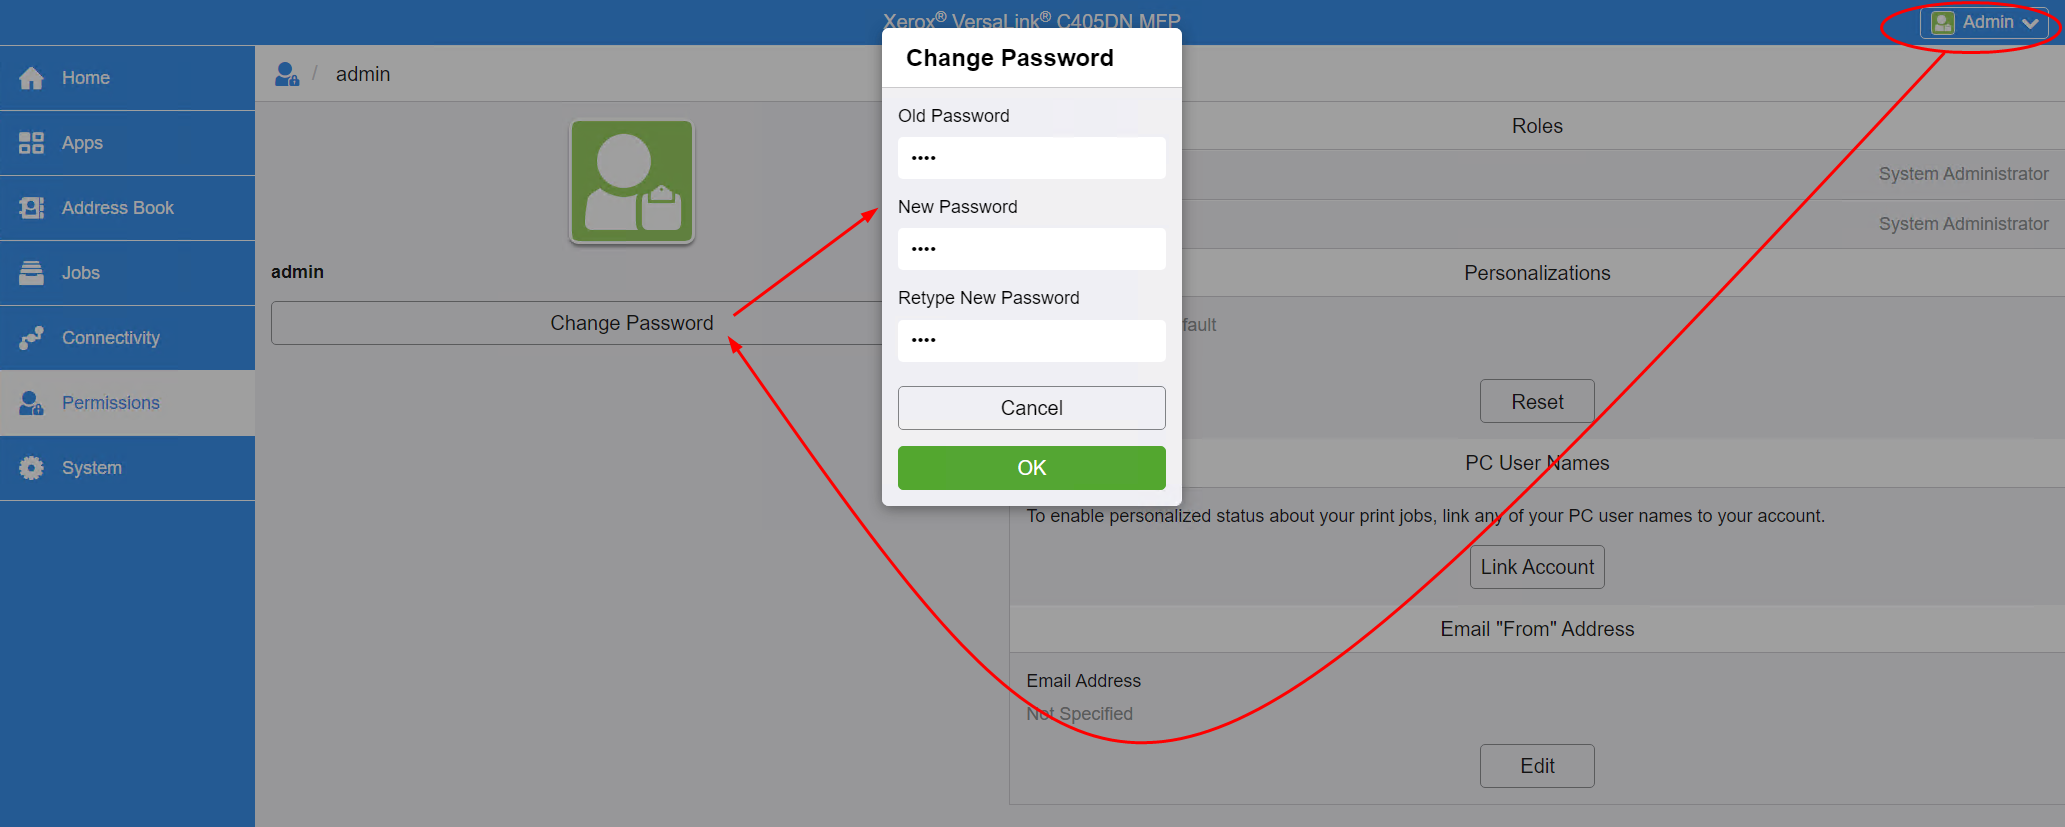
→ The interface will reload and you will be logged out: log in with the new password to check that it is valid.
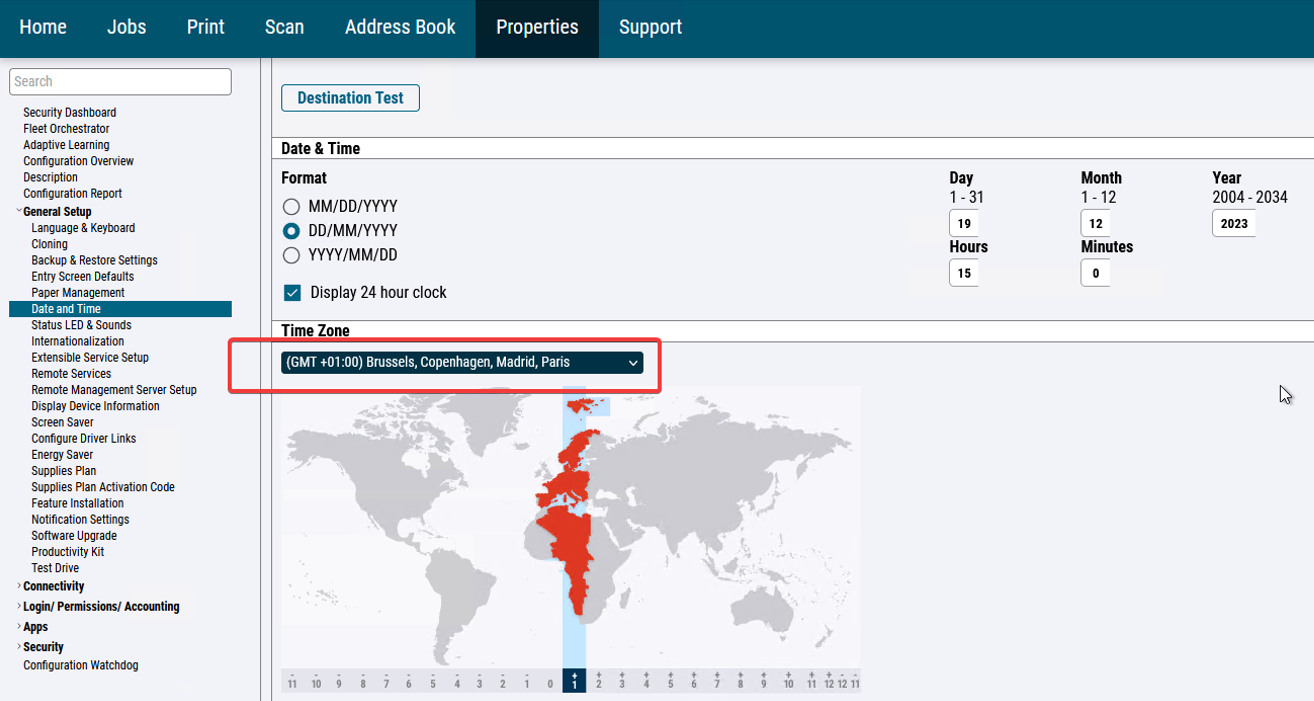
Set the time zone
-
from the device administration web interface, click on System > Date & Time or Properties > General Settings > Date & Time ;
-
In the Date and Time interface, adjust the settings to suit your needs;
-
Select the date format and the time zone corresponding to your location;
-
click OK to confirm your settings:
Configure the accounting method
On VersaLink B models
To enable Watchdoc job accounting, XSA (Xerox Secure Access - Unified ID System) must be enabled and network accounting must be enabled on the device:
-
From the device administration web interface, go to the Properties > Connection / Access Permissions / Accounting > Connection Methods or Permissions > Accounting Method tab.
-
In the Change Connection Methods interface, for the Connect from control panel setting, select the Xerox Secure Access method:
-
then click on Connection / Access authorisation / Accounting > Compatibility methods;
-
in the Modify method interface, select the Network accounting method:
On VersaLink C models
-
From the device administration web interface, click Authorisations > Accounting methods;
-
In the Accounting methods interface, enable Network accounting;
-
then click OK to confirm the settings.
SNMP community configuration
On B models
-
From the device administration web interface, go to the Properties > Connectivity > Setup tab.
-
in the SNMP properties section, check the box Activate the SNMP V1/V2c protocol ;
-
click on the Edit SNMP v1/v2c properties button;
-
in the Community Names fields, check the following values:
-
GET Community Names : public
-
SET Community Name: private
-
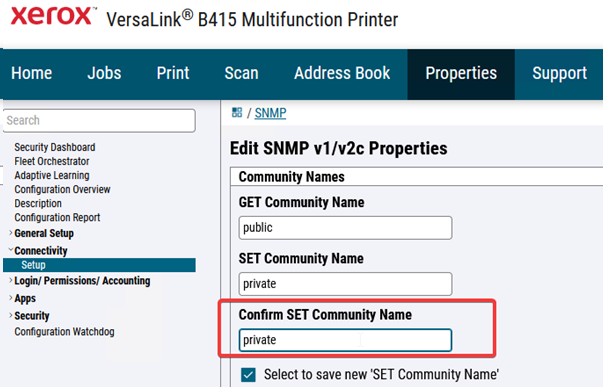
On C models
-
From the device administration web interface, click on Connectivity > SNMP ;
-
in the SNMP properties section, click on the SNMP V1/V2c line;
-
in the SNMPv1/v2 interface, in the Community names section, check the following values:
-
Read-only community name: public
-
Read/Write community name: private
-
click on OK to validate.
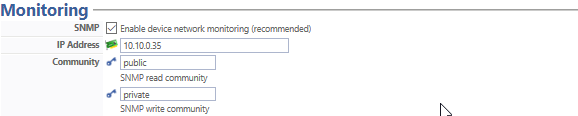
Chekc on the WES profile
Once you have configured the WES on the queue in the Watchdoc administration interface, you can check that the configuration matches: on the print queue with which the WES is associated:
-
From the Watchdoc administration interface Main menu, click Printing Queues... > Xerox > Properties > Monitoring section > Edit configuration):
-
in the Community section, check that the values entered for Read community and write community are the same as those or the device:
-
If necessary, modify them so that they are identical:
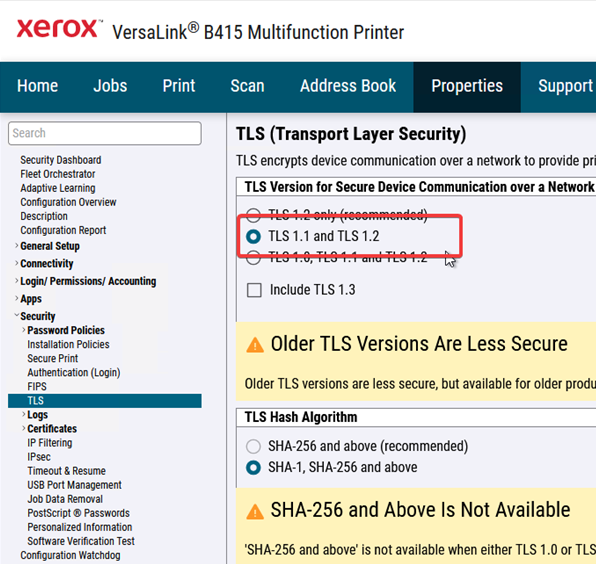
Activate the TLS security
On B models
-
From the device administration web interface, go to the Properties > Security > TLS tab;
-
in the TLS section, select TLS 1.1 and TLS 1.2:
On C models
-
From the device administration web interface, click on System > Security
-
in the Network Security section, click on SSL/TLS Settings ;
-
in the SSL/TLS Settings interface, tick
-
-
TLS 1.1
-
TLS 1.2
-
Communication HTTP-SSL/TLS.
-
-
Click on OK to validate.
Install the card reader
On the C models
To enable C405 devices to read badges, a specific plug-in must be installed and downloaded from the Xerox website.
-
From the Xerox website, download the compressed file VersaLink_Card_Reader_Plugins.7.zip ;
-
unzip the file in a temporary folder on the print server;
-
From the device administration interface, click on System and then on Plug-in Settings;
-
in the Plug-in settings box, activate the Plug-in functions function ;
-
click on Add ;
-
click Close to close the box:
-
in the Add a plug-in box, click Select, then select the Generic_CardReader.jar executable contained in the archive unzipped at the start of installation;
-
click on Restart now:
→ a message informs you that the device is unavailable during the reboot:
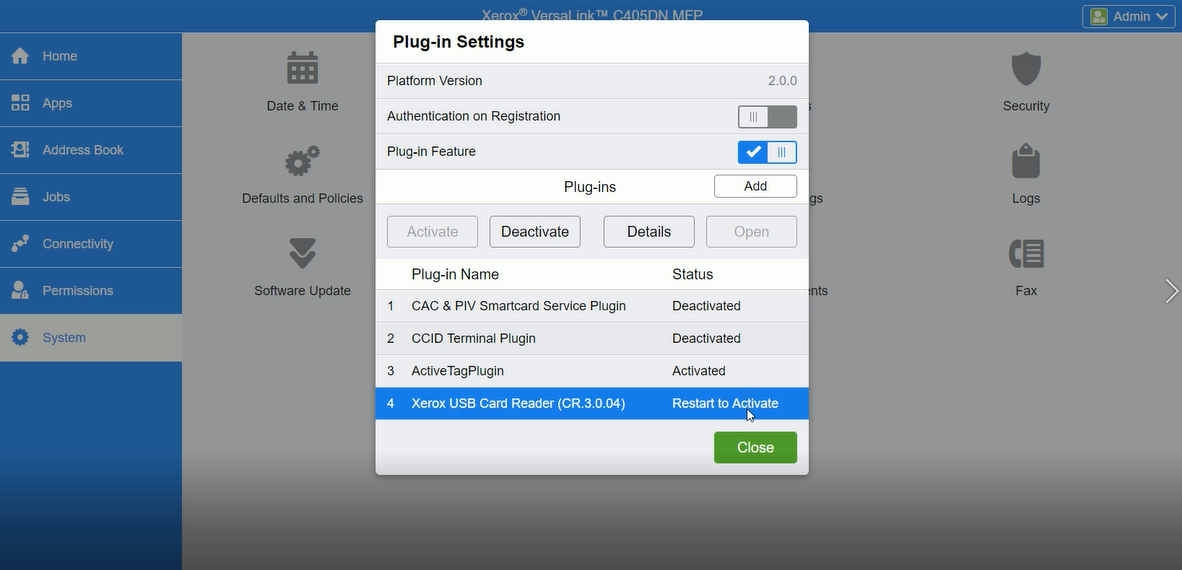
-
The device is rebooted.
Log out of the device administration interface and create / configure the WES (cf. Create / configure the WES).
Activate the IPP/IPPS protocol
To use the IPP![]() The Internet Printing Protocol (IPP) is a specialized communication protocol for communication between client devices (computers, mobile phones, tablets, etc.) and printers (or print servers). It allows clients to submit one or more print jobs to the network-attached printer or print server, and perform tasks such as querying the status of a printer, obtaining the status of print jobs, or cancelling individual print jobs.
(Source: Wickpedia) protocol on printing devices, they must first be configured:
The Internet Printing Protocol (IPP) is a specialized communication protocol for communication between client devices (computers, mobile phones, tablets, etc.) and printers (or print servers). It allows clients to submit one or more print jobs to the network-attached printer or print server, and perform tasks such as querying the status of a printer, obtaining the status of print jobs, or cancelling individual print jobs.
(Source: Wickpedia) protocol on printing devices, they must first be configured:
-
For AltaLink models:
-
From the web administration interface of an Altalink model, go to the Properties tab > Connectivity > Configuration;
-
in the IPPS section,
-
enable IPP:
-
Select No Authentication:
-
-
Then save the configuration.
-
-
For VersaLink models:
-
From the web administration interface of a Versalink model, go to the Connectivity > Protocols tab.
-
If the IPP protocol is not enabled, click on the line corresponding to IPP:
-
activate the Port ;
-
desactivate the Mandatory password setting
-
- Click OK to save the configuration.
-