Configure TCP Conv 2
Prérequisites
To configure the TCP Conv2 device thanks to the TC2Config tool, you must connect it to the network and to the others devices:
-
connect the TCPConv2 device to the network;
-
connect the TCP Conv2 device to the printer device;
-
connect the TCP Conv2 device to the card reader.
-
"Power" light is green when the TCP Conv 2 is working properly.
Installing and launching TC2Config
To install the administration tool, from the printing server:
-
go to the Elatec® download web site : https://www.elatec.com/en/support-center/downloads/twn3-tcpconv-devpack/
-
download the TCPConv2 administration pack (compressed archive) on your work space and unzip the archive;
-
click on the TC2Config.exe executable;
→ the TC2Config administration interface is displayed: 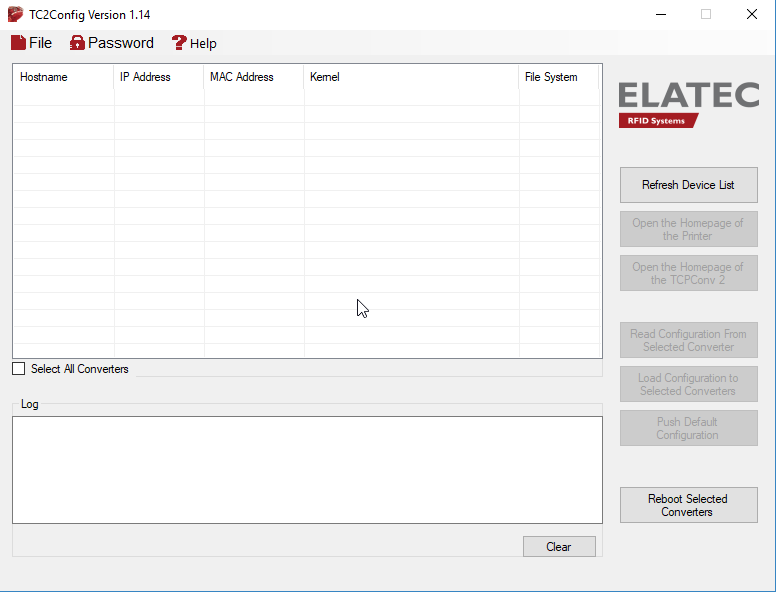
Configure the network
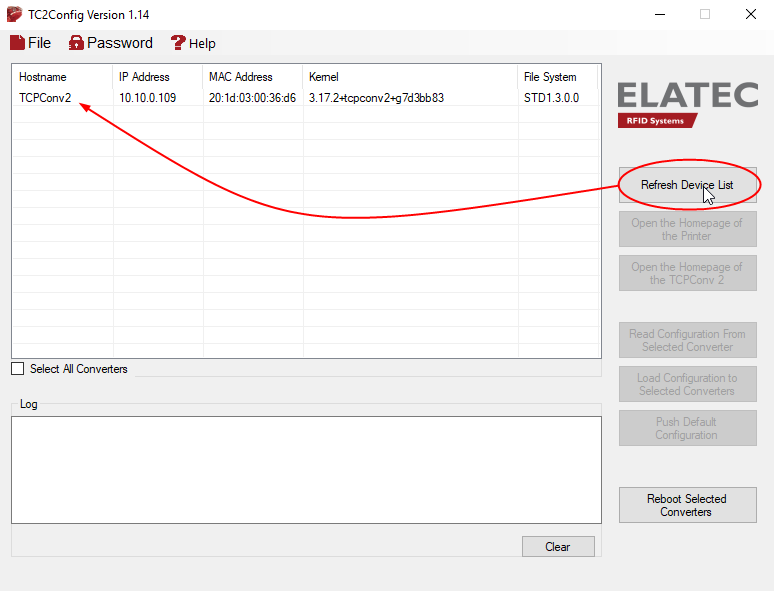
-
in the TC2Config interface, click on the Refresh Device List button:
-
the TCPConv2 devices connected on the network are displayed in the list:
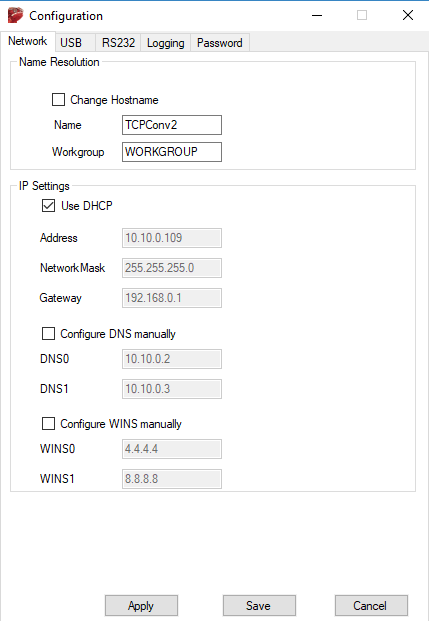
-
in the Configuration dialog box > Network tab > Name Resolution button:
-
in the Configuration > Administration > Setup interface, fill-in the Network Settings section fields:
-
Name : enter the TCPConv device's name. Unused by Watchdoc, this name will ease the maintenance tasks. It is therefore recommanded to associate this name with the print device one. This name is limited to 16 caracters (or less if this characters are accented);
-
Address: indicate the fixed IP adress (the same as the IP configured in the Watchdoc print queue) ;
-
Netmask: indicate the network mask in which is located the TCPConv2 device;
-
Gateway: if necessary, indicate the gateway of the TCPConv device.
-
Click on the Apply button to apply parameters
Configure the USB Card reader
-
in the Configuration > USBinterface, Representation of Keyboard Newlinesection, keep the default parameters;
-
in the TCP/IP Configuration , tick the TCPConv 2 as Client box:
-
in the TCP Server Configuration, enter the Local Port number;
-
in the TCP Client Configuration,indicate the following parameters:
-
tick the radio-button Send Plain Text Data;
-
Remote Hostname or IP: enter the Watchdoc server IP address;
-
Remote Port: enter the port number 5752;
-
Connect on any character: tick the radio-button;
-
Disconnect timeout: indicate in the field the period beyond which the card reader disconnects. By default, this time is set to 5 minutes
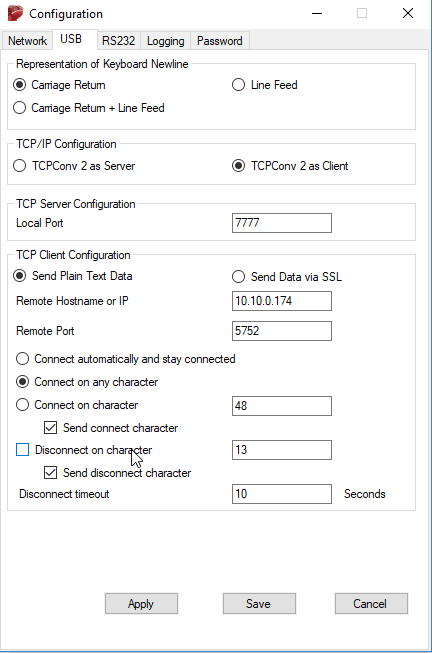 .
.
-
click on the Apply button to apply the parameters:
→ A dialog box indicates that the parameters are being recorded: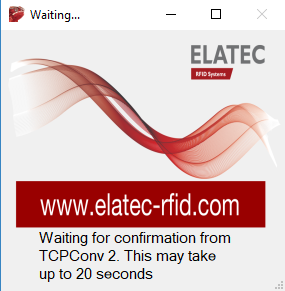
-
a report is displayed in the Log field. You then can continue to configure the WES.