WEScan - Activate the WEScan feature
Activate WEScan in the WES profile
-
from the Main Menu> section Configuration, click on Web & WES ;
-
in the Weblack and whiteES interface, in the WES profiles list, click the profile;
-
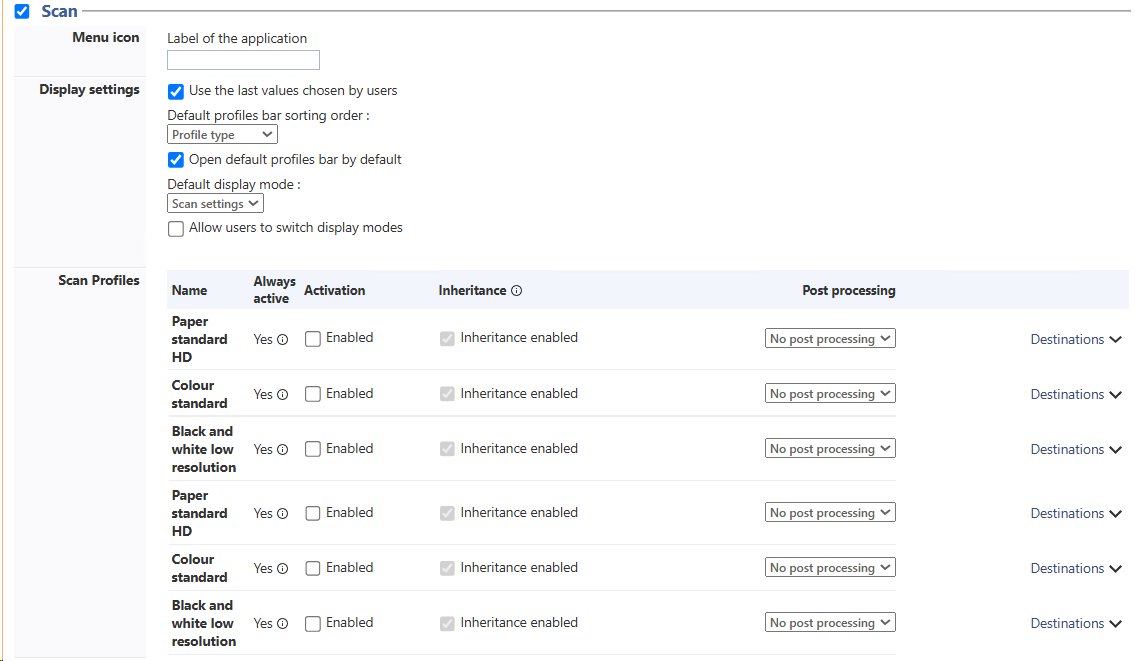
in the Configure a WES profile interface, section Scan, tick the boxes for the desired scanning options.
Menu icon: in the field, enter the name of the application that will be displayed on the device's screen.
Display settings
Use the last values chosen by users: allows you to default to the profiles chosen by users during their previous use, which saves time when scanning uses are often the same. You then define the order in which these profiles are sorted:
by date of use;
or by profile type (predefined parameters)
Open default profiles bar by default: is used to propose profiles (predefined scanning parameters) to the user, so that they can choose between all the proposed profiles (whatever their previous uses). Next, define the display mode:
either by parameter (which is useful when scanning is used for a wide variety of purposes);
or by profile (set of predefined parameters).
Allow users to switch display modes: tick this box if you allow users to choose their own preferred display mode.
Scan Profiles: In this section, indicate which profiles are available to users:
Always Active: this information indicates whether the profile is active regardless of the settings supported by the printing device;
Activation: tick the box to activate the profile and make it available to users;
Inheritage: (activated by default when the Activation box is ticked) tick the box to make all the profile settings available to the user, who can use them to create their own profile;
¨Post processing: for Kyocera WES profiles, select one of the configured post-scan treatments (seeConfigure a post-process) ;
Destination: choose your destination.
WEScan offers 3 types of scan:
Scan to Me: scans and sends the scan to the user's email.
Scan to Mail: scans and sends the scan to an email specified by the user;
Scan to folder: scans and sends the scan in a predefined folder of the user workspace and accessible by the user;
Activate the WEScan feature on the print queue
To activate the Scan function:
-
in the Watchdoc administration interface, from the Main Menu > Production section, click Printing queues, locations, queue groups & pools;
-
click on the print queue on which you want to activate WEScan;
-
In the Printing queue properties tab in the WEScan section, click on the Enable Scan button or Update interface if the function has already been activated:
