Principle
The Watchdoc Supervision Console (WSC) is a tool for controlling all controlled print servers controlled by Watchdoc from a single interface for easy management, especially in the case of your server fleet is important.
Since version 6.0.4770, it has been possible to change the WSC display language from the authentication page: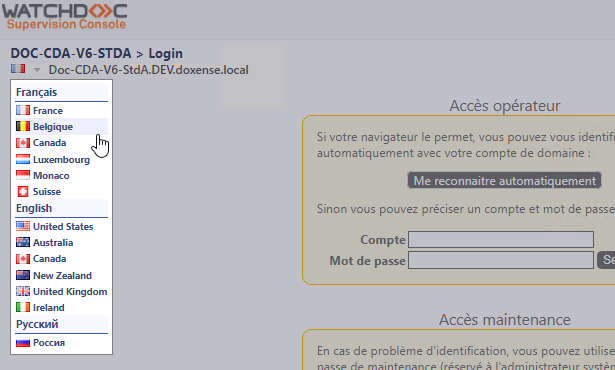
Since version 6.1, WSC only accepts certified drivers. It is therefore necessary to reinstall existing drivers (see WSC - Creating print drivers).
Access WSC
-
To access the Supervision Console, open your browser to the address of your print server and add the port number 5756 (https://server_name:5756:
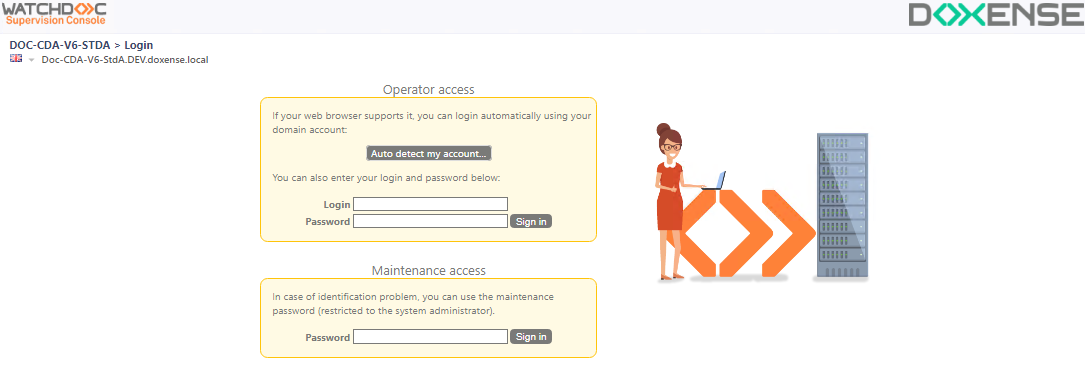
This login screen proposes two methods to identify yourself:
-
Operator access allows you to connect with your Windows credentials. This is the preferred method.
-
Maintenance access which requires only a password, is reserved for maintenance operations or when you can't login with the first method.
-
Enter your Login and/or Password and click Sign in.
è The Main Menu screen is displayed.
WSC v6.1 is protected against bruteforce attacks![]() A bruteforce attack consists of testing, one after the other, every possible combination of a password or key for a given identifier in order to connect to the targeted service. This is an old-fashioned method, widely used by hackers. The time it takes depends on the number of possibilities, the speed with which the attacker tests each combination and the defenses he is up against. As this type of attack is relatively straightforward, an organization can have systems in place to protect itself from this type of behavior. The first line of defense is to block accounts after a limited number of failed authentications for the same identifier. The operation of the brute force attack is similar to that of the credential stuffing attack, but is less elaborate.
(Source : https://www.cnil.fr/fr/): an incremental timeout is imposed after each unsuccessful authentication attempt.
A bruteforce attack consists of testing, one after the other, every possible combination of a password or key for a given identifier in order to connect to the targeted service. This is an old-fashioned method, widely used by hackers. The time it takes depends on the number of possibilities, the speed with which the attacker tests each combination and the defenses he is up against. As this type of attack is relatively straightforward, an organization can have systems in place to protect itself from this type of behavior. The first line of defense is to block accounts after a limited number of failed authentications for the same identifier. The operation of the brute force attack is similar to that of the credential stuffing attack, but is less elaborate.
(Source : https://www.cnil.fr/fr/): an incremental timeout is imposed after each unsuccessful authentication attempt.
Modules presentation
The supervision modules available in the Watchdoc Supervision Console are as follows:

-
Print Servers: gives access to the supervision of all the servers controlled by Watchdoc;
-
Printing queues: gives access to the supervision of all the print queues controlled by Watchdoc;
-
Plug and Print operations: gives access to the mass management of the print queues in order to make them controlled by Watchdoc after;
-
Printer templates: gives access to the association between printer template and driver ;
-
Supplies: gives access to the supervision of the supplies of all the print queues controlled by Watchdoc;
-
Watchdoc spoolers management: gives access to the print queues supervision and to the pending print jobs on the Watchdoc spooler supervision;
-
Cards Management: gives access to the cards manangement, which allows the users to authenticate in Watchdoc;
-
Guests Management: gives access to the Guest directory management, which allows the guests to authenticate in Watchdoc ;
-
Analytical codes management: gives access to the analytical codes supervision. These codes are used by the Billing codes feature;
-
Advanced configuration: gives access to the second level configuration menu.
Advanced configuration includes the following administration modules:
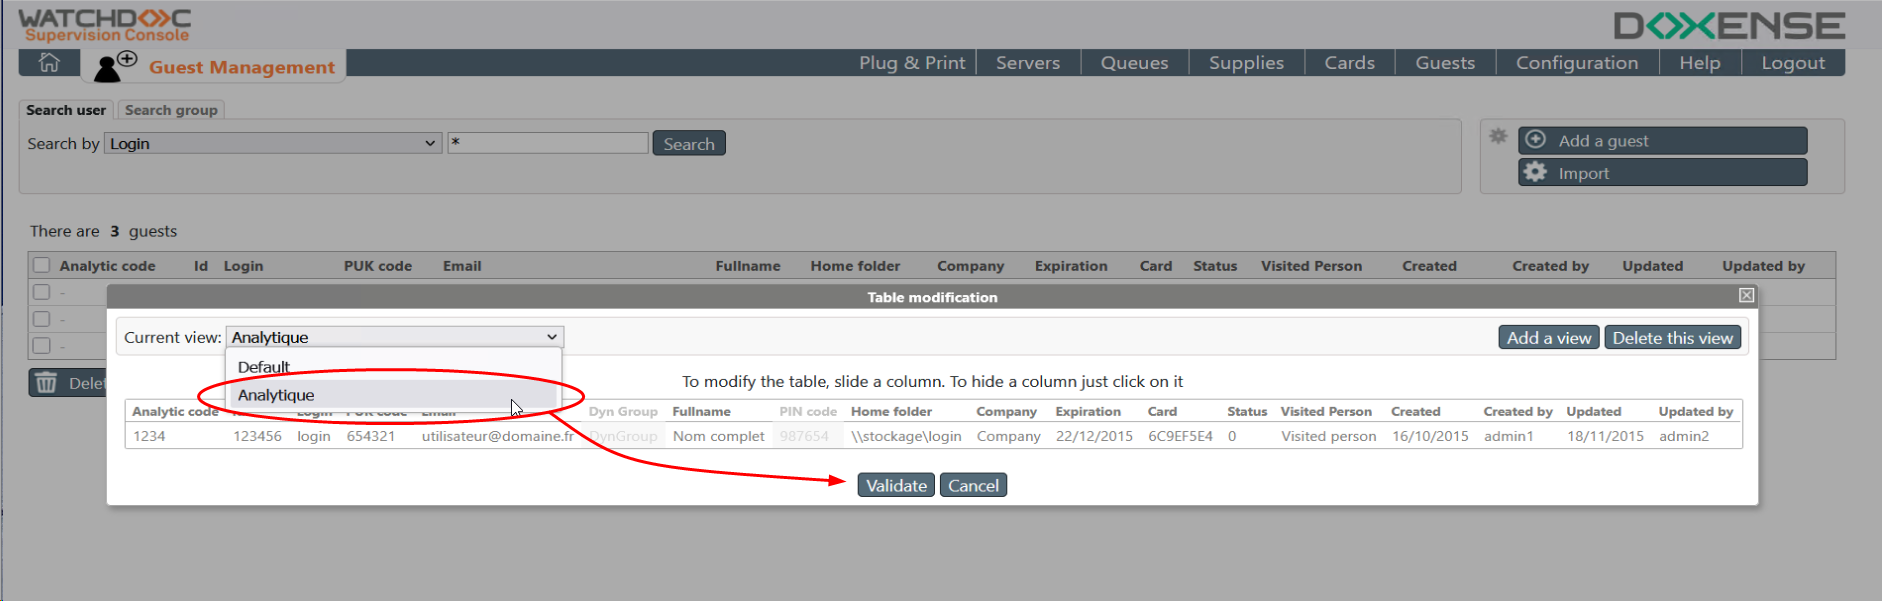
Modify the table appareance - Add a view
You can customise the appearance of a results table in WSC (whatever the object in the list) by creating new views.
To create new views:
-
From the table, in the actions box (top right), click on the button
 .
.
If the button is not in the list, first click on the cogwheel to display all the action buttons:
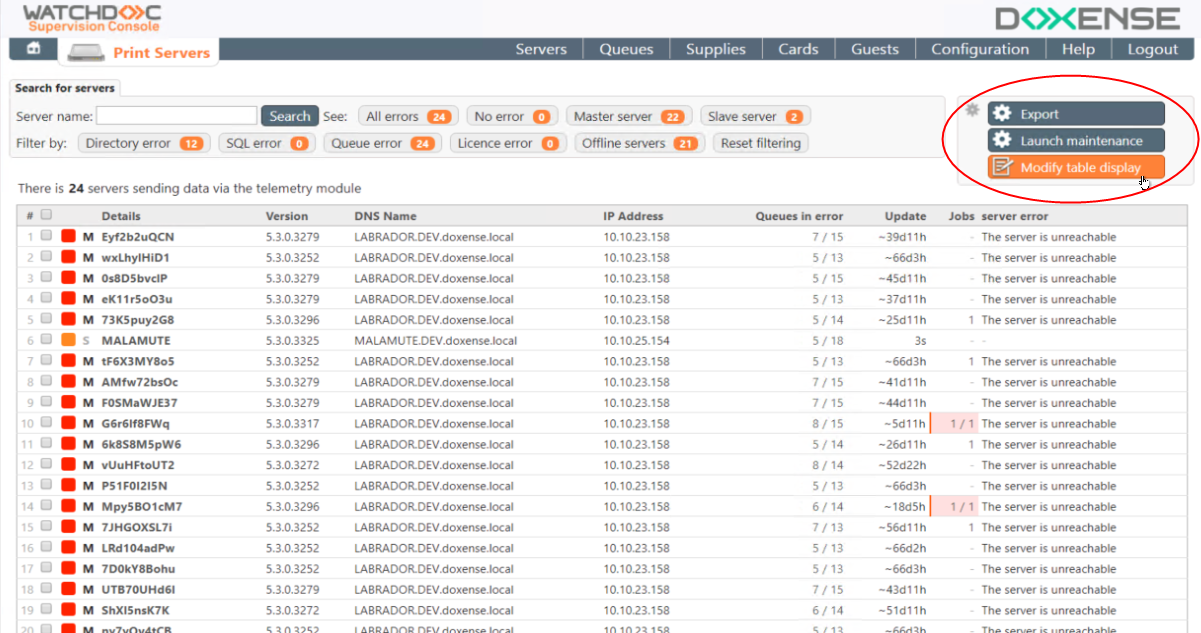
-
On the Table modification interface, click on the button
 .
. -
Then enter a name in the New view name field.
A check will be applied to the field to prevent the entry of prohibited characters (such as ‘’;alert(‘xss’);//, for example). -
Drag and drop the columns where you want them to appear:

-
To stop displaying a column in the table, click on its header: it will then be greyed out ;
-
As soon as the table corresponds to the one you want, click on the button
 .
.
èThe view created is then the one displayed by default.
Select the default view
The "Default" view is displayed by default and can not be deleted.
If more than one view exists, the last view created is displayed by default.
To modify this view,
-
click on the
button; -
in the interface Table modification, select the Current view in the list of available views;
-
click on the button
:
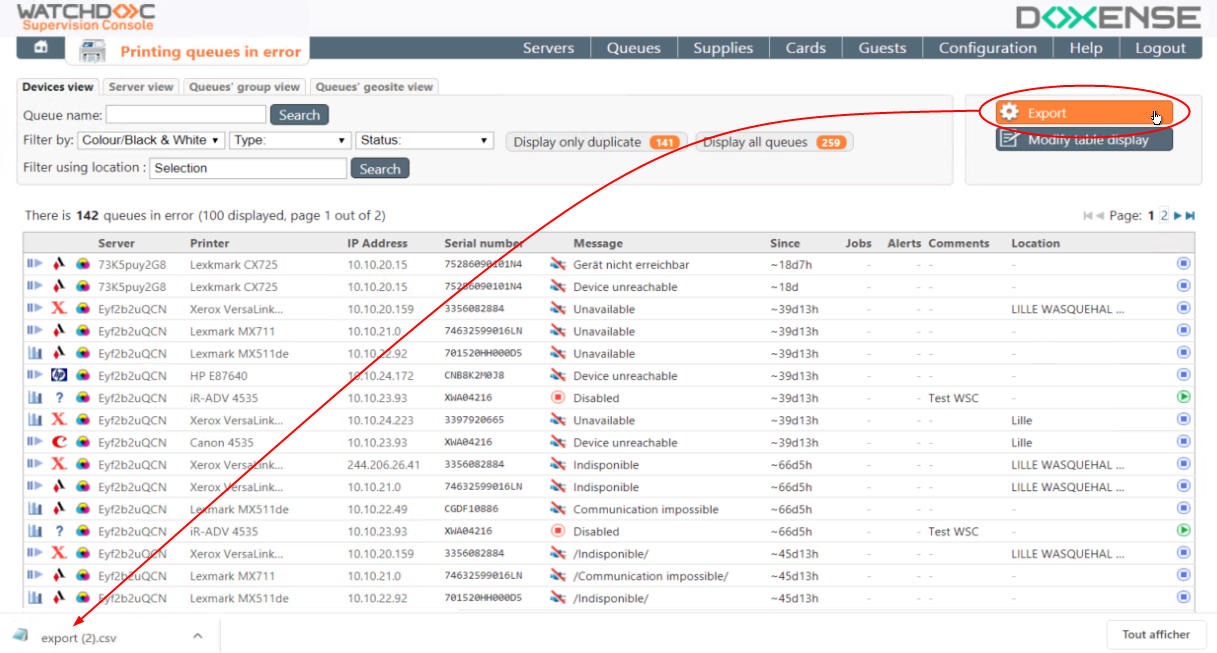
Export the list
-
To export a list, whatever it is:
-
in the list, go to the right section in which are displayed the actions
; -
click on the
 Export button;
 -
click on the file export.csv downloaded by the browser or saved it in your workspace: