Ricoh WES - Configure the WES profile
Create the WES profile
On a clean Watchdoc installation, a first WES profile is automatically created with default parameters at the end of the wizard procedure, but you can, at any time, edit existing profiles to modify them or create a new profile.
-
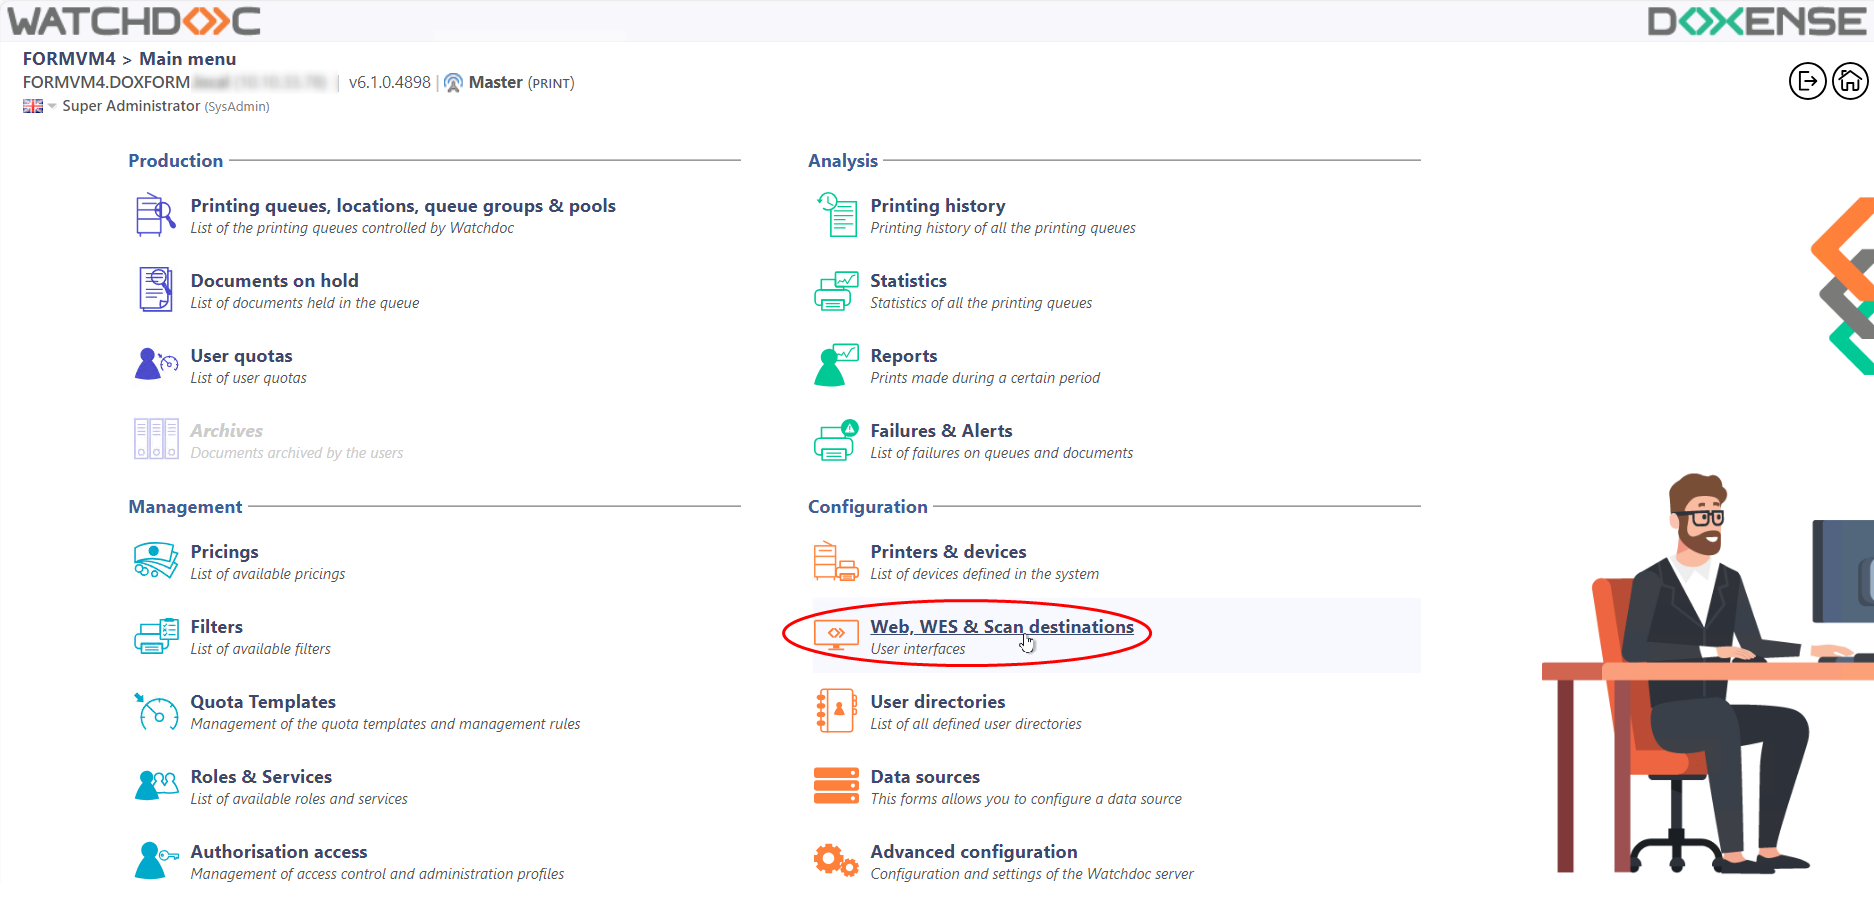
From the Main menu in the administration interface;
-
in the Configuration section, click on Web, WES & Scan destinations:
-
in the Web, WES & Scan Destinations - Client Interface Management interface, click on Create a new WES profile;
-
in the list, select the profile you want to create:
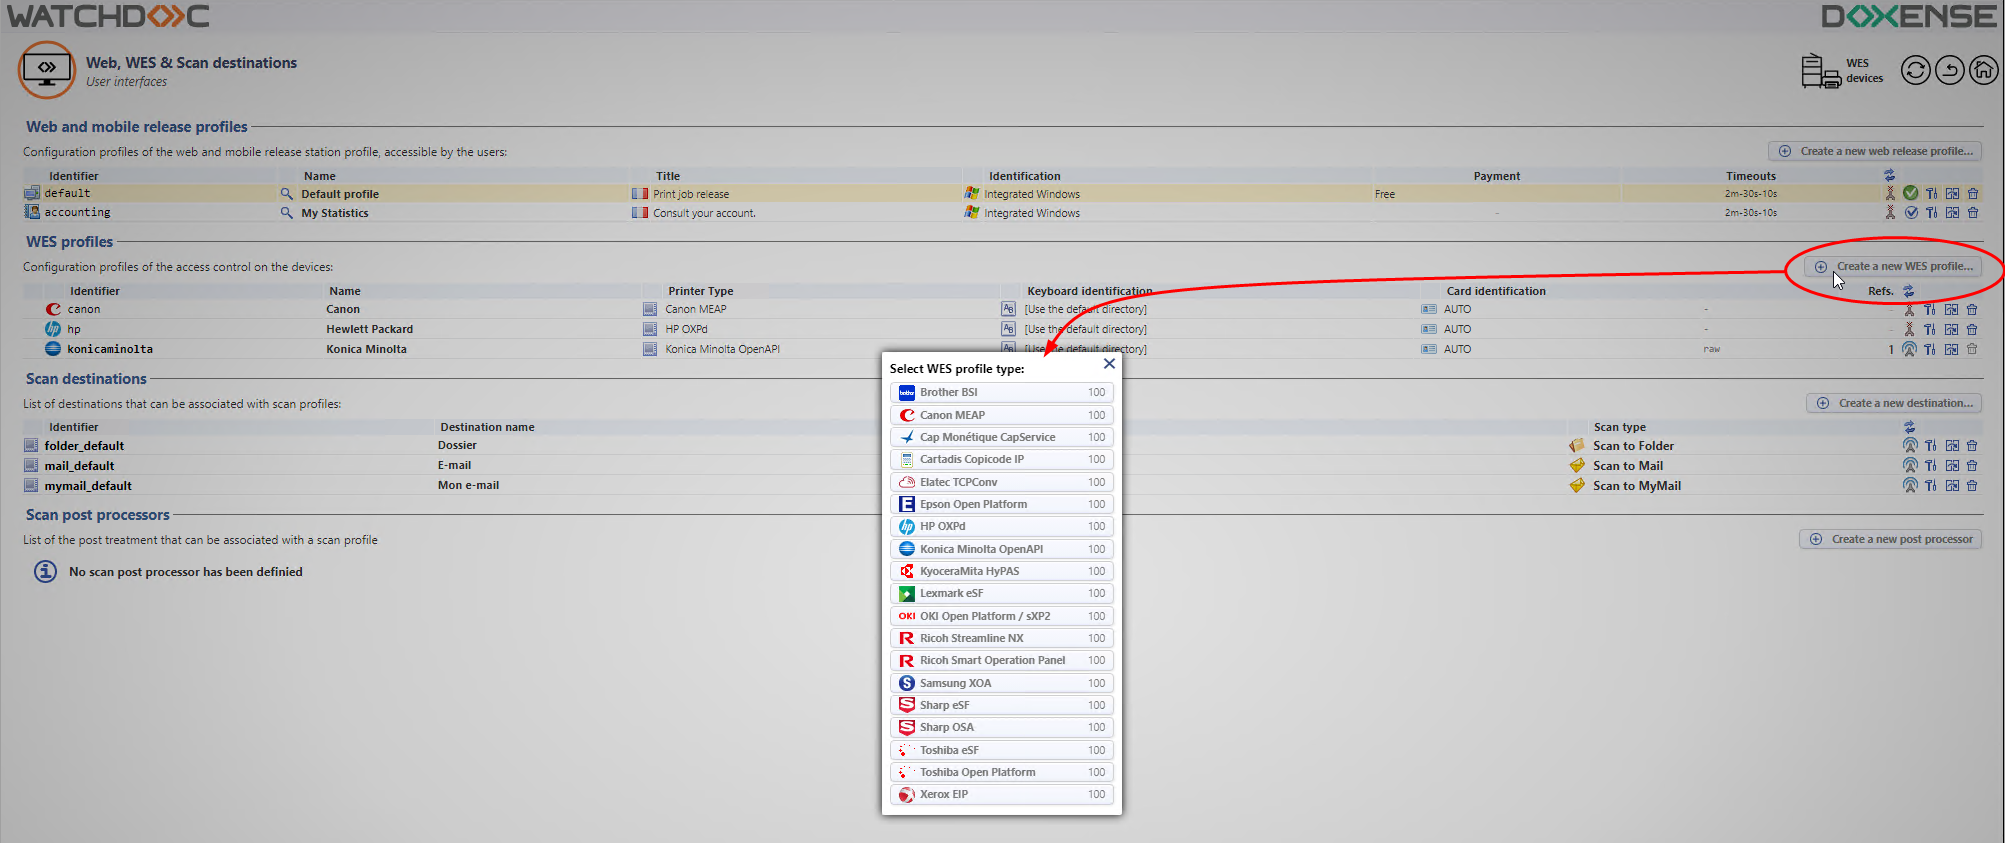
è you will access the Create a WES profile form, which contains a number of sections in which you can configure your WES.
A navigation bar helps you quickly access the desired section:
Configure the Ricoh WES profile
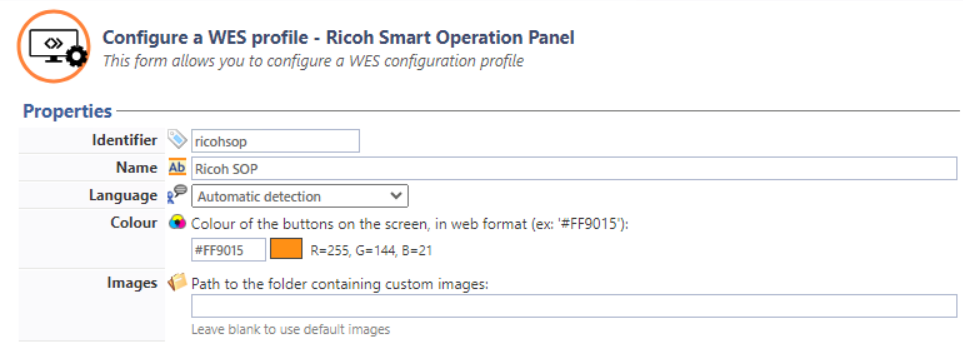
Configure the Properties section
Use this section to state the main WES properties:
-
Identifier: Enter the single identifier for the WES profile. It can comprise letters, numbers and the '_' character with a maximum of 64 characters. This identifier is only displayed in the administration interfaces.
-
Name: Enter the WES profile name. This explicit name is only displayed in the administration interfaces.
-
Global: In the case of a domain configuration (master/slaves), tick this box to replicate this profile on the slave servers.
-
Language: Select the WES display language configured from the list. If you select Automatic detection, the WES adopts the language it finds by default in the device configuration.
-
Version: Select the version of WES. For v3, you can customise the interface by choosing the colour of the buttons and images to match your graphic identity:
-
Colour: enter the Hexadecimal color value corresponding to the WES button's colour. By default, the buttons are Watchdoc orange customized (#FF901). Once the value is entered, the colour is displayed in the field.
-
Images: if you want to customize the WES images, enter the folder path in which are recorded images you want to display instead of the default images (stored in C:\Program Files\Doxense\Watchdoc\Images\Embedded\Doxense\[Manufacturer_Name] by default).
see Customize the WES.
-
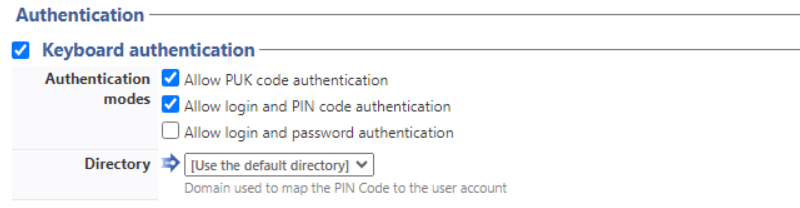
Configure the Keyboard authentication section
- Keyboard authentication: tick the box (at the section level) to enable user authentication from a physical keyboard or the touch screen one, then set out how this authentication works:
PUK
(Print User Key). In Watchdoc, this is a code (associated with a user account but used alone) sufficient to allow the user to authenticate in a WES. The PUK code is generated thanks to an algorithm. The user can consult it in the "My account" page of Watchdoc. For security reasons, we advise against using the PUK code and recommend using a login (user account)/PIN code. Code: the PUK code is automatically generated by Watchdoc according to the parameters defined in the directory and communicated to the user on the "My account" page.
Login and PIN Code: consisting of 4 or 5 digits, the user PIN code (1234, for example) is registered as anLDAP attribute or in a CSV file. It is associated to the user login (available with the Watchdoc 5.1 version).
Login and password: users will use their LDAP credentials. We do not recommend using this mode :Directory:
-
Directory: From the list, select the directory to query during keyboard authentication. If no directory is set, Watchdoc will query the default directory.
Configure the Card authentication section
-
Card authentication: tick the box (at the section level) to enable user authentication from a card, then set out how this authentication works:
-
Directory: From the list, select the directory to query during cards authentication. If no directory is set, Watchdoc will query the default directory.
-
Self registration : If you enable the self-registration
An action in which a user account is associated with its own card code. Registration is carried out the first time a card is used. The registration can be carried out by the IT manager when he issues the card to a user or by the user himself who enters his identifier (PIN code, PUK code or username and password) which is then associated with his card code. Once the registration is completed, the card code is permanently associated with its owner. from the WES, state how the user assigns their card to their account:-
with PUK code: the embedded solution will ask the user for its PUK code. If the PUK code is correct, Watchdoc stores the card number with the user's login in its database;
-
with login and PIN code: the embedded solution will ask the user for his login and his PIN cpde.
-
with login and password: the embedded solution will ask the user for his login and his password. If the data keyed in are correct, Watchdoc stores the card number with the user's login in its database.
-
Notify the user on self-registration: check this box to send a notification to the user when his badge has been enrolled.
-
-
Format : State, where necessary, how the character string for the badge number string is to be transformed. E.g. raw;cut(0,8);swap.
Specificity of the Format parameter: typically, when the code PUK is stored in an attribute of the LDAP directory, it is encoded for security reasons. Obtaining the code corresponding to that of the badge therefore requires a transformation of the format read by the badge reader. If you have a problem setting this parameter, contact Doxense Support.
-
Display timeout: indicate, in seconds, the time to wait before a second badge swipe is taken into account (5s < Time < 15s)

-
Configure the Anonymous connection section
Check this section to enable anonymous login to allow a non-authenticated user to access the device by clicking on a specific button.
You can restrict the functionality that the anonymous user can access by applying a rights policy to the queue, group or server and using the Anonymous User filter.
-
Button label: in this field, enter the label displayed on the device functions access button. The default text is Anonymous:

Configure the Accounting section
In this section, specify whether you want accounting to be performed by the device itself or from the Windows spooler.
-
Device: Uses the prints accounting: tick this box if you want accounting to be handled by the device. In this case, specify the accounting mode:

Configure the Pull-print section
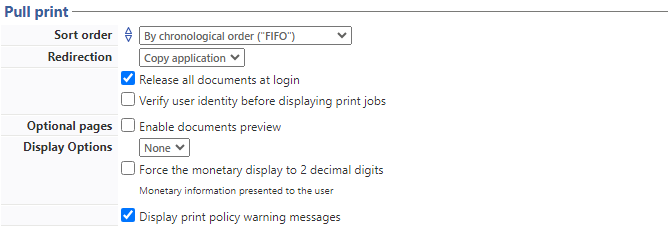
In this section, you specify the parameters relating to the print-on-demand function, i.e. the interface from which the user accesses his pending jobs and from which he deletes or validates print-jobs:
- Sort Order: in the list, select the order in which the printouts should be presented on the WES :
by reverse chronological: from most recent to oldest;
Chronological: from oldest to most recent.
-
Redirection: specify the behaviour of the WES when the user logs on, and in particular the redirection to a page other than the home page:
-
Smart: the WES displays the default home interface if the user has no pending documents; on the other hand, if the user has pending documents, the WES displays the list of documents;
-
Waiting jobs: the WES displays the list of pending documents even if there are none.
-
Home: the WES displays the default home interface and does not redirect to any other interface;
-
Copy application: the WES displays the copy interface and does not redirect to any other interface;
-
Release all documents at login: tick the box to ensure that all queued jobs are automatically printed when the user logs on to the print device. In this case, the user does not access the list of queued jobs to validate which ones to print.
-
Verify user identity before displaying print jobs: tick the box to the user is required to authenticate before accessing the list of his or her jobs.
-
Optionnal pages:
-
Enable documents preview: tick this box so that the user can preview pending jobs before confirming printing.
-
-
Display Options: In the list, select the monetary information presented to the user via the WES: none, the price or the cost of their prints.
-
Force the monetary display to 2 decimal digits:
-
Display print policy warning messages: tick the box to limit the number of decimal places displayed to the user in the tariff information.
-
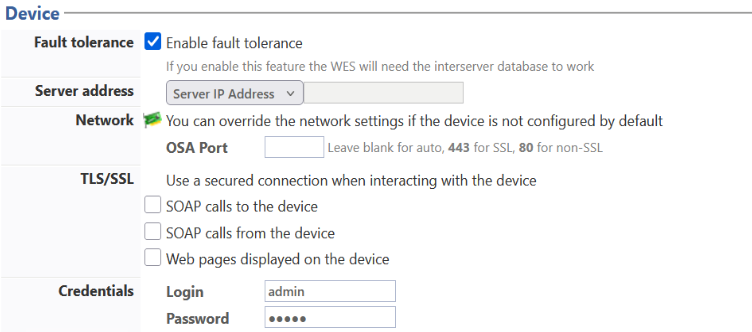
Configure the Device section
This section is used to define the connection mode between the server and the print devices.
-
Fault tolerance: tick this box to enable fault tolerance based on load-balancing. If you enable this function, you will need to configure interserver printing (see Configuring interserver printing).
-
Network: the two values can be used to set :
-
Connection timeout: the maximum waiting time for the connection between the copier and Watchdoc during a request (server off or service stopped);
-
Request timeout: the waiting time for processing the request: retrieving information about a user, sending and processing accounting requests.
-
-
Server Address type: The device needs to contact the Watchdoc server when the user tries to connect or wants to release his documents. You can specify the Watchdoc server address in three different ways: IP Address, DNS Address and Custom Address ;
-
Connection mode: select the connection mode between the WES and the Watchdoc service:
- Mixed:the WES adapts automatically according to the data communicated: it uses SSL for sensitive data (PUK code, login/mdp, etc.) and non-SSL for non-sensitive data;
- SSL: the WES always uses SSL to communicate with the server. N.B.: activating SSL can cause slowness or alerts in the event of unrecognised certificates.
- No-SSL: the WES never uses SSL to communicate with the Watchdoc service.N.B.: when SSL is deactivated, it is recommended not to use the connection or automatic association of the badge (enrolment) by account and password.
-
Device security: specify the connection parameters that allow Watchdoc to communicate with the device:
-
Account: enter the administrator account and password;
-
Password: enter the password for the device administrator account;
-
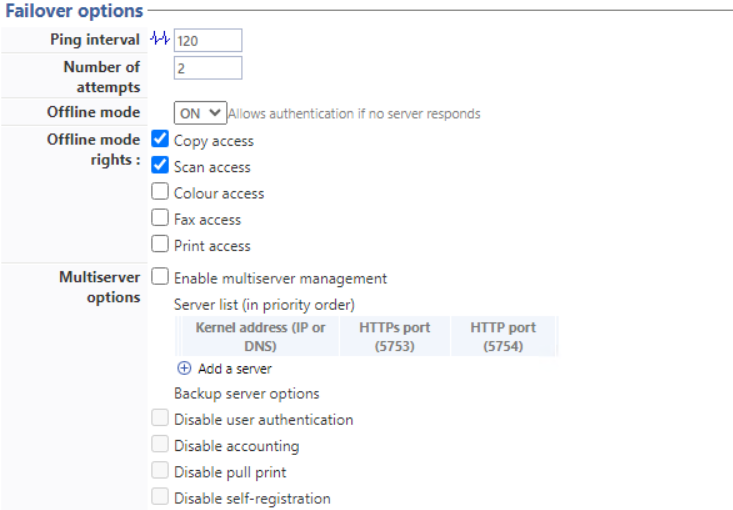
Failover options section
In this section, you configure the behaviour of the print devices in the event that the Watchdoc server does not respond.
-
Ping interval: specify, in seconds, the frequency with which the device polls the server to check its configuration and inform it that it is operating correctly;
-
Number of attempts: specify the number of connections the device should attempt to the main server before switching to the standby server.
-
Offline mode: activate or deactivate offline mode
Mode enabling the print device to operate in a degraded manner in the event of the print servers (main and backup) failing. In offline mode, printing is impossible, but the device's other functions can be offered: photocopying, faxing and scanning.
If offline mode is disabled, in the event of a server failure, all device functions are blocked until the server is repaired.
This mode is configured in the WES profile applied to the device. and complete the list by indicating the authorised functions if the server is off: -
Copy access: Tick this box to enable the user to copy;
-
Scan access: Tick this box to enable the user to scan;
-
Color access: Tick this box to enable the user to print in color;
-
Fax access: Tick this box to enable the user to send documents by fax;
-
Print access: Tick this box to enable the user to print documents.
-
-
Multiserver options: tick this box to relay requests to a backup server in the event of failure of the server with which the WES is associated, then enter the information required to access it in the table: backup server address; https port; http port.
Then check the functions provided by the backup server:-
Disable user authentication: tick this box if the rescue server does not authenticate users. For each request, it returns the details of an anonymous user with the rights defined for an anonymous user on the main server. The work carried out is then recorded under the "anonymous" account;
-
Disable accounting: If this is checked the accounting elements will be held on the device until it reconnects to the primary server. This is useful if you wish the accounting to be all sent to the same sever (if the databases are not common for example)
-
Disable pull print: With this option, the print on demand application will be disabled. This is useful because if the backup server has no access to the jobs of the user.
-
Disable self-registration: With this option, the self-registration will not be available on the backup server. This is useful if the cards database are not the same for both servers.
-
Configure the Misc. section
In this section, configure how and where the log files should be stored in the event of a of a malfunction between the WES and the server.
-
Log options - Destination: Specify where the application should collect the information:
-
file: Tick this box so that the information is saved in a file accessible by Watchdoc;
-
device: Tick this box so that the information is saved on the device;
-
all : Check this box to have the information saved in a file accessible by Watchdoc and on the device.
-
-
Log options - Level: indicate the level of detail of the information recorded:
-
debug: Option to keep track of WES malfunctions;
-
verbose: All detailed traces left by the WES;
-
info: Traces left by the WES;
-
warning: Traces left by the WES when there is a default;
-
error: Traces left when an error is detected at the WES.
-
fatal: Traces of faults detected on the WES
-
none: No trace

History section
This section displays information on the configured WES and on modifications made to it :

Validate the profile
1. Click the button
 to validate the WES profile configuration.
→ Once validated, the WES profile can be applied to a print queue.
-