Devices
The Devices tab contains all devices You have added, and displays crucial information about them. Among the non-obvious features that can be seen, and the name of the column does not necessarily say what they mean, you can include:
-
Status column provides information about the current status of the device connection with agent and includes four possible options:
-
Active
-
Not responding
-
Inactive
-
Deleted
-
Lowest supply status column contains information about the status of the supply with the lowest level and includes four possible options:
-
Ok
-
Low
-
Empty
-
Unknown
-
Connection type column contains information on how to communicate with the device, and includes three possible options:
-
LAN - connects using a network agent
-
UBS - connects using USB agent
-
Unmanaged - stands for an unmanaged device - in other words a manually added device.
Note: To delete device go to the Actions column
Advanced search
On the left side there is an advanced search panel where you can search for devices using the following filters:
-
Companies and locations, search using the name of added companys or locations
-
Device model number, search using device name and specific device model number
-
Coordinator, search using the name of the coordinator, person responsible for a specific device
-
Device
Device
General information
To access detailed settings for a specific device, click on its name in the Device ID column. Then a window with general information about the specific device will appear, while on the right you will see the other devices. Detailed information about the device is displayed below, divided into the following columns:
-
Parameters information about used dictionaries for this printer, the plus on the right takes you to Device settings.
-
Toners and drums
-
Maintenance kit/others
-
Input tray
Alerts
The alerts tab is on the left side and it is about device crashes and low supply. Alerts tab displays errors for specific devices.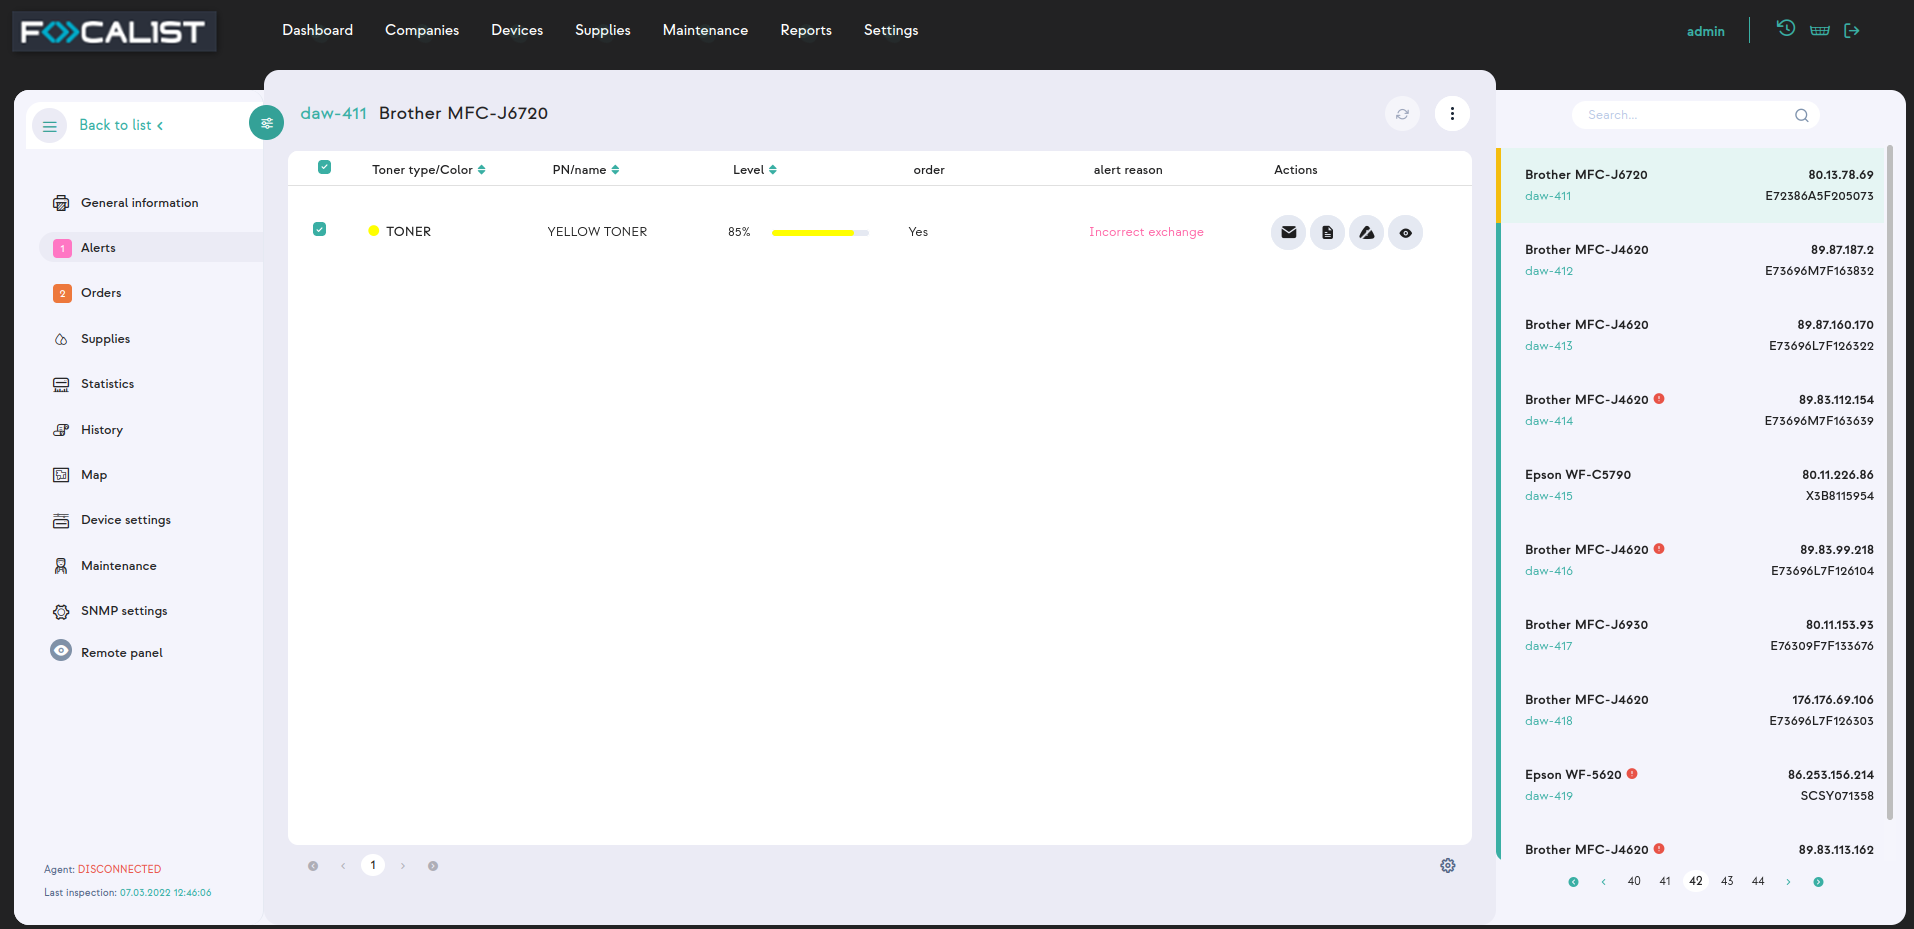
There are four possible action that can be taken with alerts:
-
Send email
-
Add note, note that
-
Ignore alarm,
-
Details,
The left-hand menu shows the devices discovered by the Agent that are not yet managed by Focalist. You can then add them by clicking on the Add button: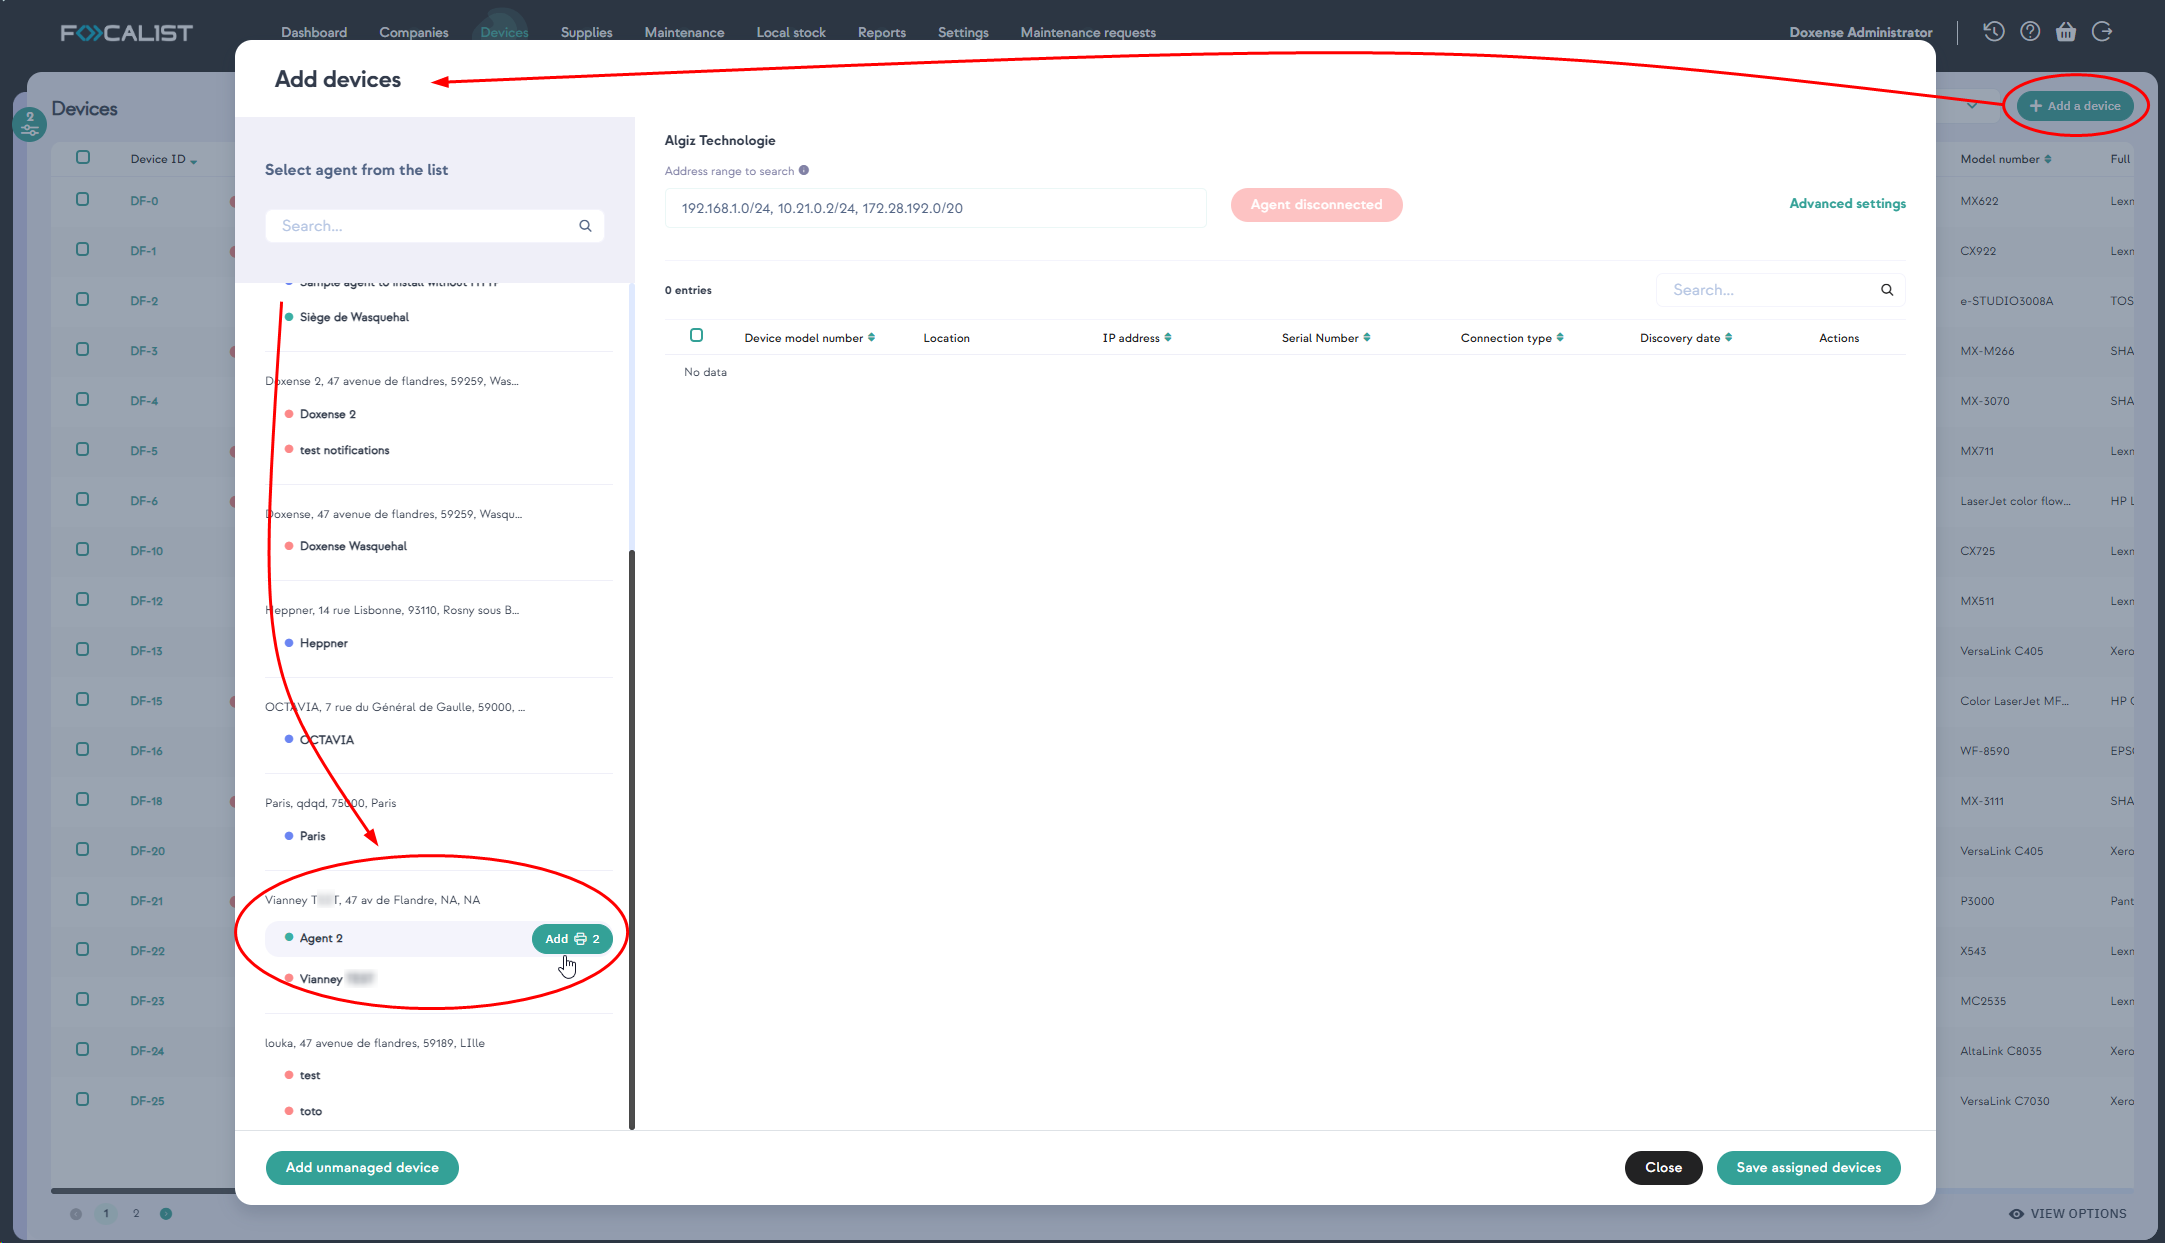
Orders is one of main Focalist features, agents at regular, preset intervals, it polls devices for the status of resources. And if they are low on some supply it generates order for that supply. The generated orders are visible in the section also in tab Supplies.
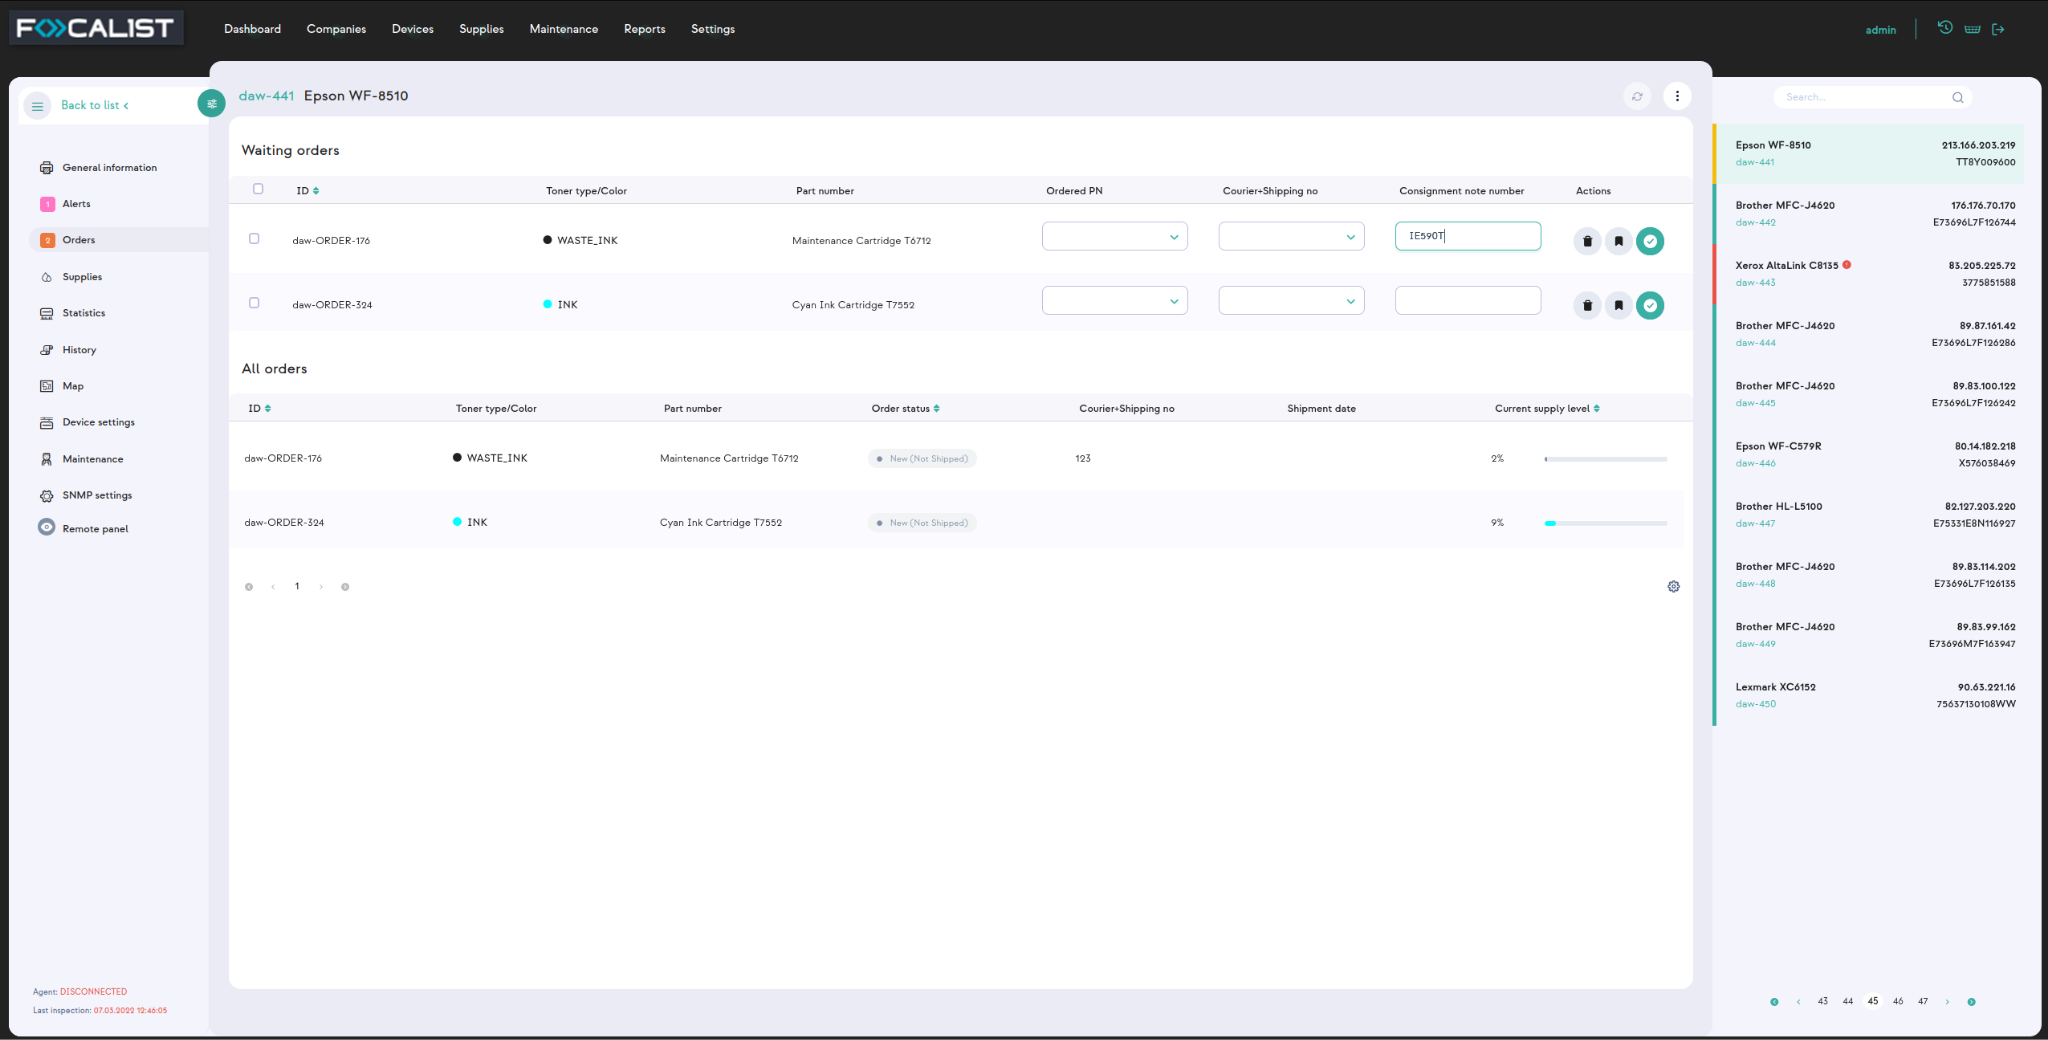
Part number - Information retrieved from device about part number, they can be accurate as on the above screen, but most of the time there is only shor information like
black toner.
Ordered PN - Ordered Part Number, full catalog part name, selected from list that client can enter manually in the settings(Supplies model numbers)
Courier+Shipping no - clue about courier in charge of delivering supplier. Selected from list, can be added in settings (Couriers).
Supplies
This tab contains information about supplies installed in the printer. Additionally you can check each supply separately and see statistics about them.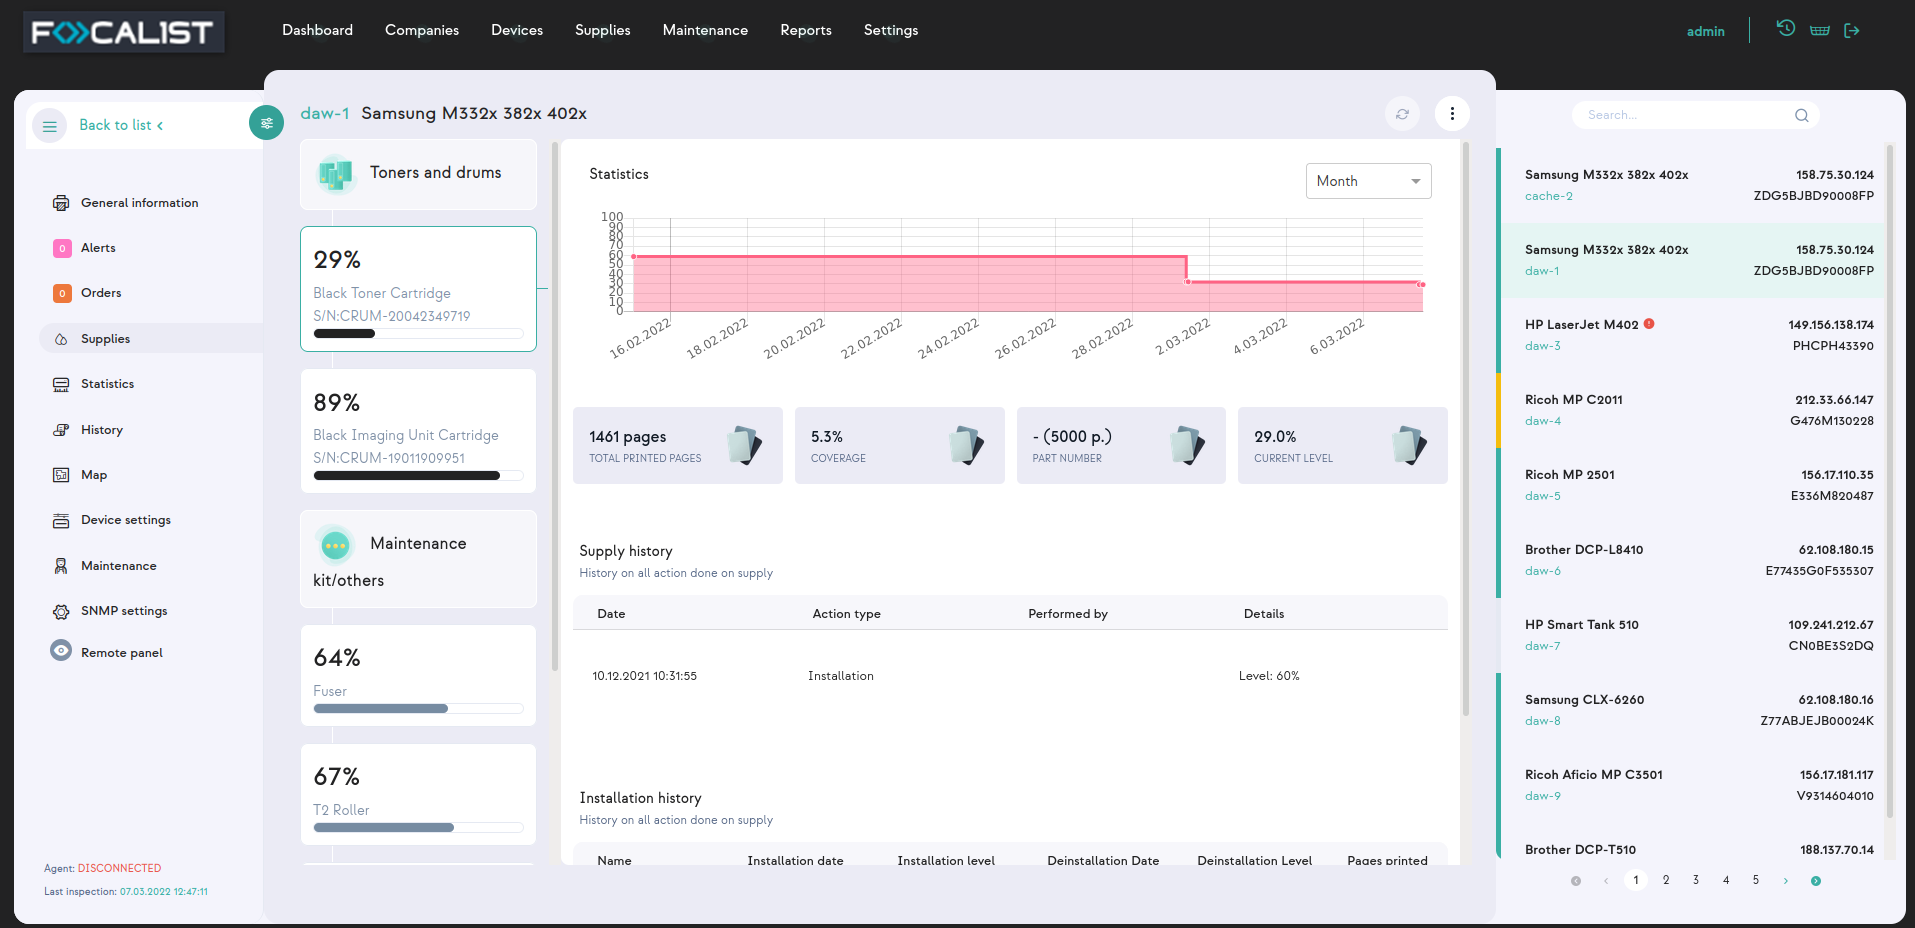
Statistics
This section contains information about detailed printer statistics. If possible separate printed pages by format(A3, A4,...) and mono/color.
How does the Focalist count pages?
This is one of the most frequently asked questions, because there is often a problem that the number of pages in the Focalist app is different from those given by the printer.
At Focalist, we bring the final total result of printed pages to A4. Considering that, Focalist count pages accordingly:
-
A3 and everything bigger than A3 - 2 pages
-
All other lower sizes than A3 - 1 page
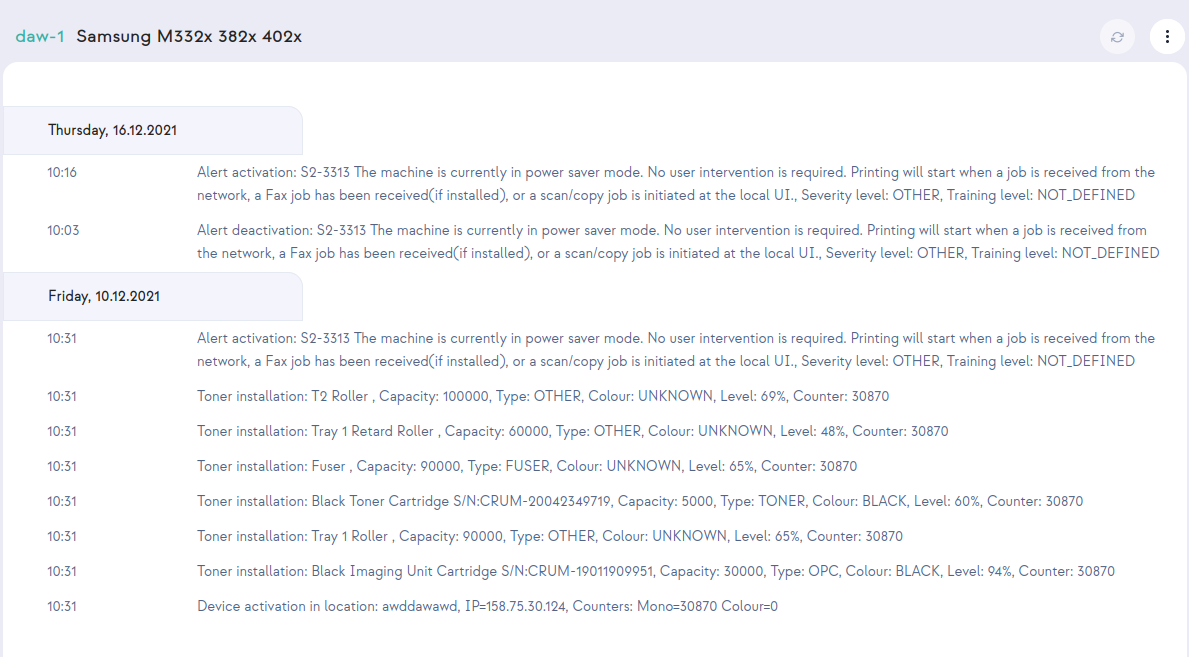
History
History section contains information about what has been going on with the device since it was added to the application. The historical information such as error alerts, toner installation or Device activation in chosen location.
Map
This tab is really useful in case of many devices installed in different locations. You can add information about device location with an image of a map where the device is placed.
Device settings
-
Additional parameters
Information that are displayed In tab Devices and are included in generated reports under section Parameters.
-
Location
You can select here information about where the device is installed. It would affect future reports.
-
Coordinator
By default is assigned the one in charge of the location where the device is installed, but it can be changed here.
-
Reports
Include or not printer in reports.
-
Order settings
Option for customizing the generation of orders for chosen devices.
-
Price settings
Custom settings for prices, only available if chosen if Advanced billing method is chosen to be “The custom price for the device model”.
Maintenance
In this tab you can submit a new maintenance request and assign someone or edit an existing one. All created requests would be visible in the Maintenance tab. It is only visual information, to better organize work.
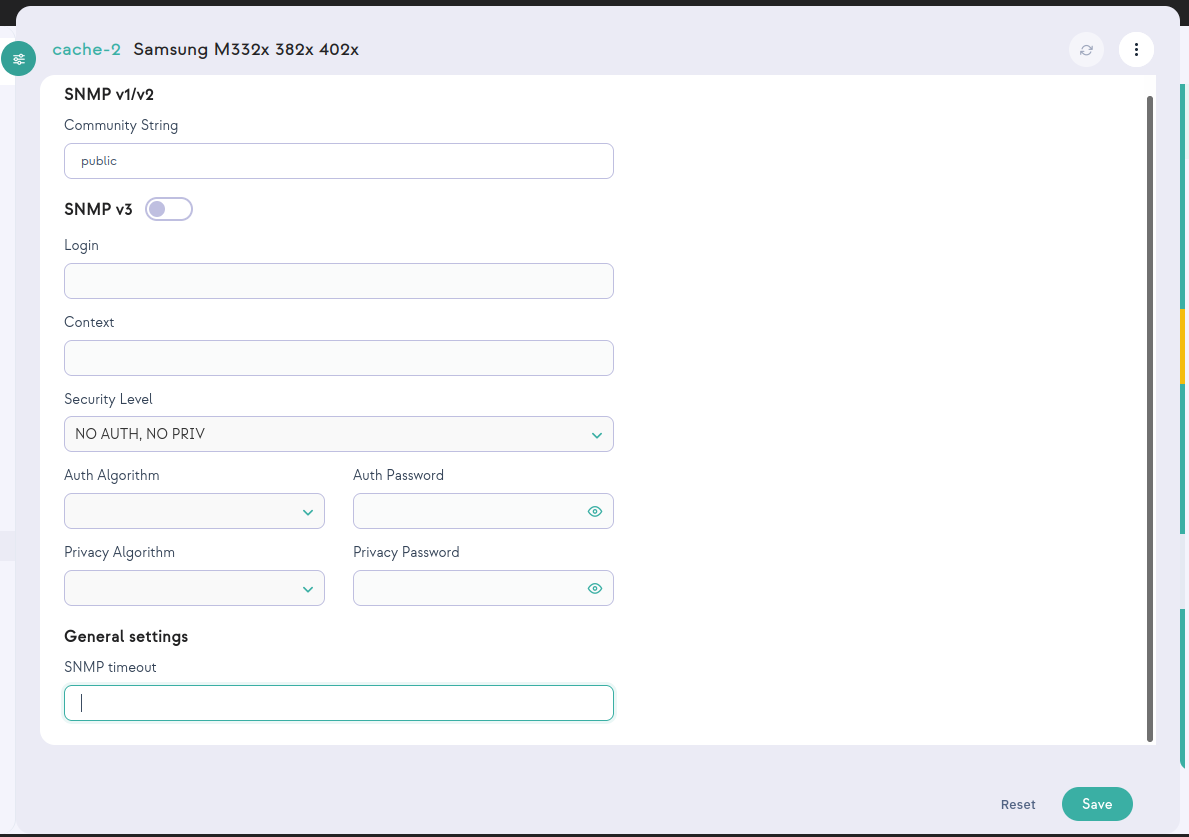
SNMP settings
In this tab you can set configuration data for SNMP. In versions v1 and v2, it is enough to configure one parameter: Community String. In the case of the v3 version, more parameters must be given for authorization.
Remote panel
This option isn’t available by default, so customers need to make a support request to unlock it. Additionally, the Agent by through the printer is added. Need to have unlocked this option. You can unlock the agent by adding line remotePanel=true to the file agent.config at directory config/ on the place where agent was installed. If the file doesn't exist, you need to create it and add that one line there.
When it’s available it allows remote access to the device panel outside of the local network where the device is installed. Agent and Server applications work as proxy to local devices, for this reason it’s locked by default.