Principle
In Watchdoc, a location is a label belonging to a structured list of geographical sites used to physically locate configuration elements of the print fleet (print devices, servers, queues, users, etc.).
The list of locations can be managed from the Watchdoc administration interface.
Watchdoc can automatically detect print devices connected to a location.
It can also automatically locate users using the Watchdoc Print Client.
Since Watchdoc v6.0.0.4731, it is also possible to specify (when declaring the user directory) that you do not wish to use locations.
Prerequisites
-
During initial configuration, you can choose not to use the locations if you want to use Watchdoc without Print Clients.
However, you must configure them to use one or more of the following Watchdoc Print Clients:
-
WPC for Android
-
WPC for Chrome
-
WPC for Windows
-
Skyprint
-
-
You must be familiar with the network infrastructure, particularly IP address ranges, in order to configure locations and, above all, the “site” level.
-
The server must be associated with a location to be able to route print jobs to printing devices using Print Clients. If a server is listed in the Undetermined location, it is unable to process print requests sent by Print Clients.
-
The site, the last location in the hierarchy, is associated with a list of subnet IP addresses in order to automatically detect printing devices connected to a server. Similarly, thanks to the connection IP address of the workstations, Watchdoc can automatically locate users who are using Watchdoc Print Client.
Routing principles
When a user selects a location, they obtain a list of “Sites” locations associated with printing devices.
If a server is associated with this Site (or if this Site depends on a parent associated with a server), this server processes the print request.
However, if the site is not associated with any server (or if it depends on a parent that is not associated with any server), no server processes the print request. In this case, it is therefore possible that the user will see printing devices associated with the site but will not be able to print. This is why it is important to associate a print server with every site (or parent of the site).
In addition, routing between multiple servers can be considered. In this case, the route must start from the master server and go to a slave server. Routing does not work in the opposite direction.
Access administration interface
-
Access Watchdoc administration interface as an Administrator.
-
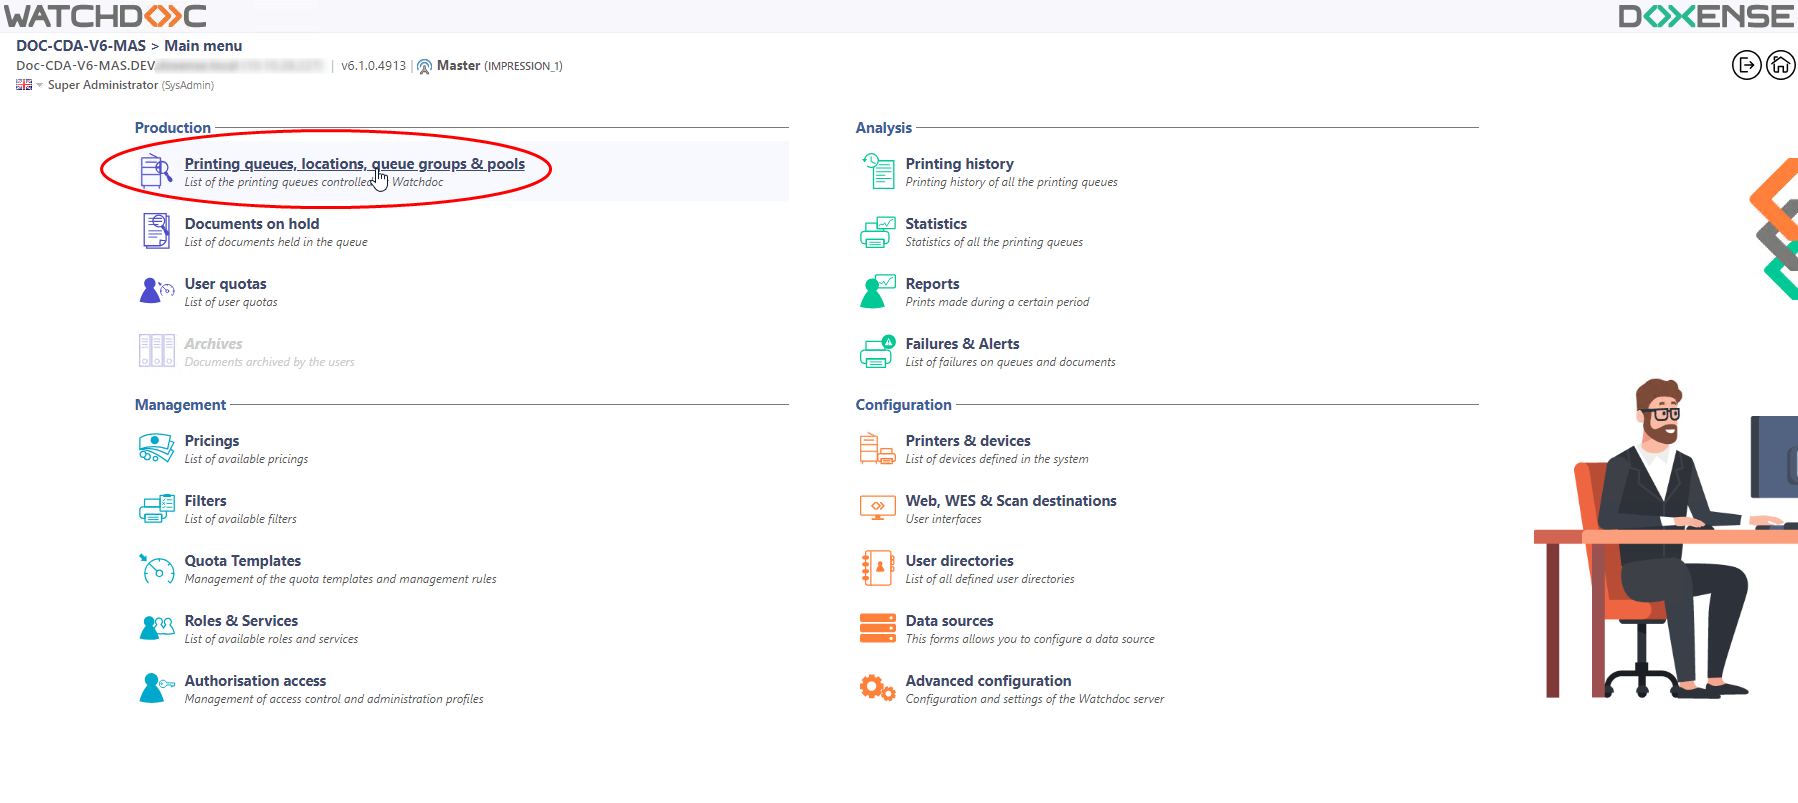
From the Main menu, section Production, click on Print queues, queue group & pools ;
-
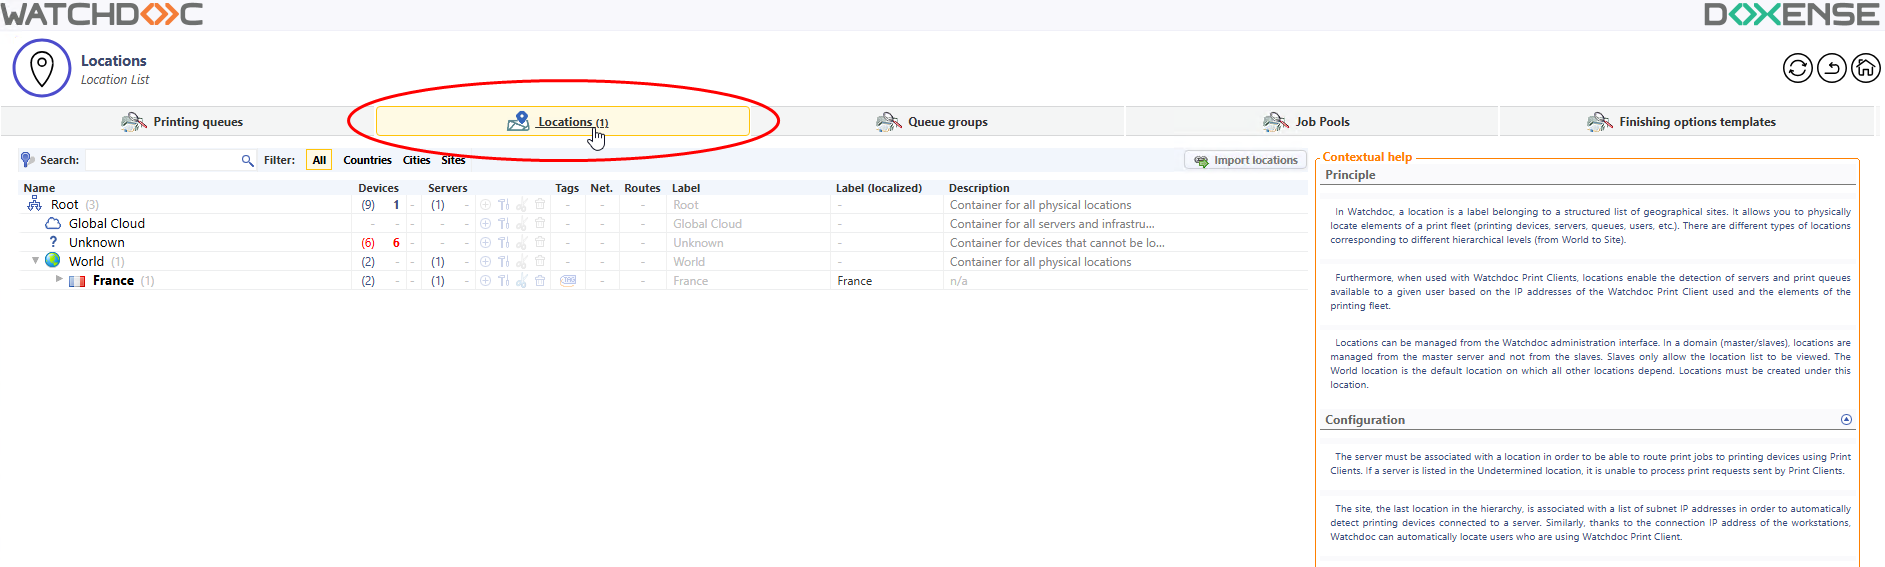
Click on Locations tab :
-
This takes you to the list of locations, which includes three default locations :
-
Cloud global : location for administration servers like Watchdoc Master
-
Unknown : used for non-localised print devices
-
World : default "parent" location, not modifiable, to which we can add "child" locations.
-
Create a location
-
From the list of locations, go to the location under which you wish to add one or more locations:
-
click on the
 button to the right of the location:
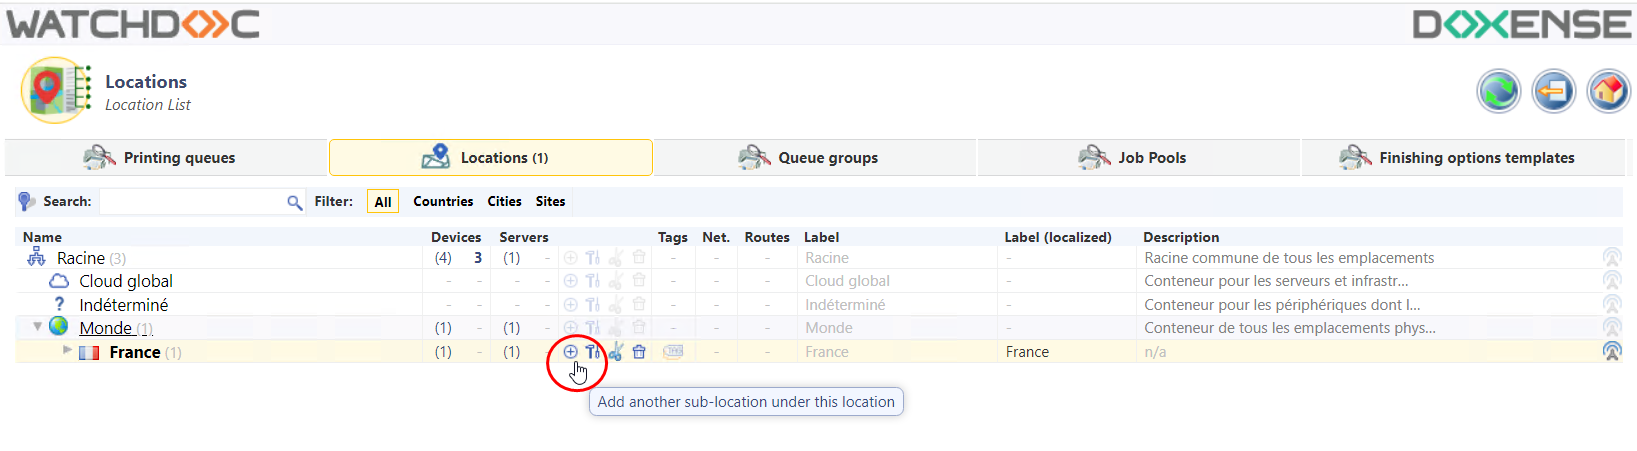
-
indicate the type of location you wish to add (this step does not appear if you are at site/agency level) ;
-
fill in the General information associated with this location:
-
Name: name visible in administration interfaces and by users
-
Sub-Type: country, area, department, city, site, ...
-
Country Code: code corresponding to the country, automatically filled in using the parent location under which the new location is created;
-
Label (Intl.): comprehensible label (assigned to the location) displayed in user interfaces;
-
Description: additional information relating to the location displayed in the administration interfaces and to users;
-
Identifier:
-
Automatically: leave the "automatic" option so that an identifier is automatically assigned to the location (recommended);
-
Use the following: in the field, enter an identifier of up to 32 alphanumeric characters, separated by a dash if necessary (may be usefull if there is an existing nomenclature, but not recommended)
-
-
Tags: enter one or more tags that help to qualify the location. The tag or tags are used as discrimination criteria;
-
Connectivity: Watchdoc is authorised (or unauthorised) to send print requests to remote locations. This function is useful if the devices in a location are not available or to make printing easier for mobile users:
-
-
Remote location: from the list, select one or more remote locations;
-
-
-
Link type: from the list, select the type of link that can be established:
-
blocked: select this option to explicitly block any transfer between the location and another;
-
outbound only: select this option to allow an outbound flow from the configured location to the designated remote location;
-
VPN site-to-site: select this option to allow bi-directional transfers between the set location and the designated remote location.
-
-
Default queue(s) section; you can configure a default queue for this location and for a predefined role (see Configuring a default queue):
-
in the Queue list, select the queue you wish to associate with the location;
-
in the Role column, click on the Browse
 button to access the list of roles and select the role associated with the default queue. If the role you wish to associate does not appear in the list, click on Create a new role to add it (see Creating a role) :
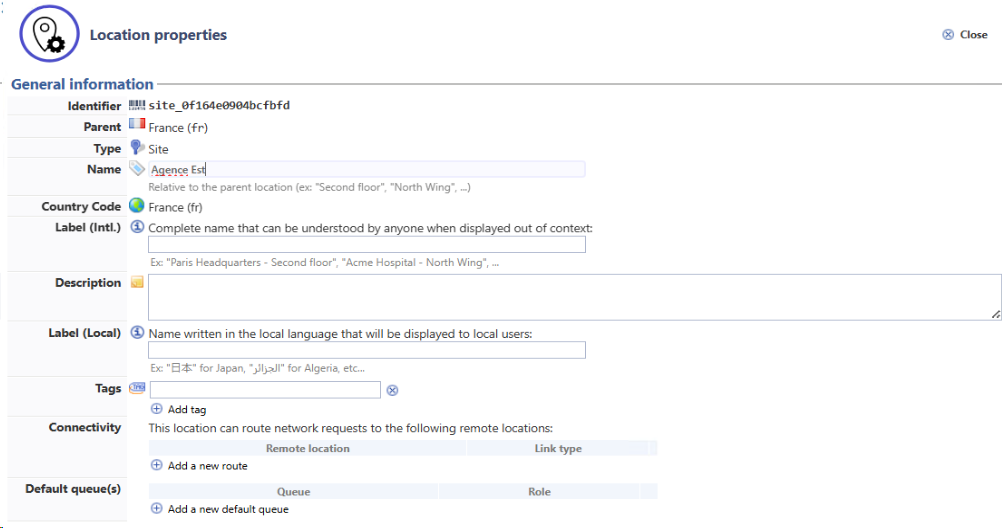
è When a default queue is associated with the location, a green dot is displayed in the list of locations:
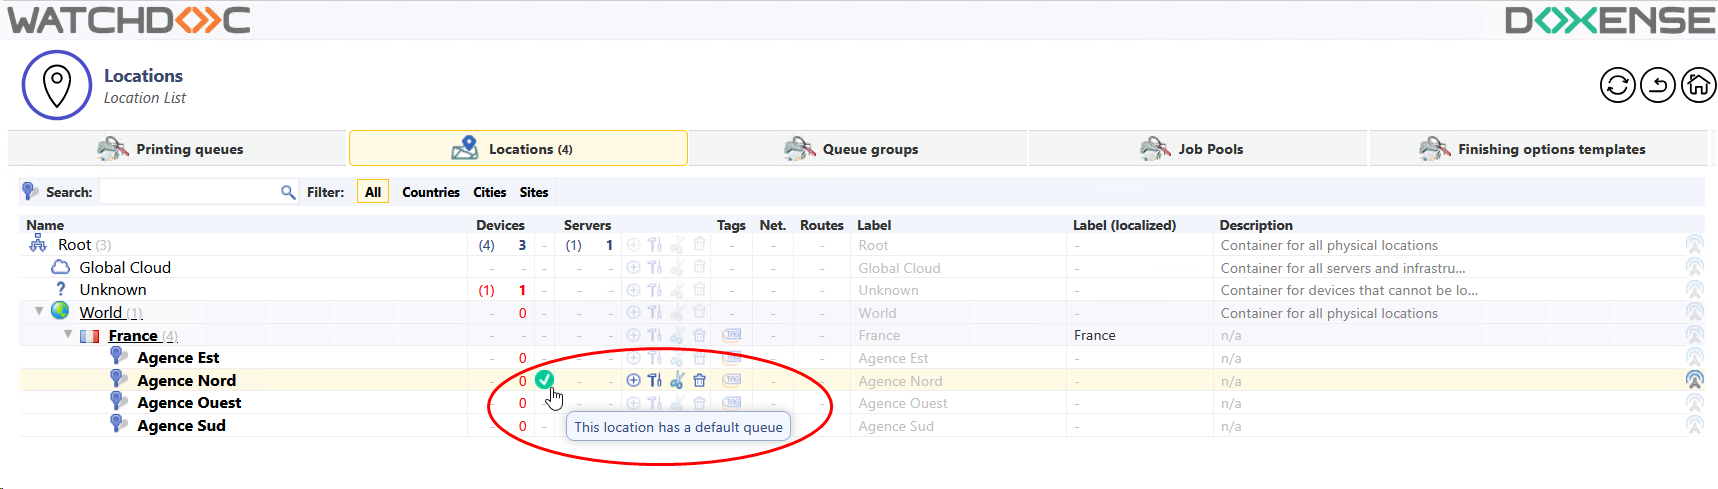
-
-
Complete the Additional Settings (when you are at branch or site level):
-
Devices: tick this box to allow the association of print devices at this location. This parameter can only be activated on locations at the top level of the hierarchy.This setting makes it possible, for example, not to allow the association of devices at generic levels (too wide) in favour of associating devices at a specific level.
-
Users: check this box to allow the Watchdoc Print Client user to associate the location with a physical printer.
-
Subnets:
-
In Subnet, enter the range of IP addresses associated with the location, so that all print devices within that range will be attached to that location. A location can have several subnets.you can specify a range of private ip addresses or a public ip address.in a cloud architecture, declaring the public ip makes it possible to locate all the devices and users connected to this location.
-
in Tags list, enter labels to characterise the subnet.

-
-
Change a location
To change a location, click on the  button related to it and add the changes in the fields.