Principle
To facilitate the use of print queues managed by WPC for Windows, the administrator can define a physical or a universal default print queue for a given group of users and a given location.
In order to be defined as the default queue, a physical queue must have been configured with the “forceinstall” tag (see Configuring a print queue).
So when a user moves, they can be offered the default queue associated with the location from which they are launching their print request.
Depending on the configuration and the printing policy defined, the user has more or less freedom to refuse this default queue and choose another one or not.
Several default queues can be associated with a given location. For example, the North Agency may want to provide a default A4 black and white queue for all members of the East, South and West Agencies, but allocate a default A3 colour queue to members of the East Agency marketing team who need to print colour posters.
Steps
Configuring the default queue for WPC for Windows requires the following steps:
-
configuring the location to associate it with a default print queue and an associated role;
-
configuring WPC for Windows to activate the default queue and the conditions for using this function.
Procedure
Configure the default queue and role associated with the location
-
From the Main Menu of the Watchdoc administration interface, click Print Queues, Locations, Queue Groups and Pools;
-
click the Locations tab;
-
In the list of locations, click the Edit
 button for the location to which you want to assign a default queue;
 -
In the Location Properties interface, go to the Default queue(s) section;
-
in the Queue list, select the queue you wish to associate with the location ;
-
in the Role column, click on the Browse
 button to access the list of roles and select the role associated with the default queue;
-
-
If the role you wish to associate does not appear in the list, click on Create a new role to add it (see Creating a role).
-
Repeat the operation if you wish to associate several default queues with other roles;
-
Confirm the configuration by clicking on
 Save:
Save: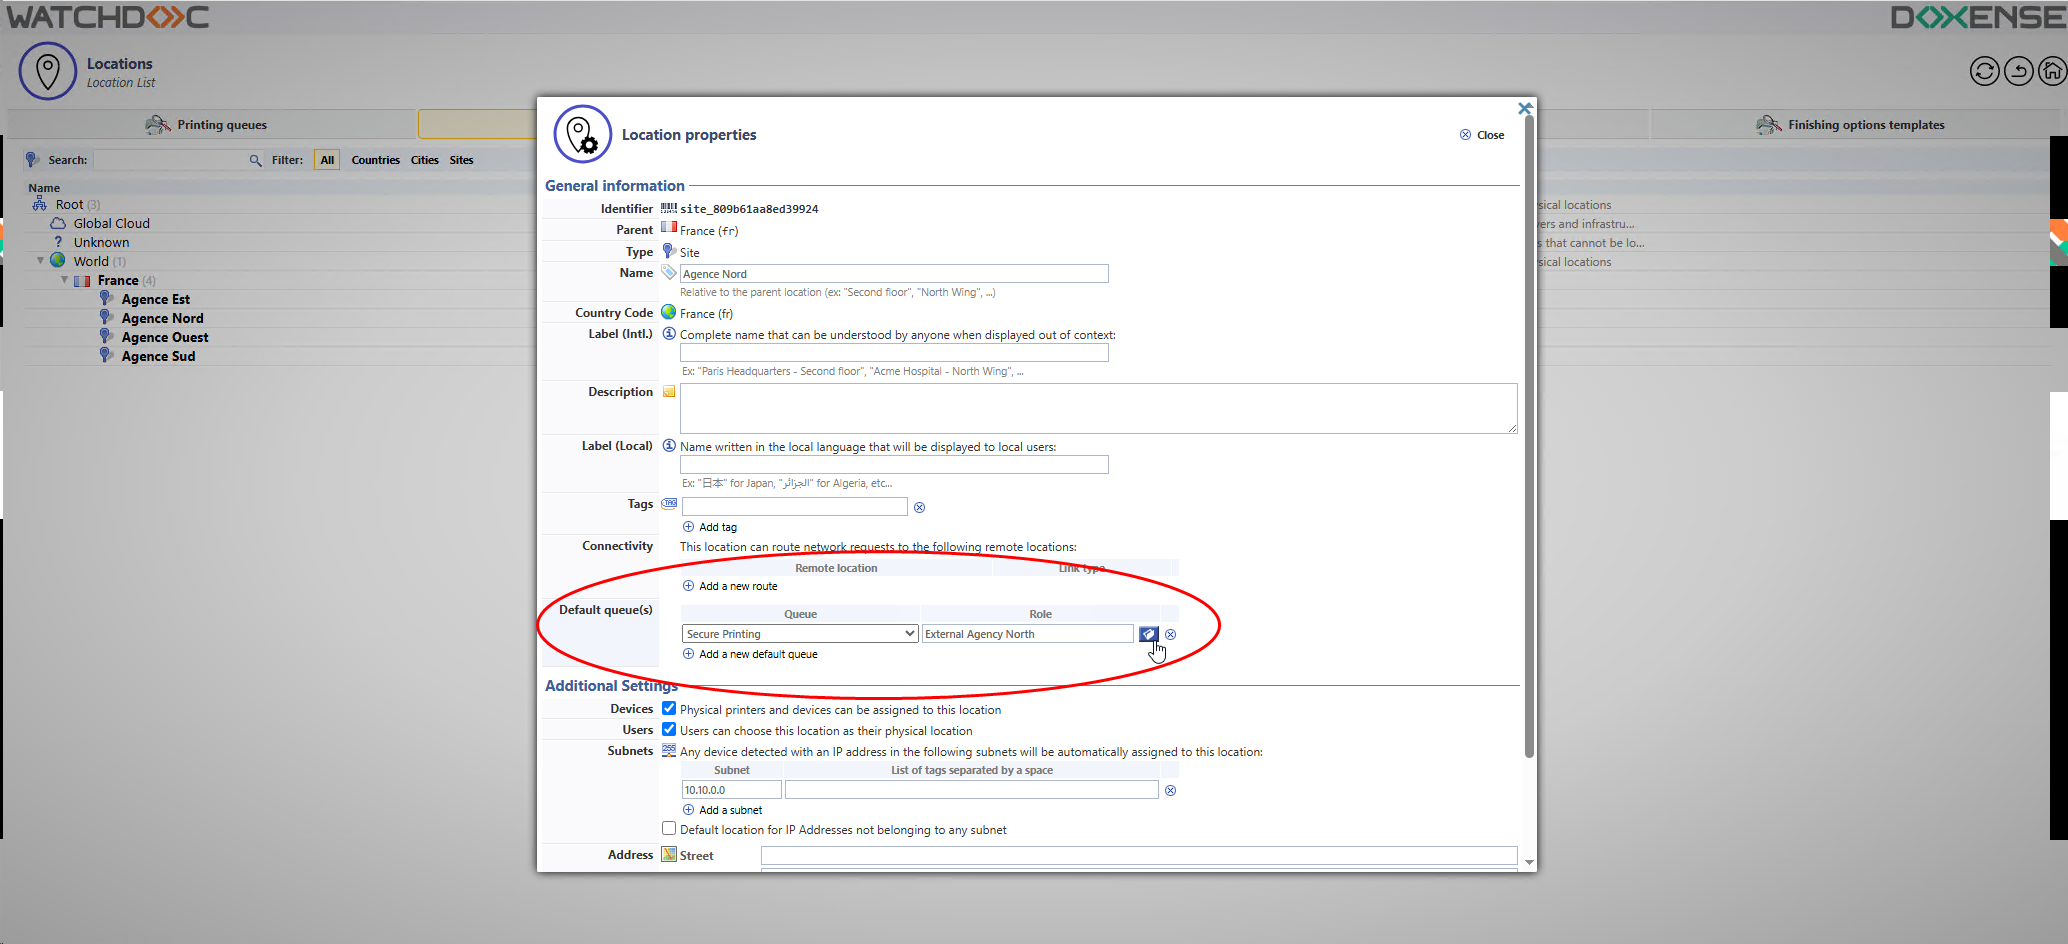
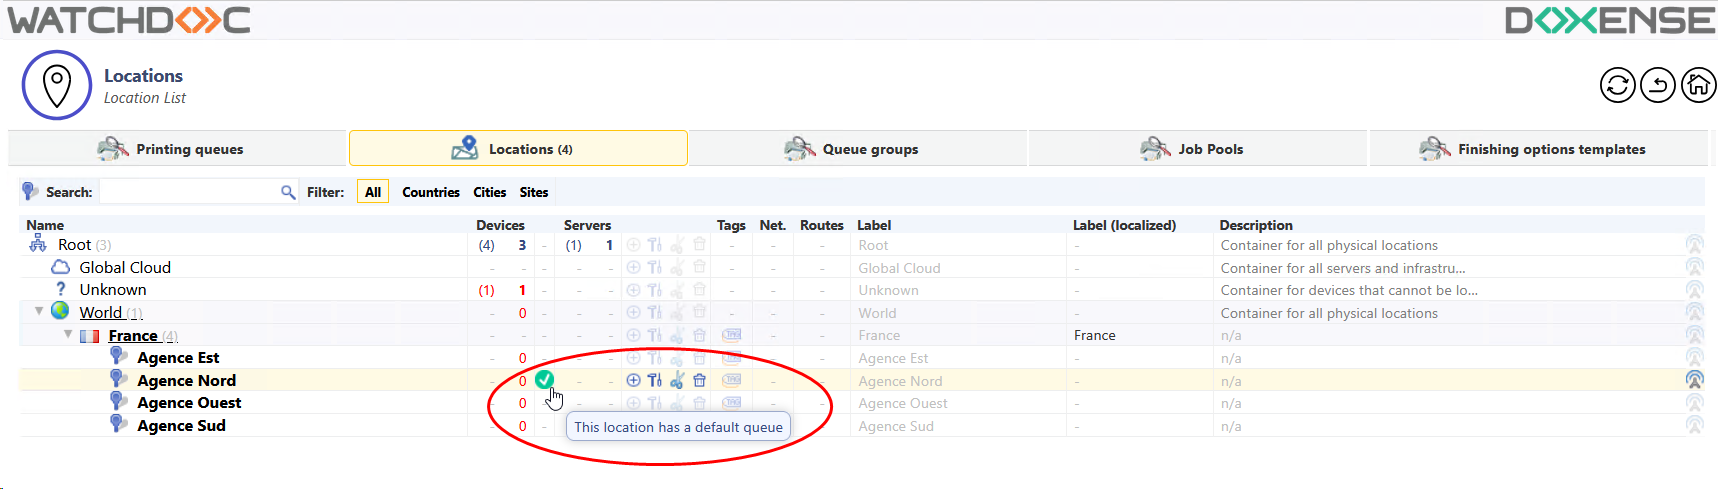
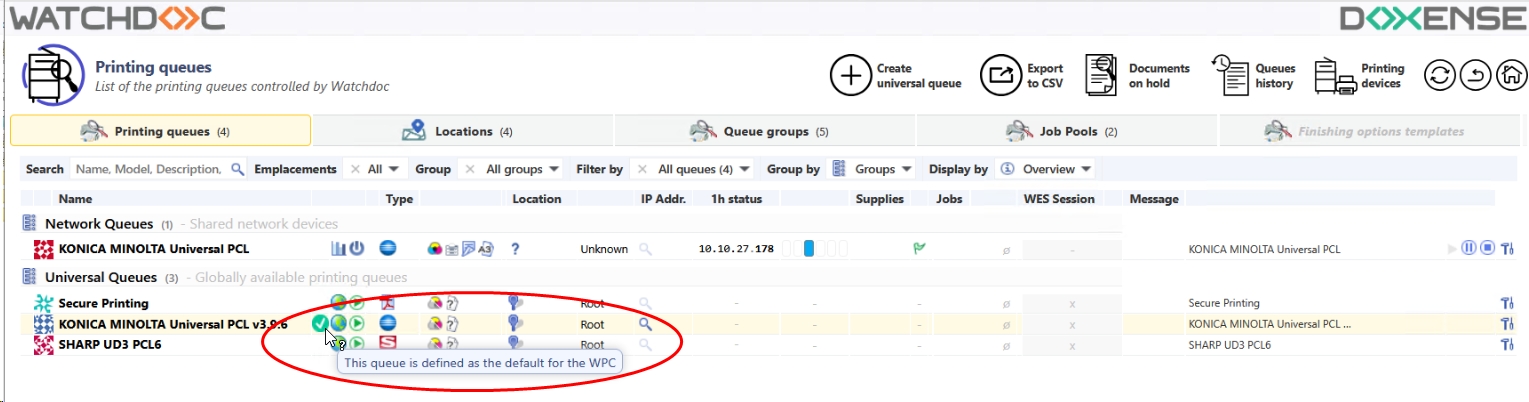
è When a default queue is associated with the location, a green dot is displayed in the list of locations and in the list of Printing queues:
Configuring the default queue in WPC for Windows
-
From the Main Menu of the Watchdoc administration interface, click Advanced Configuration;
-
in the Advanced Configuration interface, click on Windows Client Configuration;
-
In the Windows Client Configuration interface, go to the Default File section;
-
Tick the Enable default print queue management check box;
-
for the Users parameter, select Change default queue when user changes location;
-
Confirm the WPC for Windows configuration:

Usage case
Your company has four branches: North, East, South and West.
You want employees from the other branches to use the default queue associated with the North branch location when they travel to the North branch.
-
You therefore create a ‘North Agency Externals’ role that excludes all employees who are not members of the North Agency group:
-
You associate this role with the default queue configured for the NorthAgency location:
-
You configure WPC for Windows by activating the Default Print Queue function and specifying that the default queue changes when the user changes location (see WPC - Configure WPC for Windows).