Access to the configuration interface
To configure the Watchdoc Print Client for Windows,
-
access the Watchdoc administration interface as an administrator ;
-
from the Main Menu, Configuration section, click Advanced Configuration ;
-
in the Advanced Configuration interface, click on Windows Client settings:
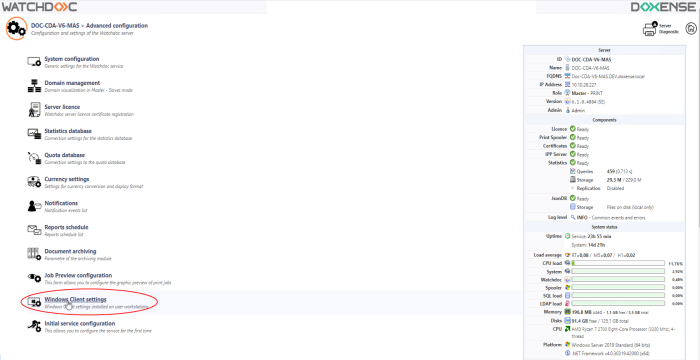
→ This takes you to the Windows Client settings interface.
Configure Watchdoc Print Client for Windows
-
Properties: collects the customer's properties, including an internal, non-modifiable identifier.
-
Name: if necessary, enter a name for the Customer ;
-
Description: if necessary, enter additional information about the WPC.

-
-
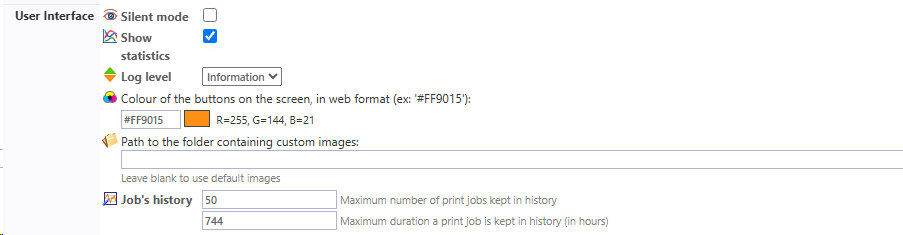
User Interface: specify the characteristics of the user interface.
-
Silent mode: Check the box if you want WPC for Windows to run in silent mode. This mode allows you to hide the "Devices" and "Locations" tabs from users, leaving only the "Profile" tab. This tab displays the user's profile and usage statistics.
-
Show statistics: check the box if you want to display usage statistics to the user, in the "Profile" tab.
-
Logs level: in the list, select the level of information you wish to track in the WPC event logs.
As these traces require significant resources and storage space, we recommend that you only activate them for analysis purposes in the event of an audit or problem, and deactivate them once the diagnosis has been made. -
Colour of the buttons: in the field, enter the hexadecimal code of the colour you want to apply in the user interface (cf. Customize WPC) ;
-
Path to the folder:in the field, enter the path to the images used to customise the user interface (cf. Customize WPC).
-
Job's history: specify the parameters for displaying this jobs history:
-
maximum number: specify the number of sent jobs retained on disk and shown in the list on the Print Jobs tab;
-
maximum duration: specify, in hours, the maximum retention time for jobs shown on the Print Jobs tab.
-
-
-
Windows Service:
-
Log level: From the list, select the level of information you wish to trace in the WPC event logs. As these traces require significant resources and storage space, we recommend that you only activate them for analysis purposes in the event of an audit or problem, and deactivate them once the diagnosis has been made.
-
Direct Print: the box to allow the user to print directly (without going through Watchdoc) if the Watchdoc service is down.
There are two prerequisites for this mode:
-
the inter-server database must be enabled (see System configuration - Inter-server printing section) and accessible from all servers;
-
At least one print queue must be configured with the tags ‘remote’ and ‘tcpip’ to designate it as suitable for use in indirect printing (see Configuring a print queue).
-
the user must have authenticated at least once on the WES of the printing device designated for direct printing.
In the event of a breakdown, the user can choose to wait for the server to become available again or print directly. In this case:
-
if WPC works with a universal queue, the user can choose the device on which to print;
-
if WPC works with a physical queue, the user can print directly to this device.
-
- USB devices: tick the box to allow WPC to count jobs from devices connected via USB and not via the network.
In this case, the print jobs appear in the configured database (in master if it is a domain configuration) as well as in the WPC Windows service trace files.
-
Disable ICMP
 Internet Control Message Protocol is a network layer protocol (No. 3 in the OSI model) that controls transmission errors. In this way, a sending machine knows that there has been a network incident, for example when a service or host is unreachable. The Ping command is an example of an application that uses ICMP control messages.
(Source : Wikipedia): tick the box to disable ICMP requests so as not to saturate the server if WCP for Windows is installed on a large number of workstations.
Internet Control Message Protocol is a network layer protocol (No. 3 in the OSI model) that controls transmission errors. In this way, a sending machine knows that there has been a network incident, for example when a service or host is unreachable. The Ping command is an example of an application that uses ICMP control messages.
(Source : Wikipedia): tick the box to disable ICMP requests so as not to saturate the server if WCP for Windows is installed on a large number of workstations. -
Driver's PrintProcessor: tick the box if you want the print devices to use the driver's print processor. If the box is not ticked, the ‘winprint’ processor is used by default.

-
-
Port monitor
The Print Client Monitor Port is a proprietary print port, the communication link between the part that operates as the Spooler user and the part that operates as the System. It is a DLL executed as a user requesting printing and which communicates with the Windows Print Server.: Specify the characteristics of the Port Monitor WPC event logs: -
Size limit: enter, in megabits, the maximum size of the log files for the monitor port on the disk;
-
Path: specify the path to the folder where the log files for the monitor port will be stored;
-
Log level: in the list, select the level of logs relating to the Port monitor:

-
-
Spool retention: tick the box if you want to activate spool retention.
This retention allows users to reprint print jobs that have previously been sent to the server. The spools are then stored (depending on the configuration defined) on the workstation and can be found under the Print Jobs tab. Specify the parameters for this spool retention in the following fields:-
Number: specify the maximum number of spools kept on the disk;
-
Size: specify the maximum size of bytes allocated to spool retention;
-
Duration: indicate, in hours, the maximum duration of a spool (720 hours / 30 days).

-
-
Default Queue: to facilitate the use of print queues, the administrator can define a default universal print queue for a given user group and location (see Configuring a default queue for a location).
This function can be activated when WPC for Windows is installed in normal mode (not in silent mode).
Once the function has been activated, you can specify the conditions for modifying this default queue:
-
Enabled: tick the box to apply the ‘default queue’ function.
-
Param. Windows: this setting refers to the MS Windows® setting which gives it the right, for each user workstation, to manage the default printer:
-
Keep Windows setting: retains the setting as Windows has defined it on the user workstation. If the user ticks the box manually, this MS Windows setting will be applied to the workstation;
-
Let Windows manage the default printer: lets MS Windows® manage the default print queue;
-
Do not let Windows manage the default printer: allows the WPC setting to be applied. In this case, the ‘Let Windows manage the default print queue’ setting is disabled and WPC automatically monitors this setting. If the user activates this setting directly in Windows, WPC overrides it to apply its own setting.
-
-
Users :
-
Allow users to specify their default printer: allows users to modify the default queue defined by WPC. There are two ways of doing this:
-
by choosing another queue from the list and designating it as the default ;
-
by printing on another queue, which then becomes the user's default queue.
-
-
-
Change the default printer queue only when the user changes it's location: allows the user to be offered the default queue associated with the location in which they are currently located. The default queue is indicated in the interface.
-
Forbid users to change their default printer queue: allows you to impose the default queue defined for each location. In this case, if the user tries to bypass the prohibition by changing the MS Windows setting directly, WPC will automatically restore the default queue associated with the location.

-
Specify an operating environment
By default, all physical queues are considered usable by WPC for Windows. If you wish to exclude a physical queue from WPC, you need to apply a specific "tag" to this queue:
-
from the Main Menu, Production section, click Printing Queues, Locations, Queue Groups & Pools ;
-
In the list of queues, click on the button
 to edit the physical queue you wish to exclude;
 -
in the Printing Queue Properties interface, go to the Platform section;
-
in the Supported Tags field, enter the value !WIN32 :

By default, all physical queues are considered usable by WPC. If you wish to exclude a physical queue from WPC, a specific ‘tag’ must be applied to this queue:
-
from the Main Menu, Operations section, click Print Queues, Locations, Queue Groups & Pools ;
-
In the list of queues, click on the button
to edit the physical queue you wish to exclude; -
in the Printing Queue Properties interface, go to the Platform section;
-
in the Supported Tags field, enter the value !WIN32 :
-
In the Supported tags field, enter the value ![environment_name] to exclude the WPC queue installed on the cited environment. Use the space if you wish to combine several tags:
-
!WIN32 to exclude this queue if you are using WPC in an MS Windows 32-bit environment;
-
!CHROME_EXT to exclude this queue if you use WPC for Chrome;
-
!ANDROID IOS to exclude this queue if you are using WPC for Android:
-
Configure a print queue
Once WPC for Windows has been activated, it's time to configure the physical queues, if you haven't already done so (see Configuring a queue).
During this configuration, define the tags specific to WPC for Windows, which enable you to manage different print configurations (remote printing and direct printing).